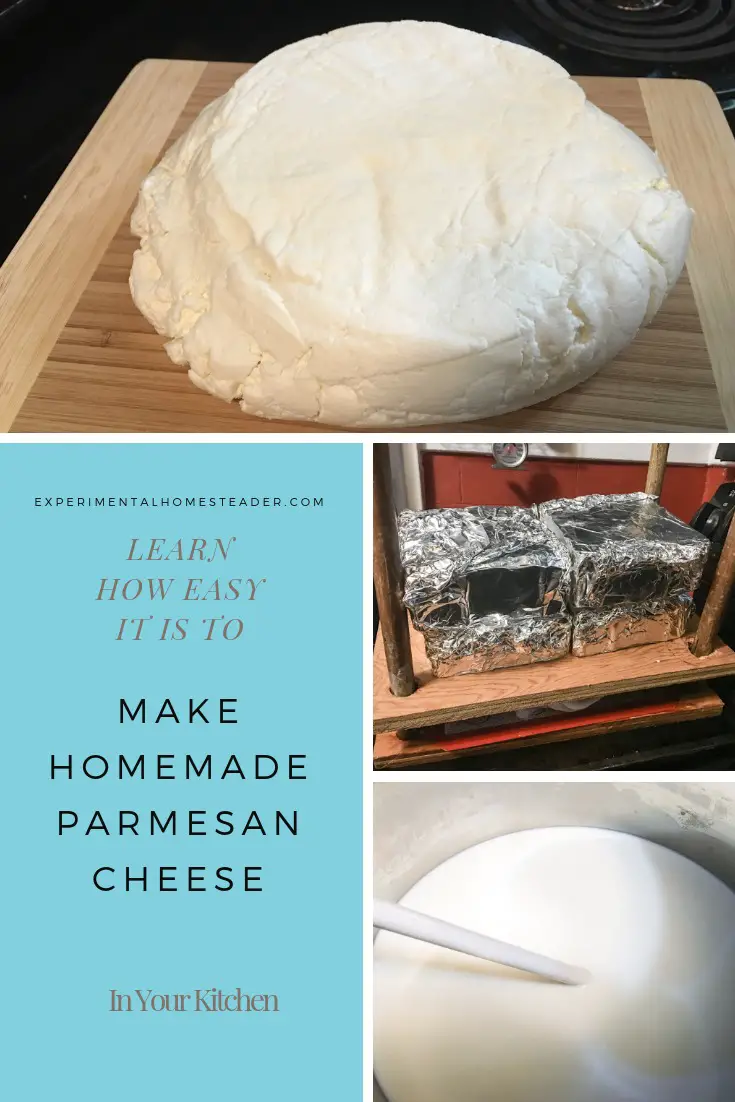
Easy Homemade Parmesan Cheese Recipe
I've always believed the only way to really know what is in your food is to grow, raise or make it yourself.

This is why I decided to make this homemade parmesan cheese recipe using fresh goat milk from my own goats.
Of course you can use any type of milk you wish such as cow or sheep milk.
Why Make Your Own Parmesan Cheese
Sure food has an ingredient list, but with the recent parmesan cheese scandal it proves yet again the ingredient list is not always accurate - never mind all the hormones, antibiotics and other things commercial dairy animals might eat that are not mentioned.
The quality of the product the animal produces is based on it's living conditions, what kinds of medications it is given and of course what it eats.
While organic is preferable to conventional in my opinion, raising my own goats lets me take it one step further and know that nothing I wouldn't want in my body is in their milk, because let's face it even organic producers can use things I might not want in my food.
This is why so many are going back to the old ways and becoming self-sufficient by learning to grow and preserve their own food as well as cook from scratch.

What You Need To Know About Making This Homemade Parmesan Cheese Recipe
I made this homemade parmesan cheese recipe because I use a lot of parmesan cheese in my recipes and decided after the wood filler scandal I was not going to buy parmesan cheese at the store anymore.
I wanted to share it with you because not only is it delicious but I guarantee it is made with only the best ingredients - and no wood fillers!
If you are like me, cheese that is made using real milk and contains nothing else but some salt and cheese cultures is exactly what you want in your refrigerator!
Before you begin be aware that parmesan cheese takes ten months to complete - start to finish, but the last ten months are just a waiting period for it to age.
The actual making of the cheese is what takes the most effort, then you turn it and keep it from molding for the first two months after it is made.
Once the cheese has aged for two months, you wax it with cheese wax and wait.
I do not have a cheese cave - and my wine cooler quit the night I made the cheese so I improvised using a dorm refrigerator.
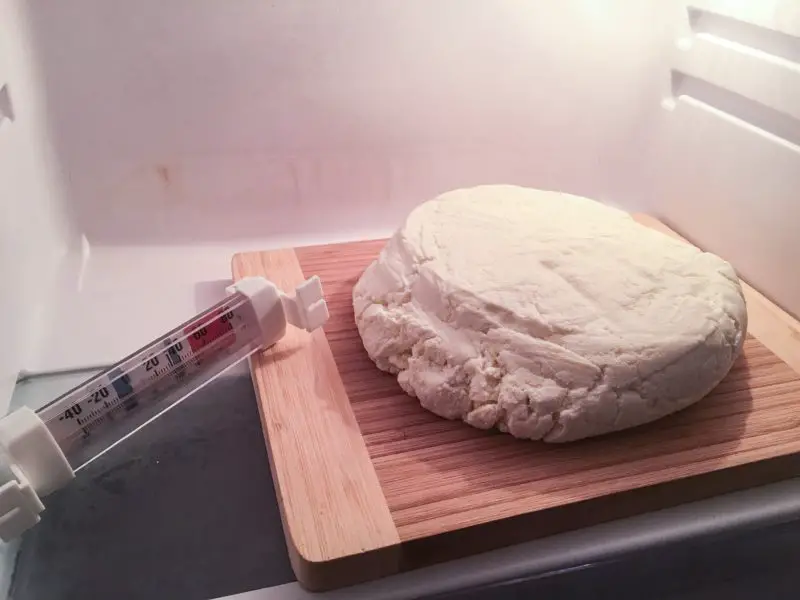
I put a thermometer inside so I could monitor the temperature, a glass filled ¼ of the way with water and I cured my cheese on a bamboo cutting board!
What can I say is, it worked.
I did have to cut some mold off occasionally but that was no big deal.
I simply cut the moldy parts off, wiped the cheese down with white vinegar and let it cure some more.
Easy Homemade Parmesan Cheese Recipe
Here is my recipe and it usually yields 2 pounds of parmesan cheese.
Print
Parmesan Cheese Scandal Worries? Try This Homemade Parmesan Cheese Recipe!
- Total Time: 7301 hours
Ingredients
- 2 gallons milk
- 1 packet Thermophilic Direct Set Cheese Culture

- ¼ teaspoon Lipase Powder, Capilase (Very Sharp)
- ½ cup cool water
- ½ Tablet Vegetable Rennet
- 1 Tablespoon Cheese Salt
- Organic Cheesecloth
- Basic Cheese Mold
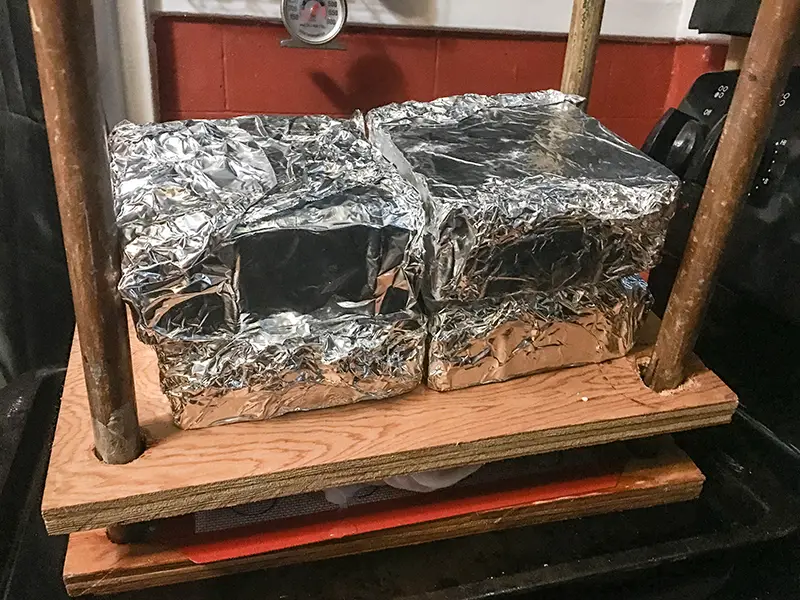
- Cheese Press for Home Cheese Making (Mine is made of two sheets of plywood and has dowel rods on each corner to keep the wood lined up.)
- Weights (I use square brick wrapped in aluminum foil. My bricks are 5 pounds each and I have a total of 4.)
- Cheese Wax
- Silicone brush
Instructions
- Dissolve the lipase powder in ¼ cup cool water, cover and let set for 20 minutes.

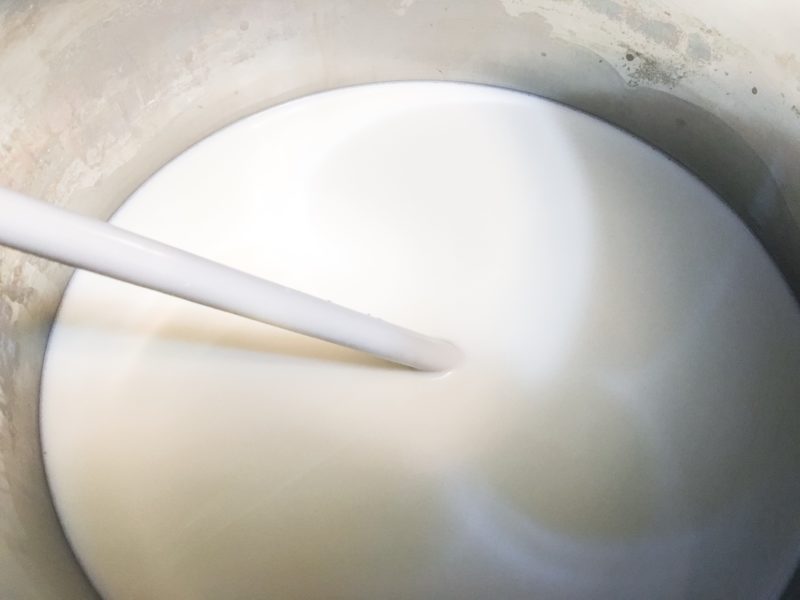
- Slowly heat the milk to 90 degrees Fahrenheit while stirring frequently.
- Once the milk reaches 90 degrees Fahrenheit, add the packet of direct-set thermophilic starter and mix well.
- Add the lipase mixture and stir well.
- Cover the pan, remove it from the heat and allow it to sit for 30 minutes so the milk ripens.
- Dilute the rennet tablet in ¼ cup cool water - un-chlorinated water is recommended.
- Once the 30 minutes are up, check to make sure the milk is still 90 degrees Fahrenheit. If not, slowly raise the temperature until it is then remove the pan from the heat.
- Add the diluted rennet and stir with an up and down motion for two minutes. Then top stir for another minute.
- Cover the pan and allow it to set for at least 30 minutes.
- Rinse a piece of cheesecloth large enough to line a colander with cold water and then place it in the freezer.
- At this point the cheese curds should cut into cubes in the pan. I've had times where they did not, but I went ahead and proceeded. If they do cut, go ahead and cut them into ¼ inch cubes.
- Put the curds back on the heat and slowly raise the temperature to 124 degrees Fahrenheit. Be sure to stir the curds frequently during this time.
- The curds should look more like grains of rice at this point. They should squeak if you try to eat them. Remove the pan from the heat and let it sit undisturbed and uncovered for five minutes.
- Remove the cheesecloth from the freezer and line a colander with it.
- Set the colander on a pan so you can catch the whey as you pour it off the curds. The curds will remain in the colander. Take your time with this process and realize you might have to swap out whey pans several times so you don't waste any whey.
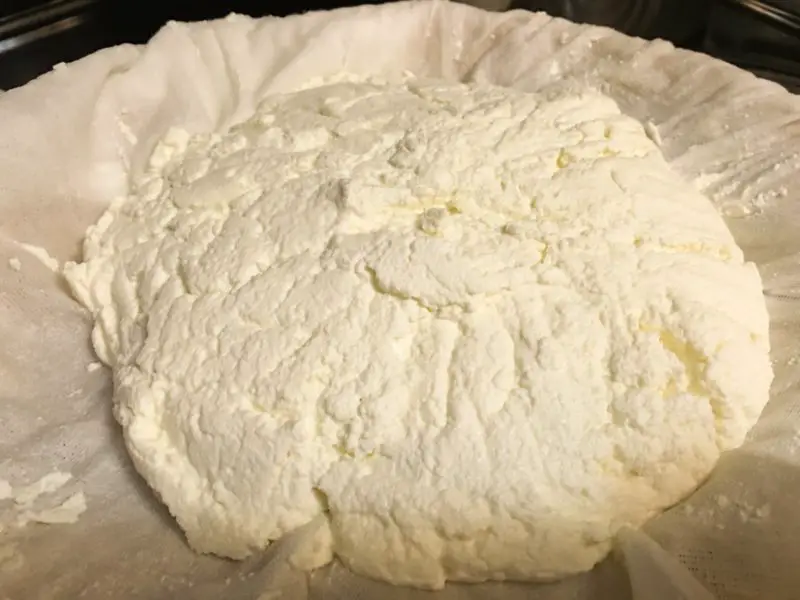
- Once you have the curds separated, use another piece of cheesecloth to line your cheese mold, mix the salt into the curds, then press the cheese curds into the mold. I do not have anything that would fit into my cheese mold perfectly , so I removed the cheesecloth and molded cheese from the cheese mold so I could press it. I ended up with mis-shapen cheese but it still tastes great!
- Once your cheese curds are in the cheesecloth, the next step is to press the cheese. I laid mine on the bottom of the piece of wood making sure it was in a pan so the excess whey had a place to drain. The I put one 5 pound weight on top of the second piece of wood. Allow this to sit for 15 minutes.
- Remove the cheese from the cheese press, remove the cheesecloth and re-dress it with a piece of clean, dry cheesecloth. Turn the cheese over, put it back in the cheese press and press it at 10 pounds of pressure for 30 minutes. If you are pressing in the mold, make sure you put the cheese in the mold before you press it.
- Remove the cheese from the cheese press, remove the cheesecloth and re-dress it with a piece of clean, dry cheesecloth. Turn the cheese over, put it back in the cheese press and press it at 15 pounds of pressure for 2 hours. If you are pressing in the mold, make sure you put the cheese in the mold before you press it.
- Remove the cheese from the cheese press, remove the cheesecloth and re-dress it with a piece of clean, dry cheesecloth. Turn the cheese over, put it back in the cheese press and press it at 20 pounds of pressure for 12 hours. If you are pressing in the mold, make sure you put the cheese in the mold before you press it.
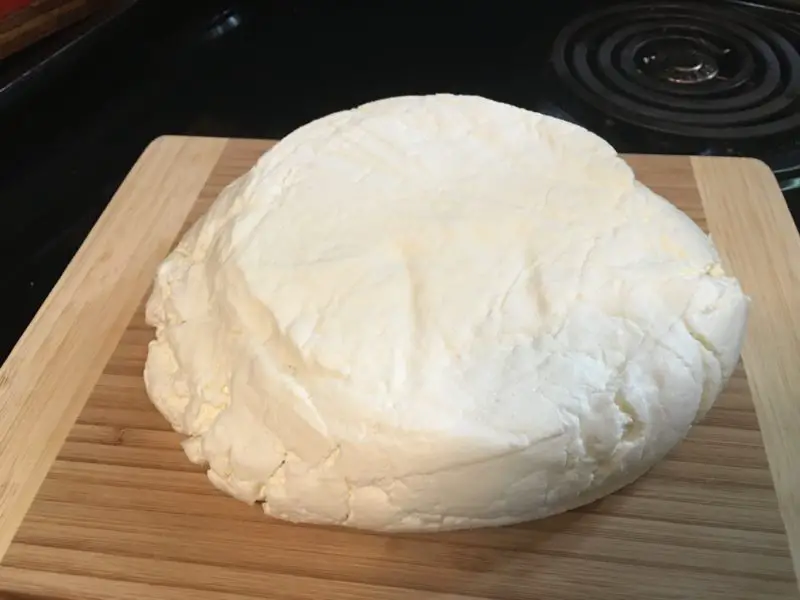
- Remove the cheese from the press and peel away the cheesecloth.
- Age the cheese at 55 degrees Fahrenheit and 85 percent relative humidity making sure to turn the cheese over daily for the first month.
- Continue aging the cheese for another month making sure to turn the cheese over weekly. During this time if you notice any mold, go ahead and cut it off then wipe the surface of the cheese - and the cutting board - down with white vinegar.
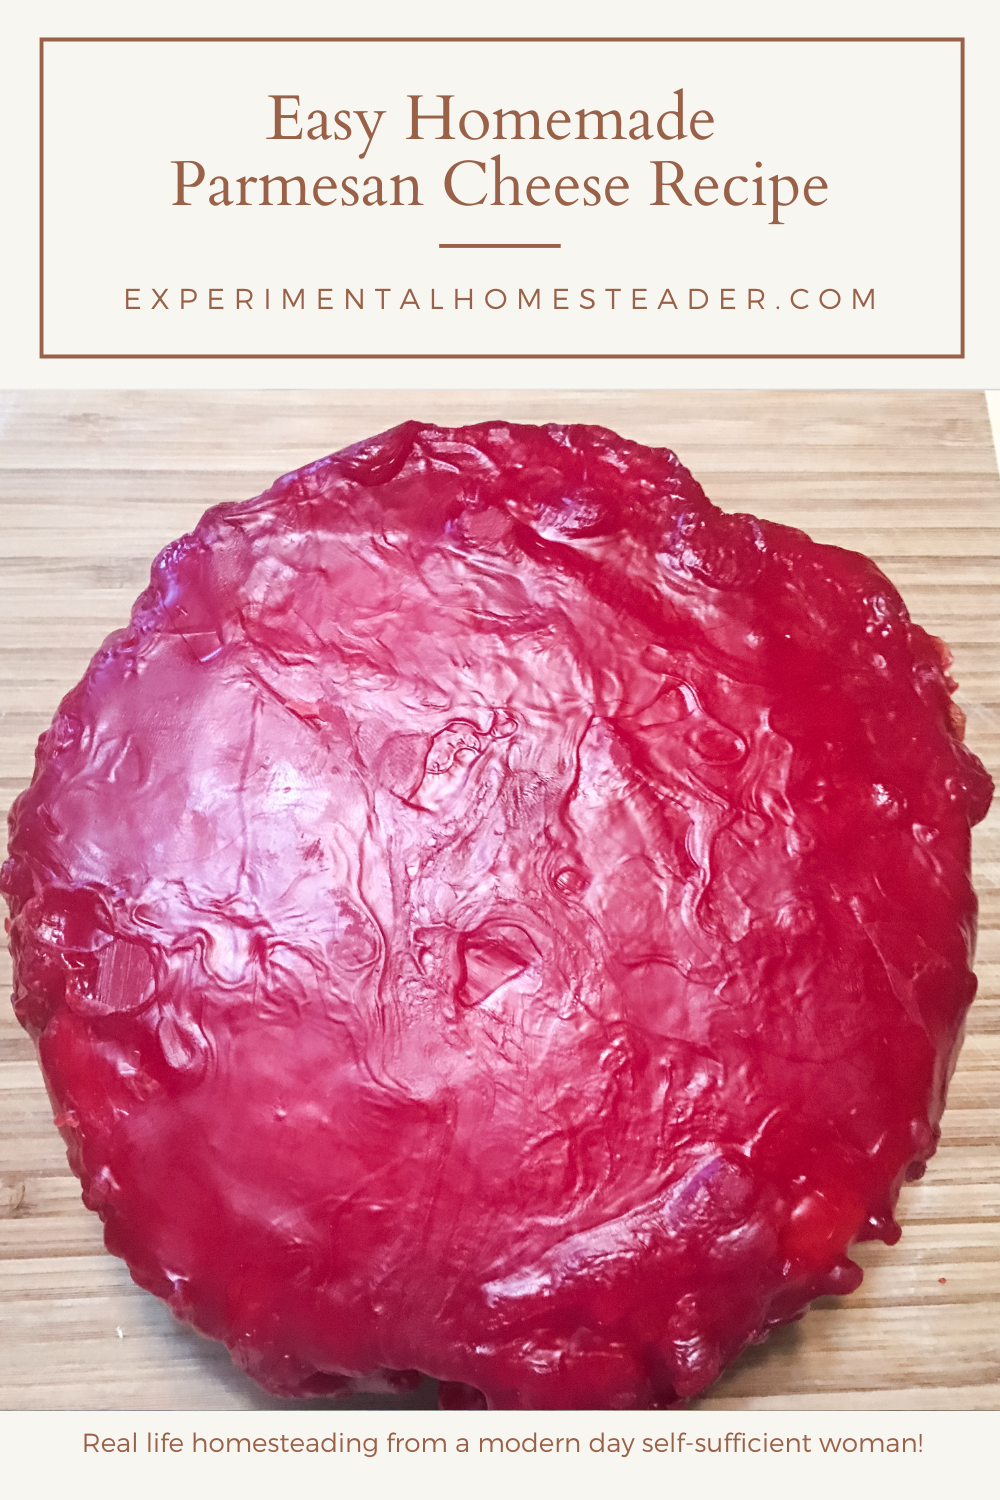
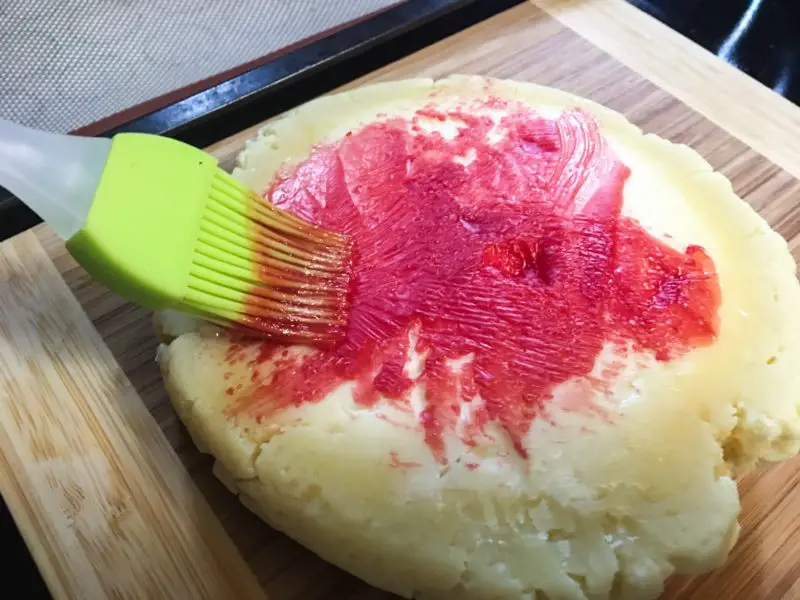
- Once it has aged for 2 months, wax the cheese with cheese wax making sure to completely cover the cheese so it cannot mold. Two coats of wax are better than one thick one. Return it to refrigerator and continue aging it for another 8 months at 55 degrees Fahrenheit and 85 percent relative humidity.
- Once it is done, cut the cheese and use it as you normally would. The wax is reusable so save it. Be sure to re-wax any exposed cheese so it does not harden too much or mold.

Equipment
thermometer made for cheese making
Buy Now →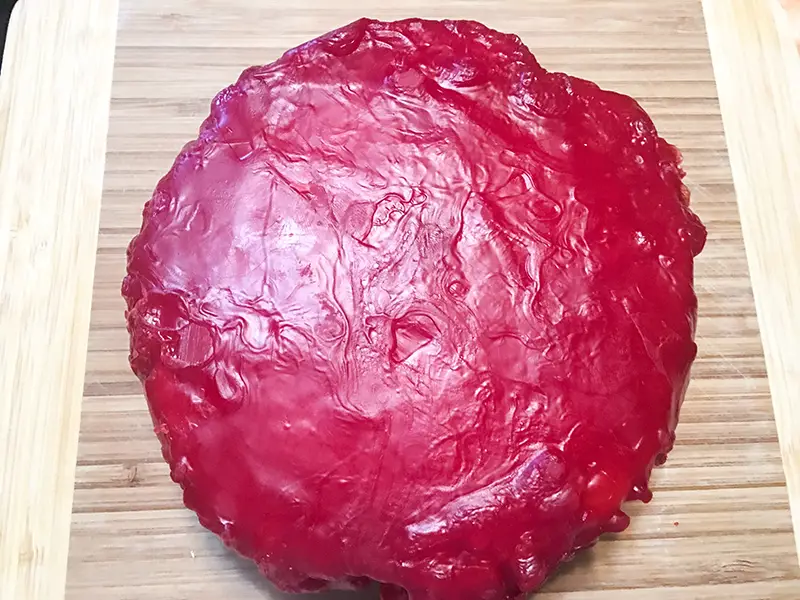
What To Do Once The Homemade Parmesan Cheese Recipe Is Done Curing
I had marked on my calendar when the ten months were up.
I had thought the mold had stopped as I no longer saw any on the outside of the cheese.
So, I took the Parmesan Cheese out of the small dorm refrigerator and cut a slice out.
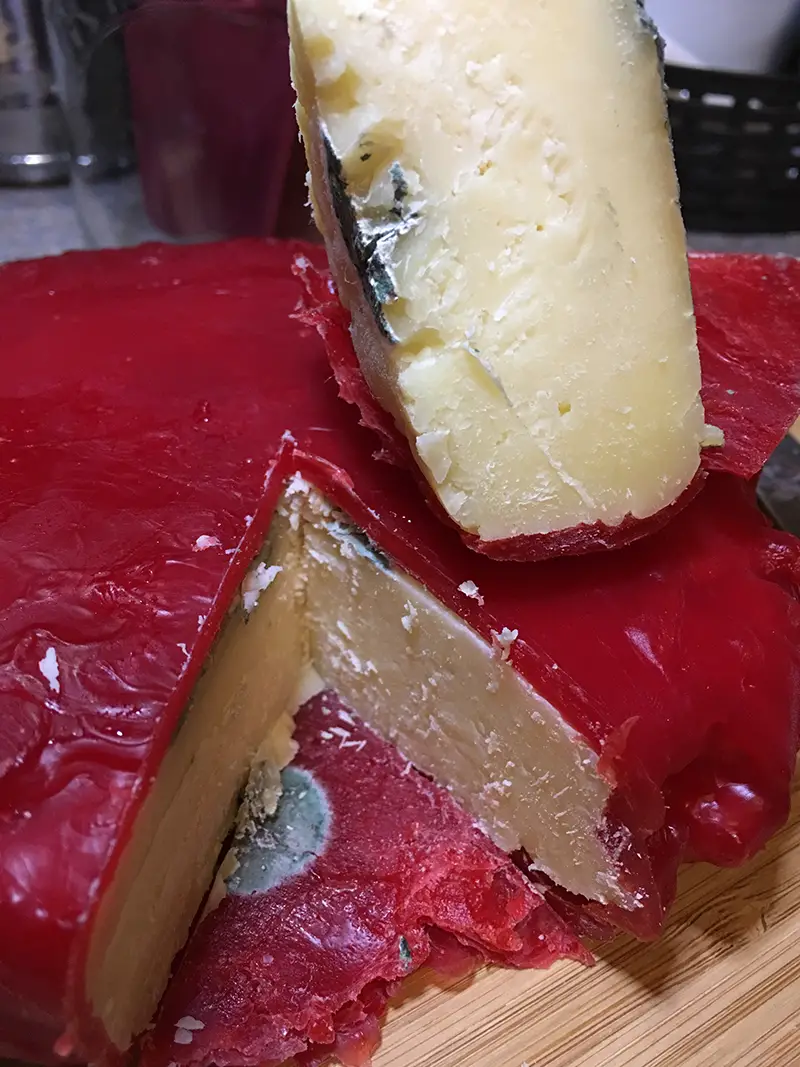
Under the wax the Parmesan Cheese was covered in mold!
The first step was to verify the mold was a normal mold and not harmful.
Once I determined that, by emailing photos of the cheese to the New England Cheesemaking Supply Company, the next step was to wait for their reply.
They said to cut the mold off because it was a normal mold and nothing dangerous, so that is what I did.
Then I placed the Parmesan Cheese in a ziplock bag with the air squeezed out of it and put that into the crisper drawer of my refrigerator.
For about three or four months afterwards I kept noticing new mold forming on the cheese.
I just kept cutting the newly formed mold out as soon as I noticed it.
Then one day the mold stopped forming.
What I determined was the Parmesan cheese was not fully cured, even though the ten months was up.
Once it was fully cured, the mold has not grown back.
It was ok to start using when I did, but the flavor as well as the hardness of the cheese actually improved once the mold stopped.
Continue Your Homesteading Cheese-Making Journey With These Posts:
- Is Mold On Parmesan Cheese Harmful?
- Top 10 Ways to Use Homemade Parmesan in Everyday Recipes
- Mastering Parmesan Cheese-Making as a Homesteading Skill
Goat Milk And Goat Meat
Recipes, DIY and more! All related to goat milk and goat meat.
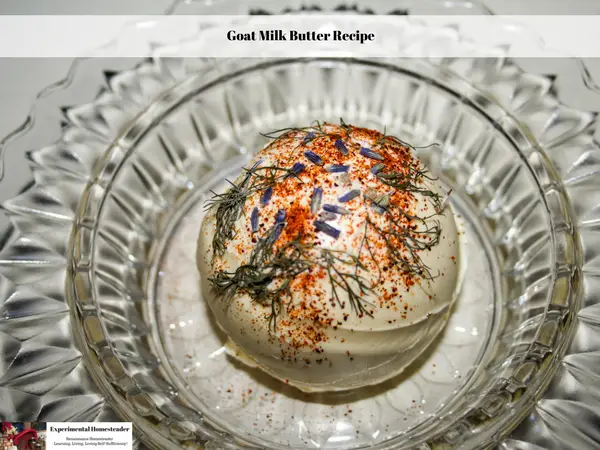
Goat Milk Butter Recipe
Making butter from goats milk is super easy and all you need is a kitchen blender! This goat milk butter recipe only takes a few minutes to make!
How To Pasteurize Goat Milk At Home
It's easy to learn how to pasteurize goat milk at home regardless of the actual method you choose to use to accomplish the task.
How Long Does Pasteurized Goat Milk Last
Have you ever wondered how long does pasteurized goat milk last? Find out the the answers for both refrigeratored and frozen goat milk!

How To Use And Separate Goat Milk Heavy Cream
Learn how to use and separate goat milk heavy cream even if you do not have a cream separator. Heavy cream is used in a lot of recipes and can be frozen.

Goat Milk Storage Ideas
Are you looking for goat milk storage ideas? Then read on to learn the best practices for handling goat milk plus short and long term storage methods.
How To Start Freezing Goat Milk
Freezing goat milk is the best way to preserve it. Learn how long frozen goat milk lasts in the freezer, how long it lasts in the refrigerator and more!

How To Make Cajeta Goat Milk Caramel
Learn how easy it is to make cajeta goat milk caramel from fresh goat milk. Plus learn how to preserve it for winter use by canning it.


How to Make Goat Milk Cottage Cheese on Your Homestead
Learn how to easily make delicious cottage cheese using goat milk on your homestead. A step-by-step guide for beginners!
Freezing Goats Meat
Freezing goats meat is as easy as freezing any other type of meat. If you raise goats or have a goat meat store close by this is an easy way to stock up.
Goat Milk Soap Recipes Round-Up
Are you looking for goat milk soap recipes? Look no further! Here you find a goat milk soap recipe for liquid soap, bar soap and even laundry soap.