How To Update Your Homestead Kitchen Countertops On A Budget
Disclaimer: I received one Daich Coatings SpreadStone Mineral Select Countertop Finishing Kit in Volcanic Black for free in exchange for my honest review. All opinions are my own.

Yes, you can update your homestead kitchen countertops on a budget if you use the Daich Coatings SpreadStone Mineral Select Countertop Finishing Kit.
The process is easy, and the end result is countertops that look fantastic, in my opinion.
Why Homestead Kitchen Countertops Matter
Kitchen countertops have a big impact on the homestead kitchen design.
In fact, they're usually one of the first things homesteaders notice when they walk into someone else's homestead house!
They often represent style and personality.
Kitchen countertops don't have to be expensive to have a significant effect on your homestead kitchen design.
Here are some smart tips for updating them without breaking the bank.
Homestead Kitchen Countertop Options
Kitchen countertops are an essential part of any modern home.
They can have a big impact on the design and style in your kitchen, so it's important to determine what you would like from your new countertop materials before you begin updating them.
Would you prefer something that looks more modern or do you want traditional wood?
Would it be better if it was slightly distressed or completely uniform?
Make a list of what you want and prioritize the elements.
Consider too how you use your countertops on a day to day basis.

Make Your Own Countertops, Then Refinish Them
Anything that homesteaders can reuse, homesteaders will use as homestead kitchen countertops .
That includes vintage doors, crates and even pallets!
Many homesteaders have made their homestead kitchen countertops out of old wooden pallets!
You don't have to buy expensive tools in order to make them - you can use a jigsaw, drill and screws.
Just avoid nails in the end if you want your homestead kitchen countertops to last for longer!
Others have simply refinished the countertops that came with their home or salvaged used countertops from thrift shops - or friends that were replacing theirs.
Our countertops actually came from a friend who was able to get all brand new countertops.
They were cut out of her home, so putting them together to fit our kitchen cabinets was sort of like assembling a jigsaw puzzle.
Take Advantage Of Pre-Existing Texture
Homesteaders aren't afraid of homemaking, homesteading or homestead style.
But they are afraid of not using all available options when it comes to home improvement, which is why this tip is perfect for modern homesteaders!
Do you see that uneven surface?
It is actually part of the jigsaw puzzle we put back together when we created the actual countertop surface!
Homestead kitchen countertops don't have to be completely smooth or flat!
They do need to look good though and be able to be throughly cleaned.
After all the countertops in a homestead kitchen get a lot of use.
Daich Coatings SpreadStone Mineral Select Countertop Finishing Kit
The good news is you don't have to give up homesteader style to save money on homestead kitchen countertops.
Even if they do look a bit tired, it's easy enough to update them doing what many homesteaders do and opting to paint your countertops!
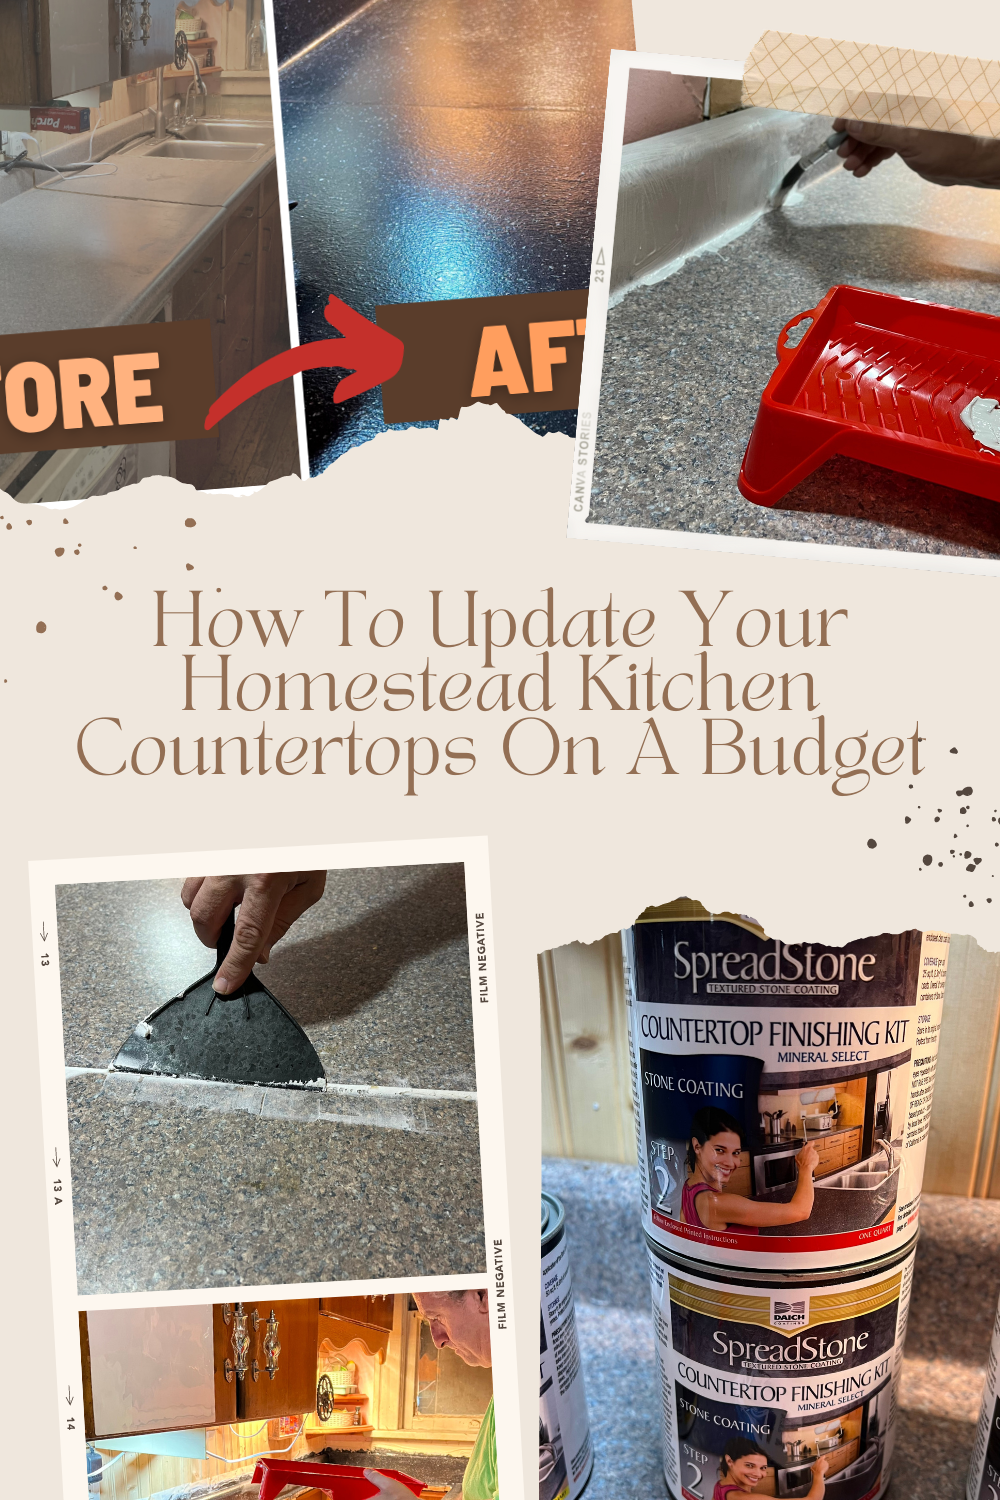
There are some high-end home decorating companies that sell paint designed specifically for faux finishes - and that is what we opted for when we chose the Daich Coatings SpreadStone Mineral Select Countertop Finishing Kit in Volcanic Black.
Yes, you can update your home's kitchen countertops with a kit that costs less and gives great results.
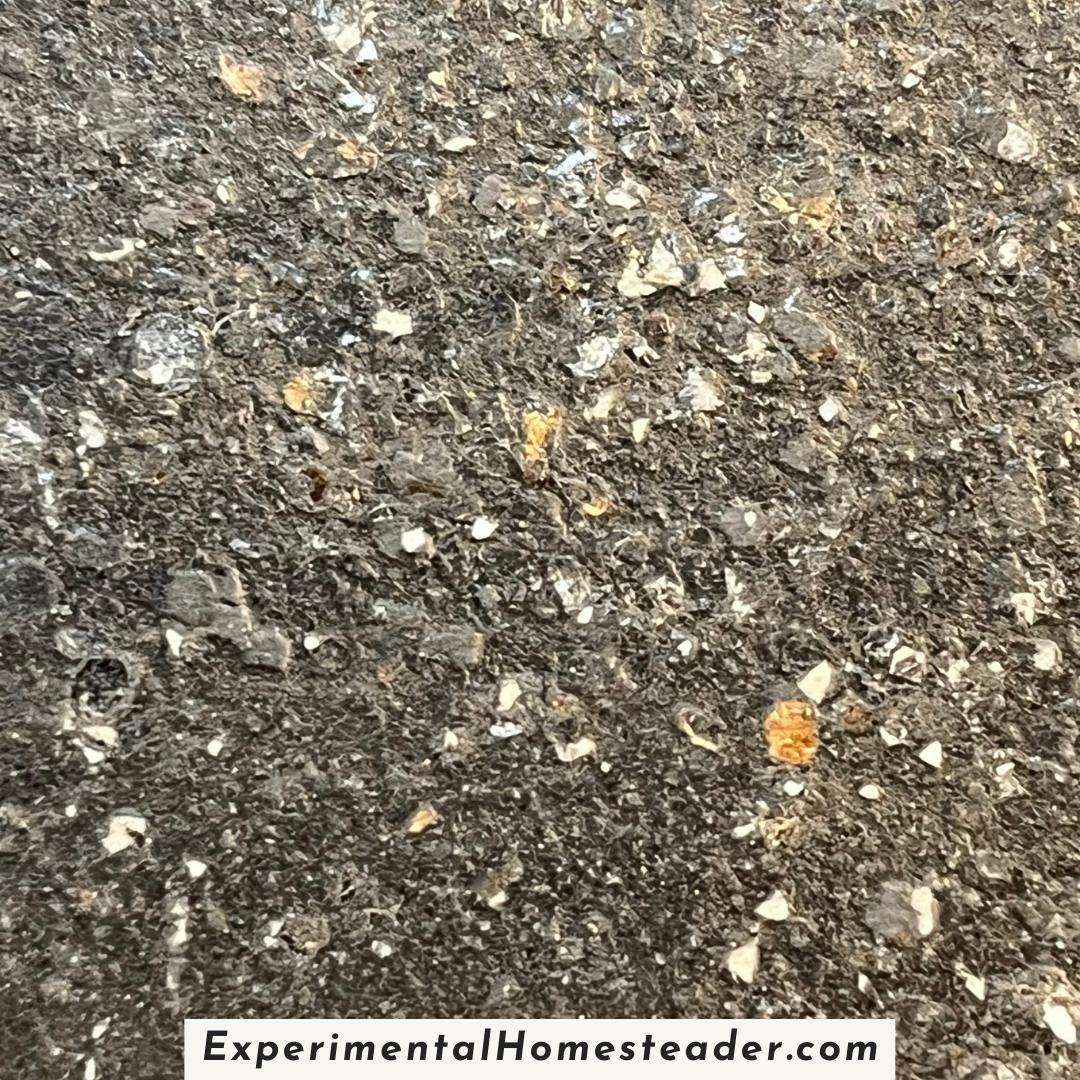
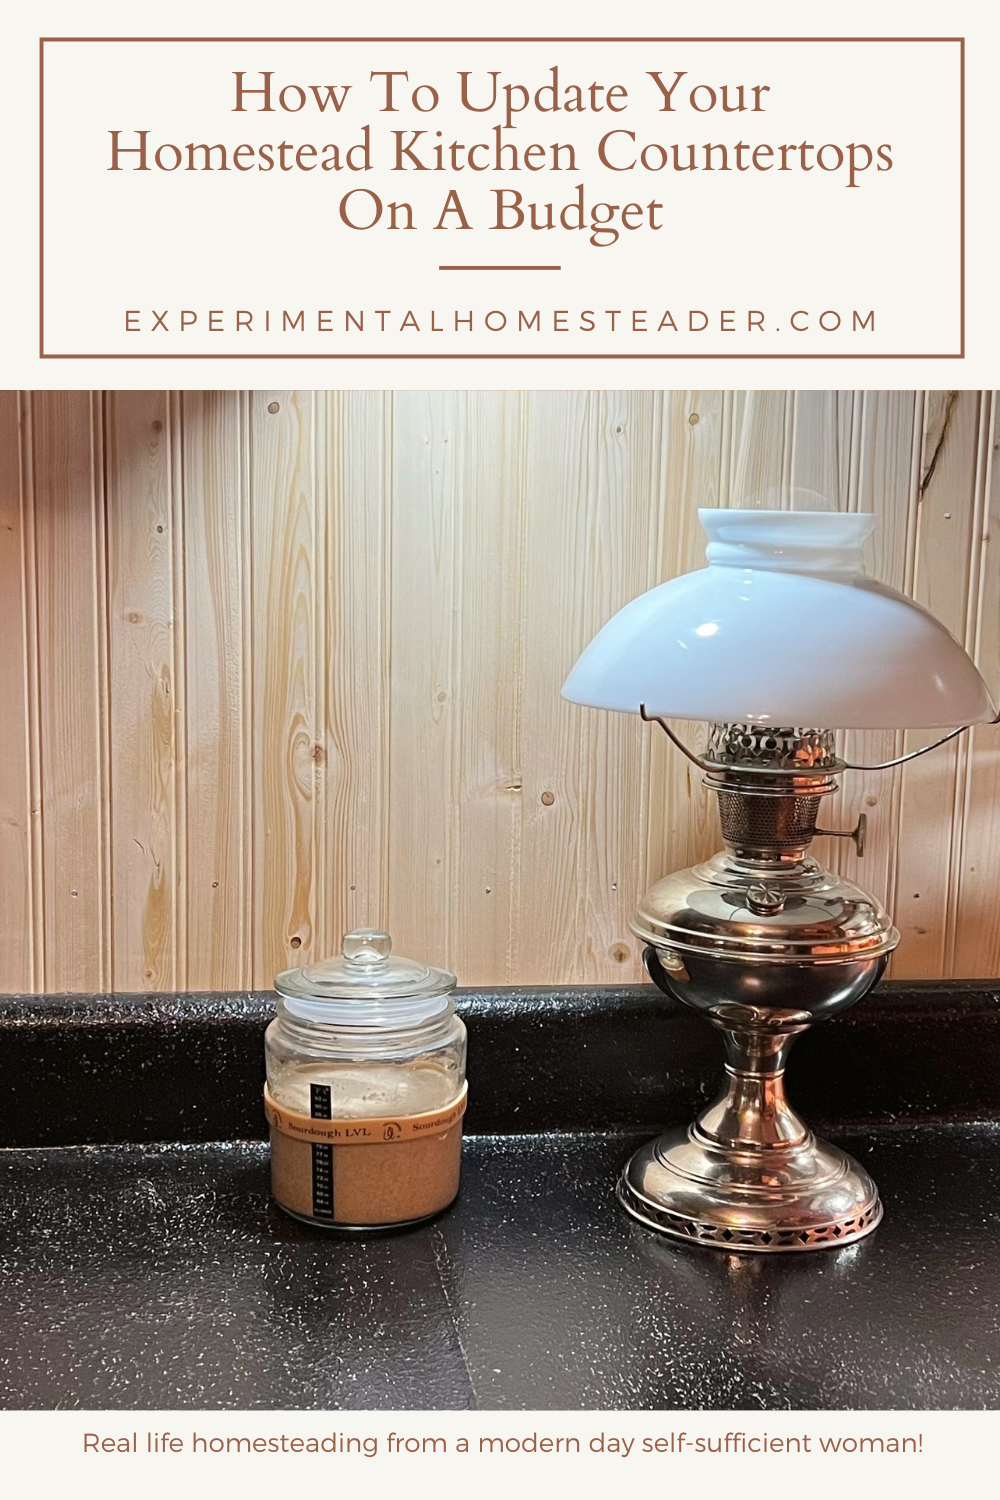
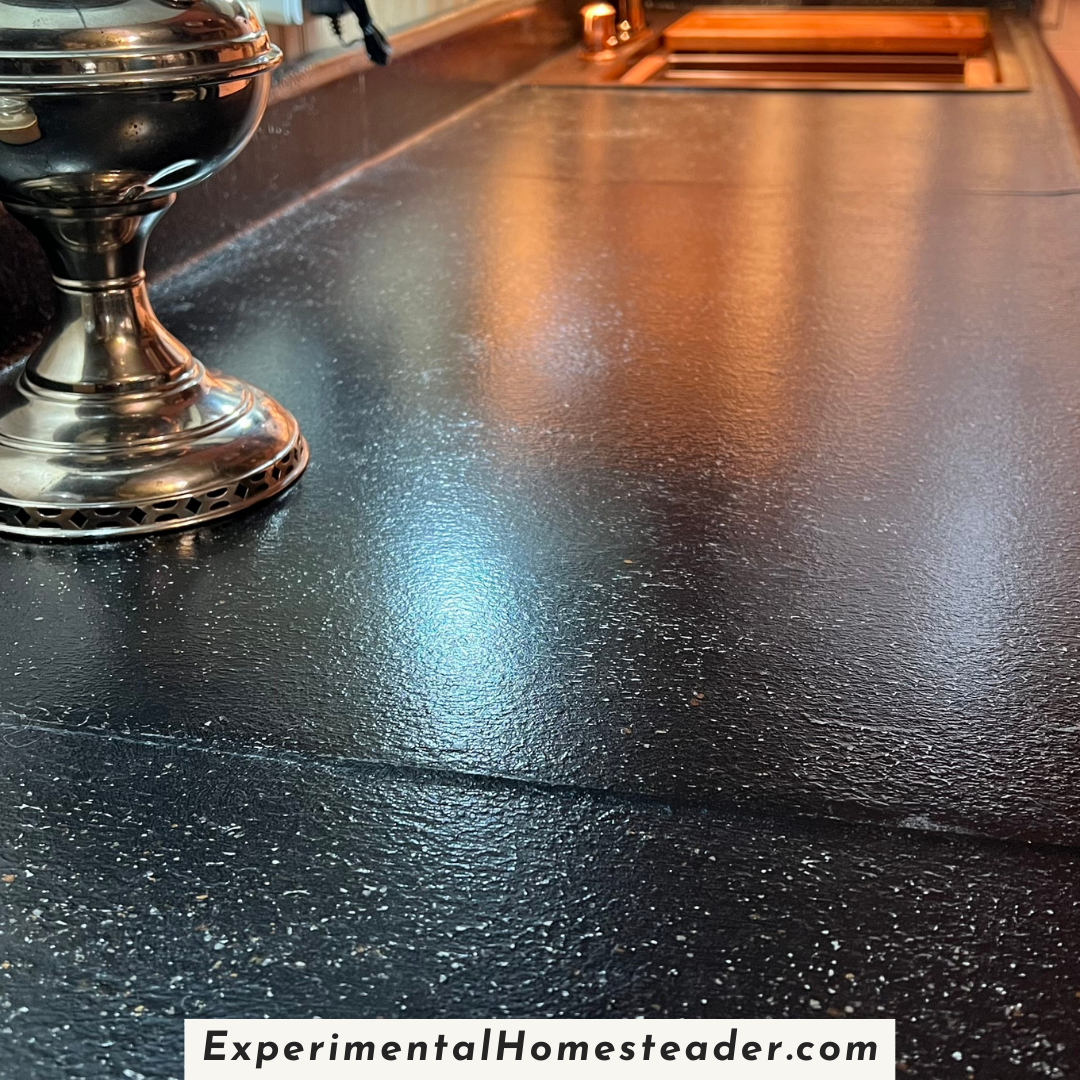
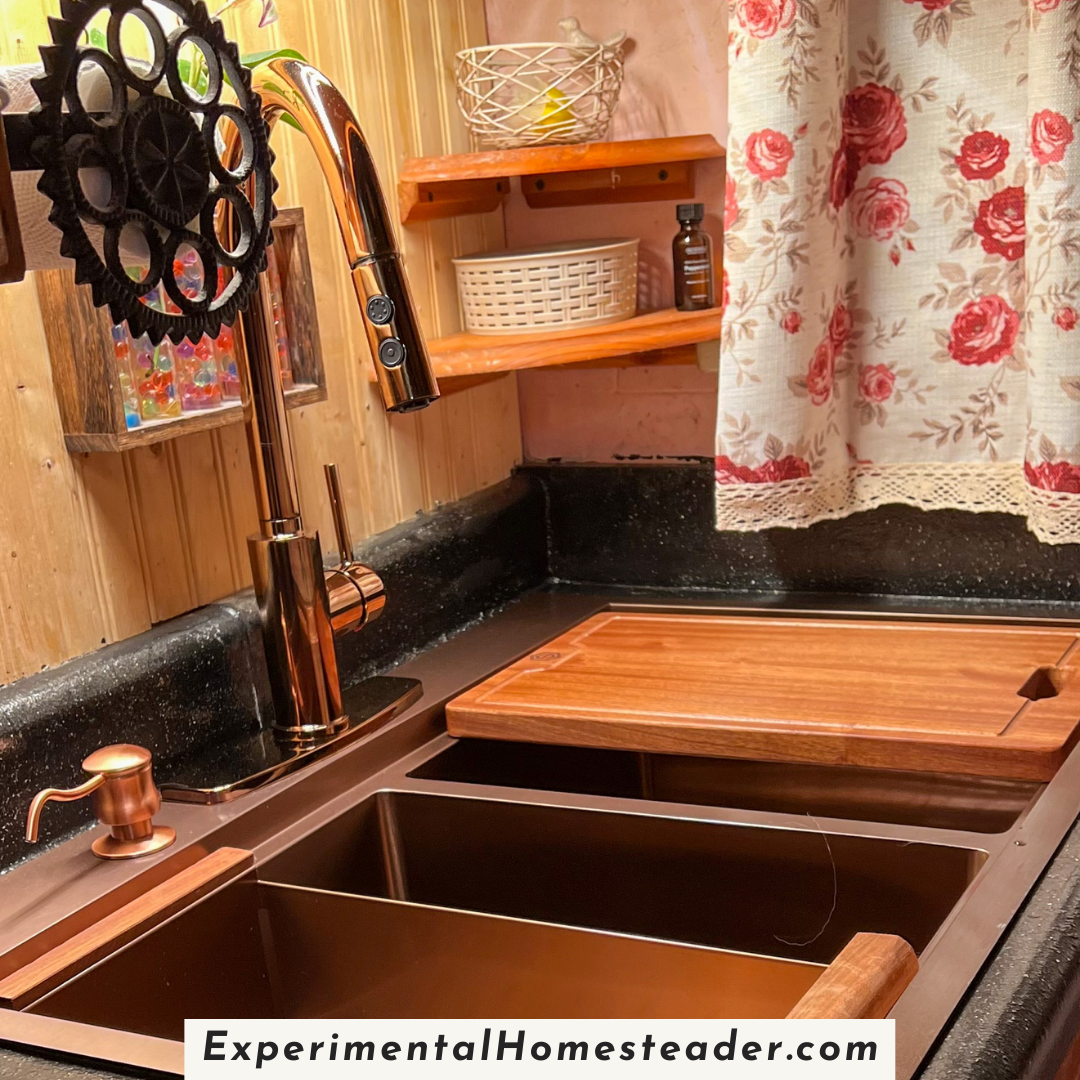
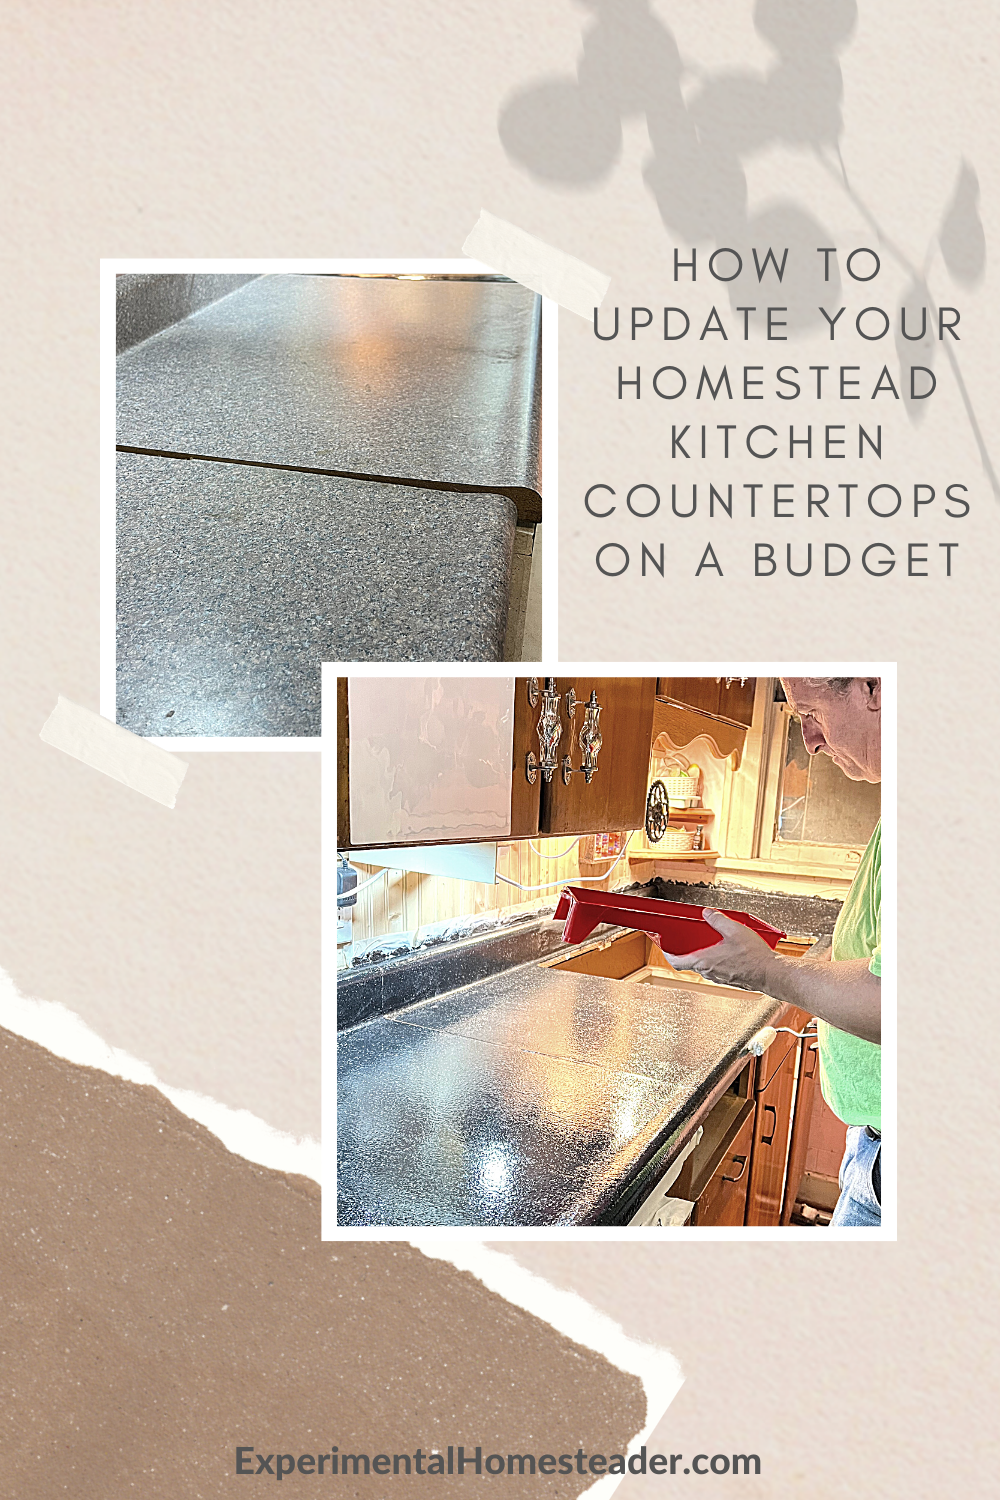
I am over the moon about my new countertops in Volcanic Black!
You can find and order the Daich Coatings SpreadStone Mineral Select Countertop Finishing Kit straight off their website.
The process was easy - all we had do was follow the steps in the video tutorial on their website.
After applying two coats of base coat followed by the stone coat and finally a clear coat.
Now my lovely new countertops looks even more amazing then what I ever thought they would!
The great thing about this kit however, is that Daich Coatings have both written instructions and video tutorials that share a lot of tips and tricks you need to know for applying their products to get great results, like how to properly prep the countertop surface, apply the primer and stone coating as well as how to apply the clear coat.

Our Homestead Kitchen Countertops Update
I love DIY projects - mainly because they are an easy way to update the look of your home or piece of furniture without spending a fortune or needing to buy something new.
Our latest DIY project was refinishing our countertops.
Years ago I had to tear the laminate off the countertops that came with the house.
Initially I planned to sand, stain and seal the old countertop, but the glue was so nasty I felt like just tearing the countertops out was the best solution.
We replaced them with countertops from someone else's house and needless to say, the countertops were not a perfect fit.

The countertops had been cut into sections and the area around the sink was actually broken.
Whoever took the countertops out of my friends house was not careful at all.
So we pieced them together as best we could and just dealt with the cracks.
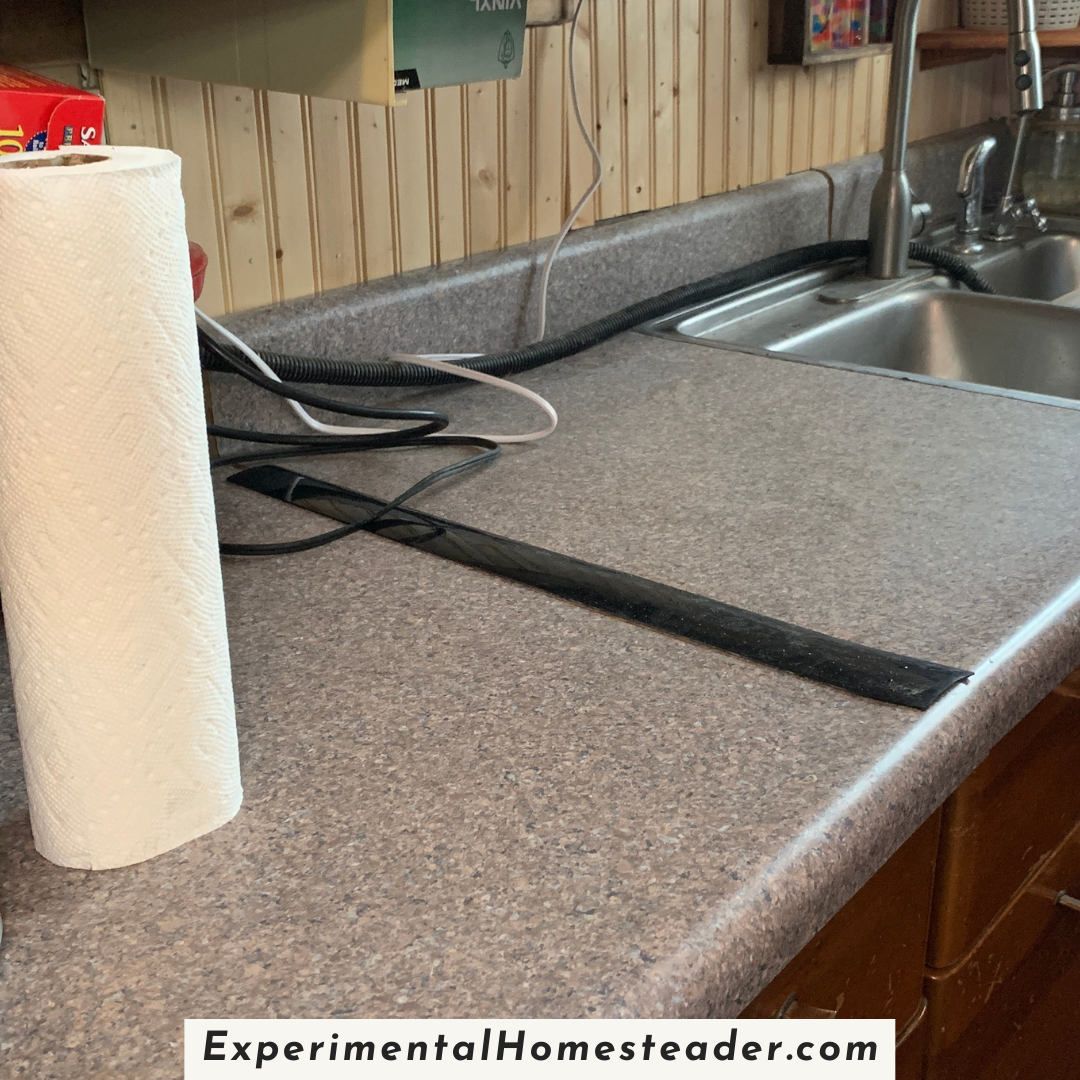
For the larger cracks, I eventually tried counter gap covers.
They worked but got dirty quickly and really stood out on the countertop, not to mention spills went down in-between the gaps which was just nasty.
I knew I needed a better solution.
I had actually looked at the Daich Coatings SpreadStone Countertop Finishing Kit years ago, but thought it would be a lot of work.
I also wondered how well it would hold up and if buying it would be a waste of money.
So, when I received an email about the product and read the story of how easy the product was to use, I asked if they worked with bloggers.
I reached out to her to ask if they worked with bloggers and she said yes, so I decided to give it a go.
Honestly, I had seen their product in stores a number of years ago and had considered it back then, but was afraid it was too hard or wouldn't turn out right.
Boy was I wrong!
It was easy and the results were more than I had hoped for!
I absolutely love my new homestead kitchen countertops!
Here Is The Process We Used To Update Our Homestead Kitchen Countertops
The first step was to clear everything off the countertops and scrub them really well so nothing including oils from our hands remained on the countertop surface.
Since our countertops were like a jigsaw puzzle, Jeffrey decided to remove them and take them out to his workshop to actually glue the countertops together.
This way they had plenty of time to properly dry without the possibility of getting wet or getting bumped and not staying securely connected while the wood glue was drying.
Once the countertops were dry, he brought them back into the kitchen and put them back in place.
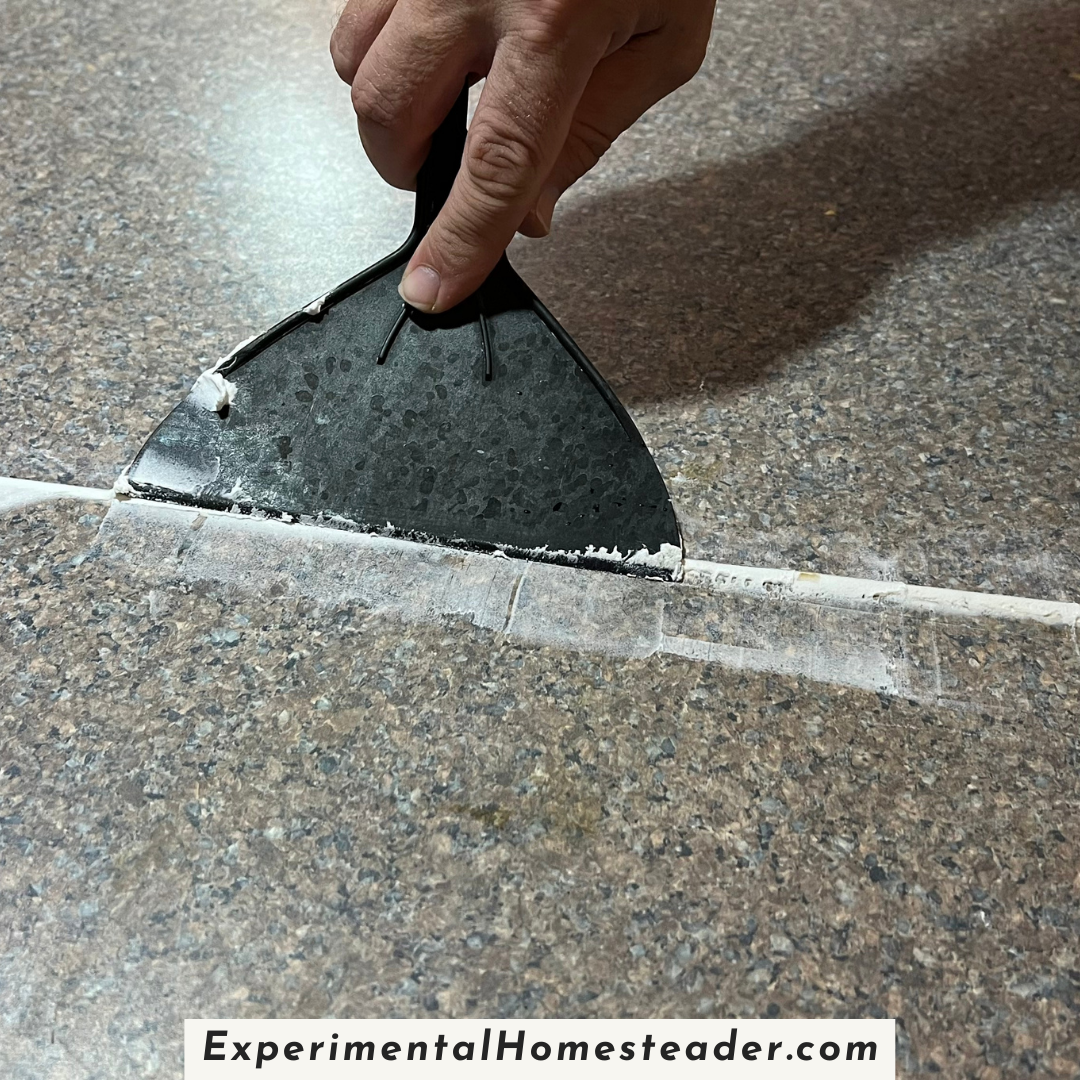
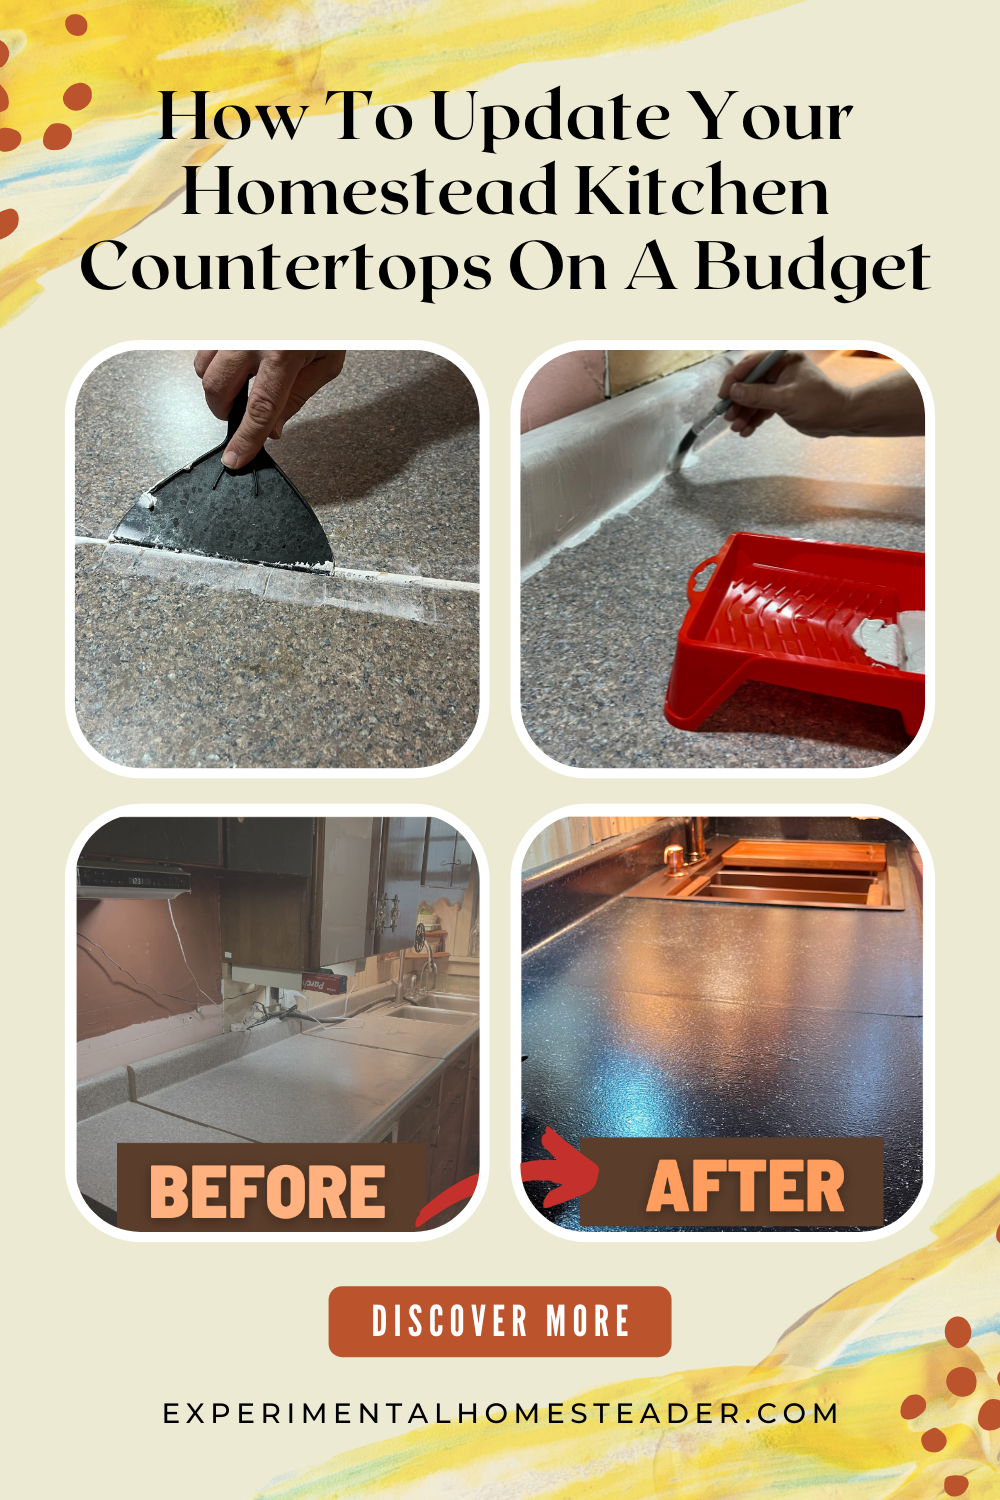
The next step was using spackle to fill in the gaps.
He chose to use a drywall taping knife to spread the spackle instead of a putty knife because of the large size of the cracks in the countertop.
This did not come as part of the kit, so we bought it seperately.
There is a great video tutorial on the Daich Coatings website that shows how to properly deal with damages in your countertop so when you refinish it you no longer see them.
You will want to watch all of their tutorials before you begin your project.
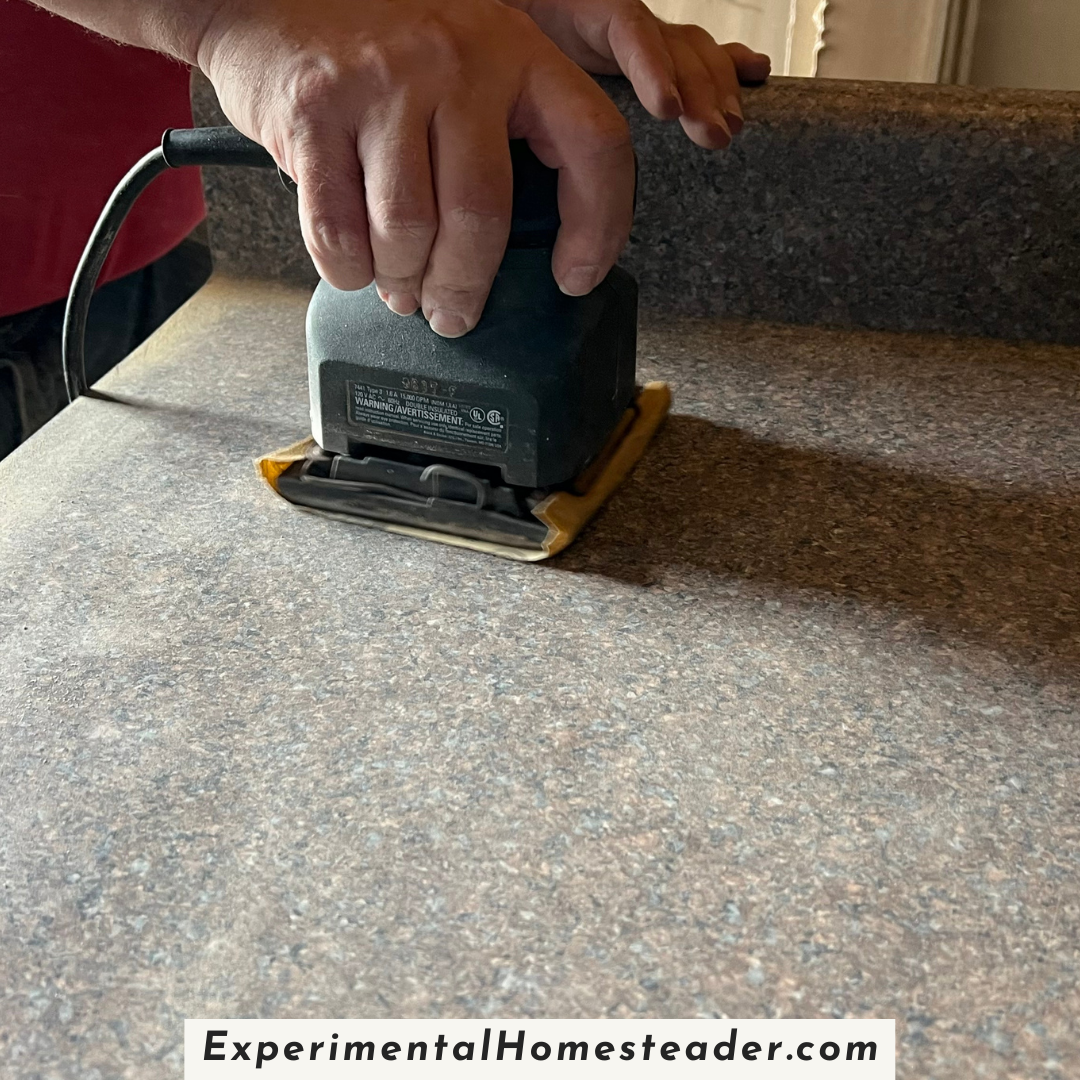
After the spackle dried, he sanded the countertop surface lightly to rough it up.
He used an electric sander on the large surfaces and a hand sander on the front edges, the backsplash and side splash.
Once he was done, we used several damp paper towels to make sure all of the sanding dust particles were removed.

Then he began applying the base coat.
The process said the apply the first base coat, allow it to dry and then to apply a second base coat making sure to pay attention to any areas where the first base coat looked a little light.
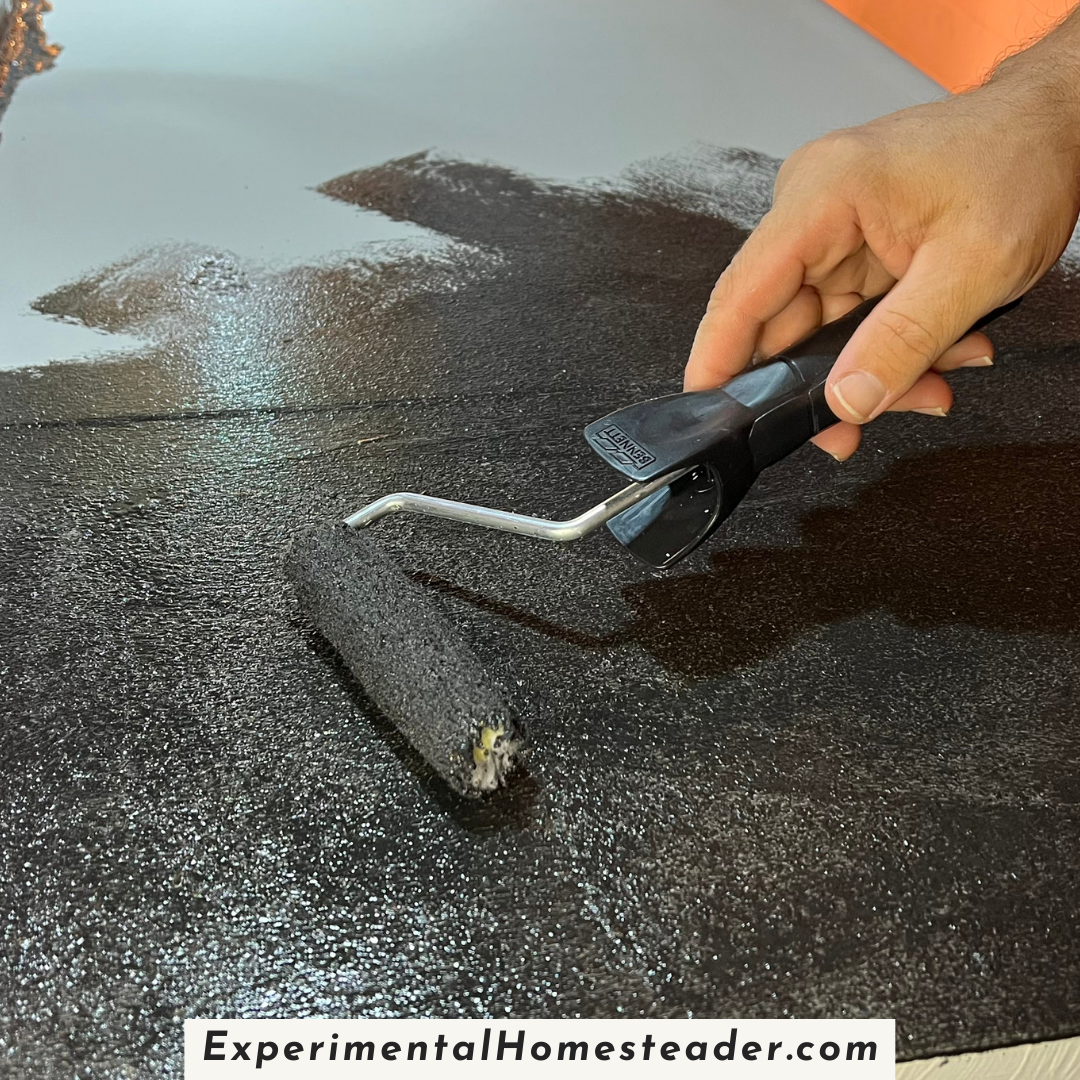
After the two base coats were completely dry, it was time to apply the first layer of stone coat.
The trick here is to make sure the stone coat is stirred well enough that the stone particles that settle in the bottom of the can are completely incorporated into the paint.
This is a step to take your time doing for the best results.
Once the paint is properly stirred, pour some into the mini roller tray that came with the kit and use the paint roller that was provided in the kit to apply the first thin stone coat onto the countertops.
Allow the first coat of paint to dry throughly and then apply a second coat of the stone coat, again paying special attention to any areas that seem sparse as well as the front edges of the countertop.
The last - and most exciting step is to apply the clear coat.
Once the stone coat is dry, apply the first layer of clear coat, wait for it to dry and then apply the final layer of clear coat.
Again, be sure to follow the directions provided in the Daich Coatings SpreadStone Mineral Select Countertop Finishing Kit for best results, since this is just a brief overview of what we did.
Homestead Improvement Projects


Save Money On Gifts, Services And More With Groupon
You really can save money on remodeling your home, buying gifts, goods and services by using Groupon, which is totally free to use!