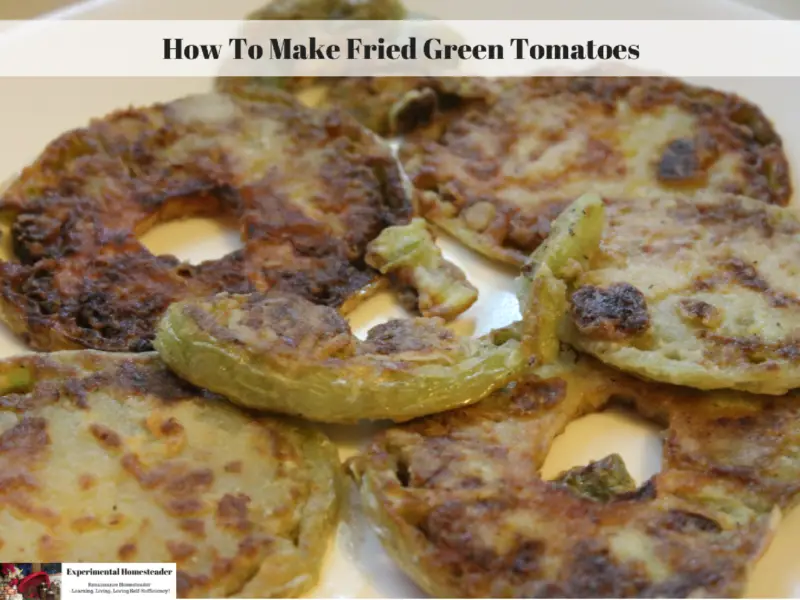
How To Make Fried Green Tomatoes
One of my favorite summer snacks is fried green tomatoes.

Now I know you can buy green tomatoes out of season - but to me the fried green tomatoes don't taste right unless they are made with fresh picked, yellow-green tomatoes that are about to ripen.
Best of all, this recipe only calls for 5 ingredients - and other than the green tomato I bet you have them all in your kitchen already.
Now for those watching their salt intake, go ahead and omit that.
Try basil or another herb instead to add a dash of extra flavor.
Here is my recipe.
Below is the recipe as well as links to products I recommend from companies I have a referral relationship with. I will be compensated if you make a purchase after clicking on my links.
Print
How To Make In Season Fried Green Tomatoes
Instructions
- Slice the green tomato into ⅛ inch thick slices.
- Add a tablespoon or two of oil to a large skillet. Turn the burner to medium heat and heat the oil until it is hot but not smoking. Do not allow the oil to start to smoke as it can burst into flames. If this happens, use baking soda to extinguish the flames.
- Sprinkle some flour on a plate and add a little salt and pepper if desired. Mix well.
- Coat both sides of the green tomato with the flour mixture then place the floured tomato slice into the pan with the hot oil. Be careful not to burn yourself.
- Cook for 2 to 5 minutes per side. You want to tomato to be brown, but not burnt. I like mine to be pretty crispy.
- Set the cooked tomatoes on a paper towel lined plate and cover them with another layer of paper toweling. This helps to soak up any excess grease and keep them warm.
- I like to sprinkle a little extra salt on mine before I eat them. This is optional.
- Serve hot!
I highly recommend the following articles:
- How To Make Homemade Breakfast Tartlets
- Pineapple Upside Down Cake With A Twist
- Angel Food Cake Recipe With Poppyseed And Lemon Zest
- Chocolate Loaf Brunch Cake Ideas
Use the buttons on the right hand side of the screen to share this article with friends or family who might find it useful. Pin the picture below to your pinboard on Pinterest for future reference.