Santa Claus Shaped Marshmallow Candy Recipe
This Santa Claus shaped marshmallow candy recipe is time consuming for sure, but the finished treats are beyond adorable!


Lessons Learned From Making This Santa Claus Shaped Marshmallow Candy Recipe
It is best to work in a cooler spot when making these so the chocolate sets up a little easier and although I do recommend refrigerating them to help the chocolate set up faster, you can let them harden at room temperature if you prefer.
While it might seem easier to coat the marshmallows first, then attach all of the candies to the marshmallows and stack them on top of the pretzel, this is more difficult than just making each Santa following the steps below.
I did try it both ways thinking the marshmallows would be easier to handle once the coating was dry.
What I found out was the candies did not stick well and I had to use a knife to cut into the marshmallow to create the space for the mittens.
When I inserted the mittens, the marshmallow cracked!
After trying that, I went back to working with each section of the Santa as soon as I coated it in the chocolate and sugar or coconut.
This project does take some patience and if the Santa's are not aligned perfectly centered, they either do not want to stand up or lean slightly even if they do stand up.
I was ok with them leaning just slightly.
I thought is looked like Santa was looking for something, but I did have several that fell over and I had to redo them!
So my advice to you is set aside about two hours worth of uninterrupted time and make these in small batches of ten, let them cool completely, and if you need more, work on them after the first batch is done cooling.
Here is how I made this Santa Claus shaped marshmallow recipe.
Print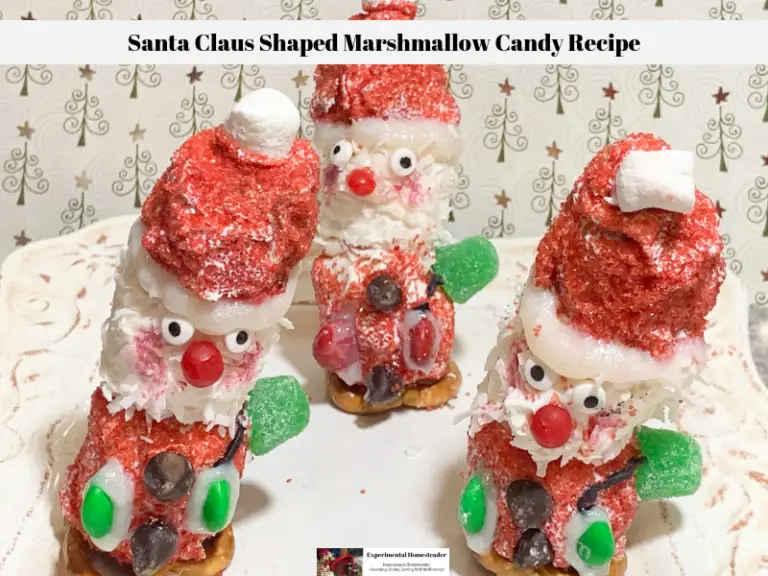
Santa Claus Shaped Marshmallow Candy Recipe
- Total Time: 0 hours
- Yield: 10 santas 1x
Ingredients
- 10 small pretzel twists
- 1 bag Wilton white candy melts
- 20 large marshmallows
- ¼ cup red sugar crystals
- 20 miniature chocolate chips
- 40 candy eyes
- 20 red and green M & M's
- ½ cup shredded coconut
- ¼ teaspoon orchid pink pearl dust
- 10 red hot cinnamon candies
- 10 chocolate covered cherries
- 10 miniature marshmallows
- 5 green spice drops or gum drops
- Black icing
- Wilton Sparkle Gel in white
Instructions
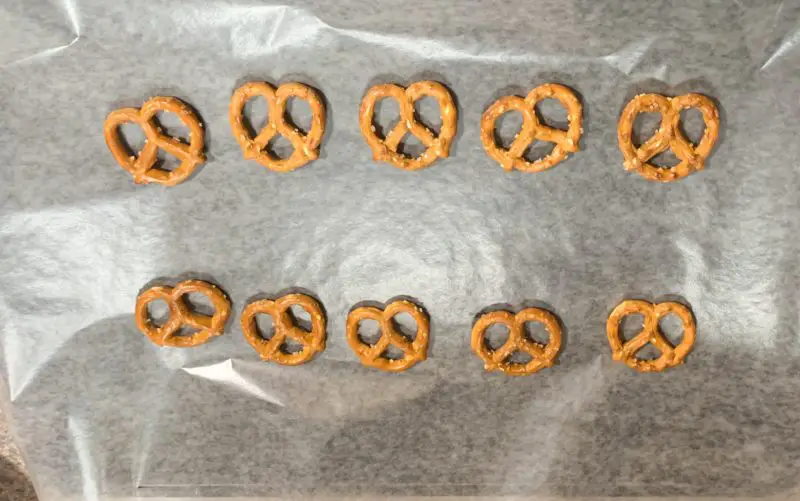
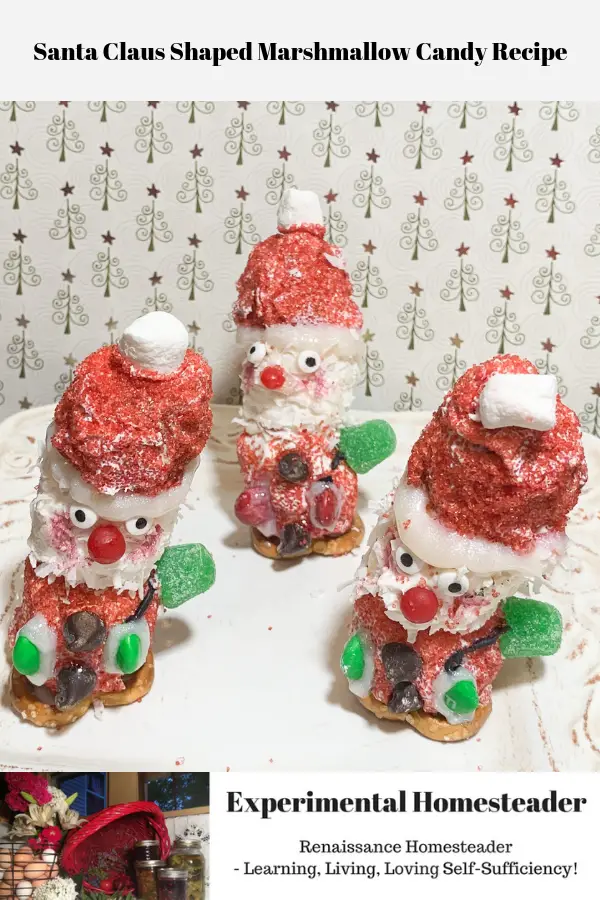
- Cover a cookie sheet with parchment paper and place 10 small pretzel twists on top of the parchment paper. Look at the pretzel twists carefully and make sure they sit level because this is the part that will hold the Santa's upright.
- Microwave the candy melts for 30 seconds, stir and then place them back in the microwave for 10 seconds and stir again. If the candy melts are not melted, return them to the microwave for 10 seconds, stir and repeat this process until they are melted. Alternatively you can melt the candy melts in a double boiler.

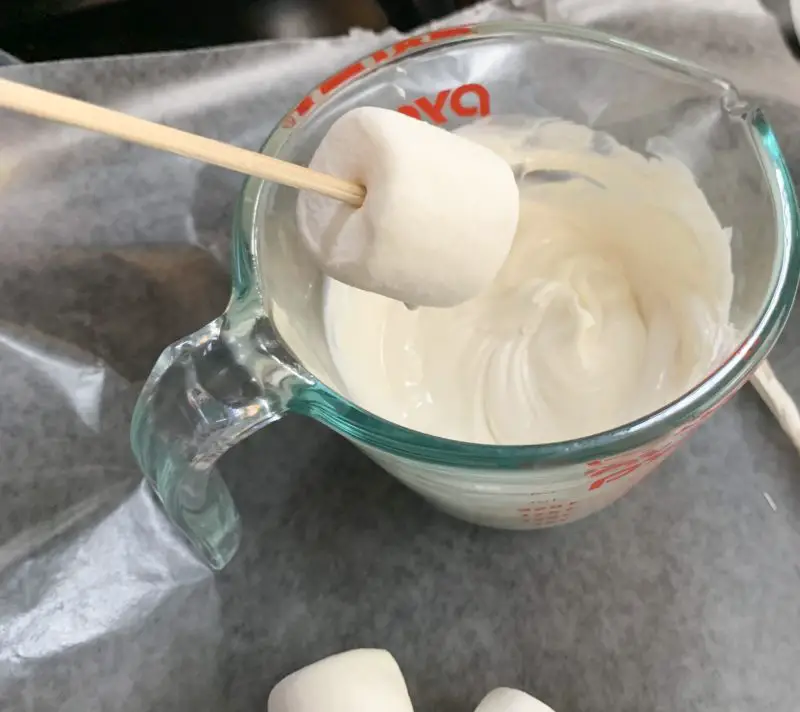
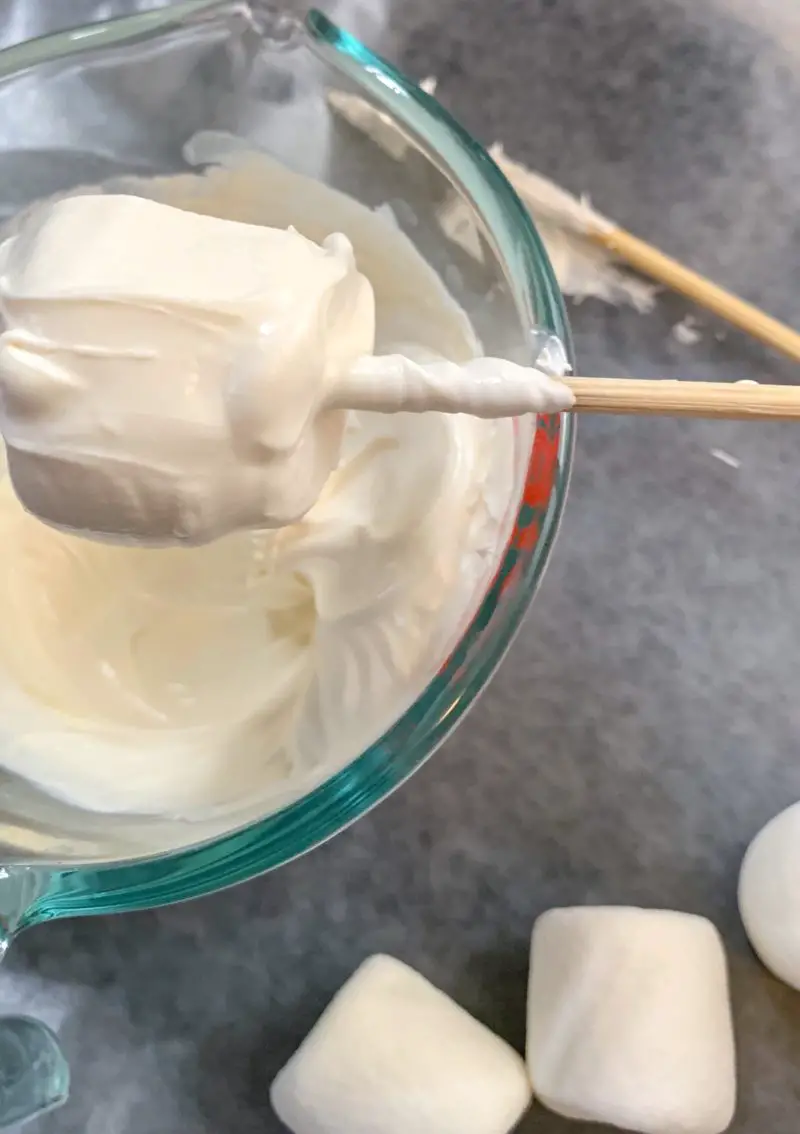
- Insert a wooden skewer through the large marshmallow and dip it in the melted chocolate.

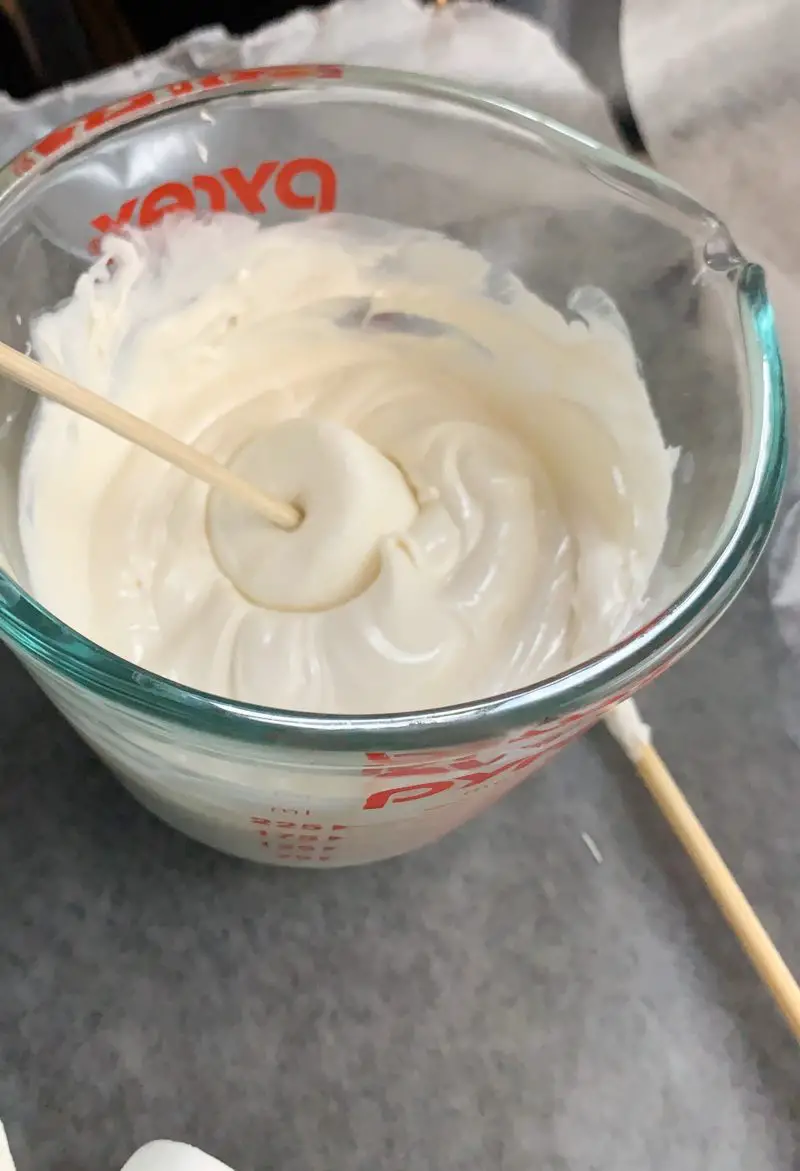
- Swirl it around so the chocolate covers the entire marshmallow, then lift it up, swirl it one last time.

- Tap the skewer on the edge of the container to remove any excess chocolate.

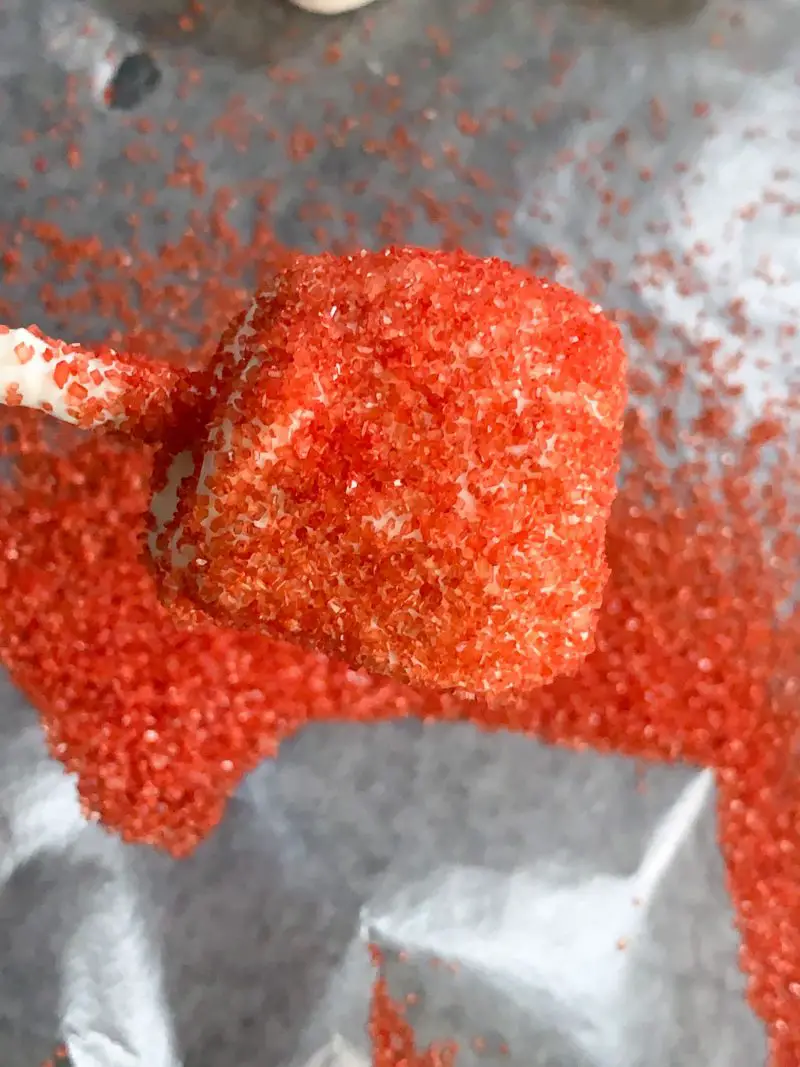
- Hold the chocolate covered marshmallow over a dish and sprinkle it with the red sugar crystals, again making sure to coat all sides.
- Place the marshmallow on top of the pretzel as close to center as possible*, but making sure that the front part of the pretzel is protruding just slightly. The pretzels are Santa's feet.
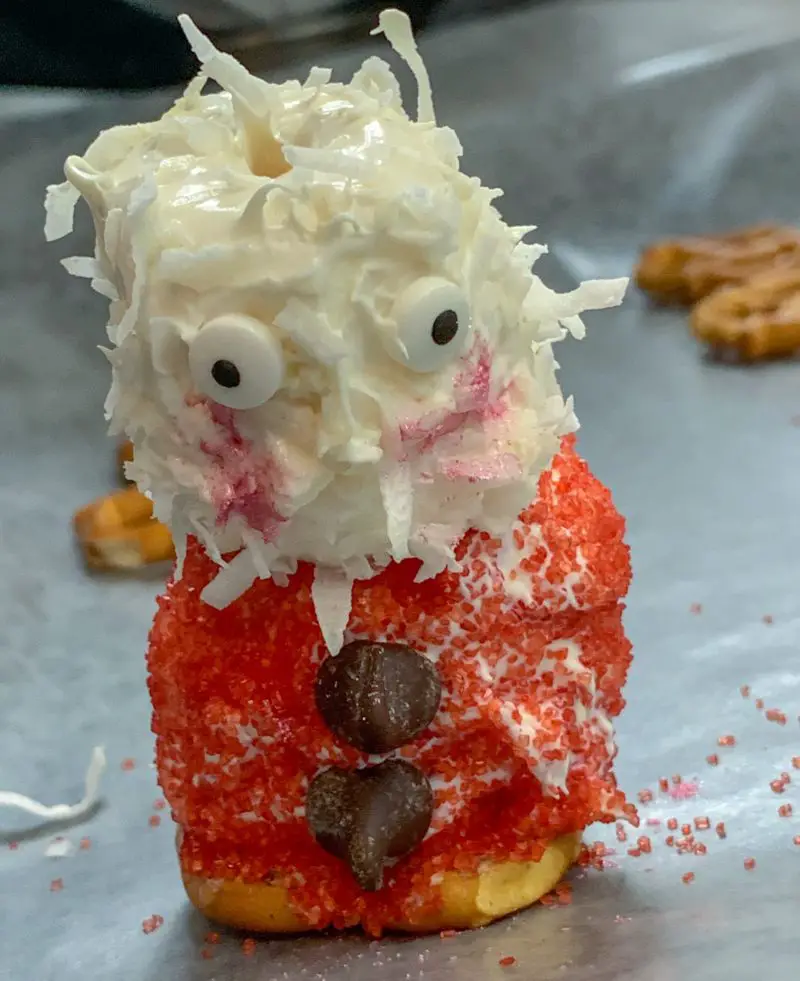
- Place two miniature chocolate chips in the center of the marshmallow to create buttons on Santa's shirt.
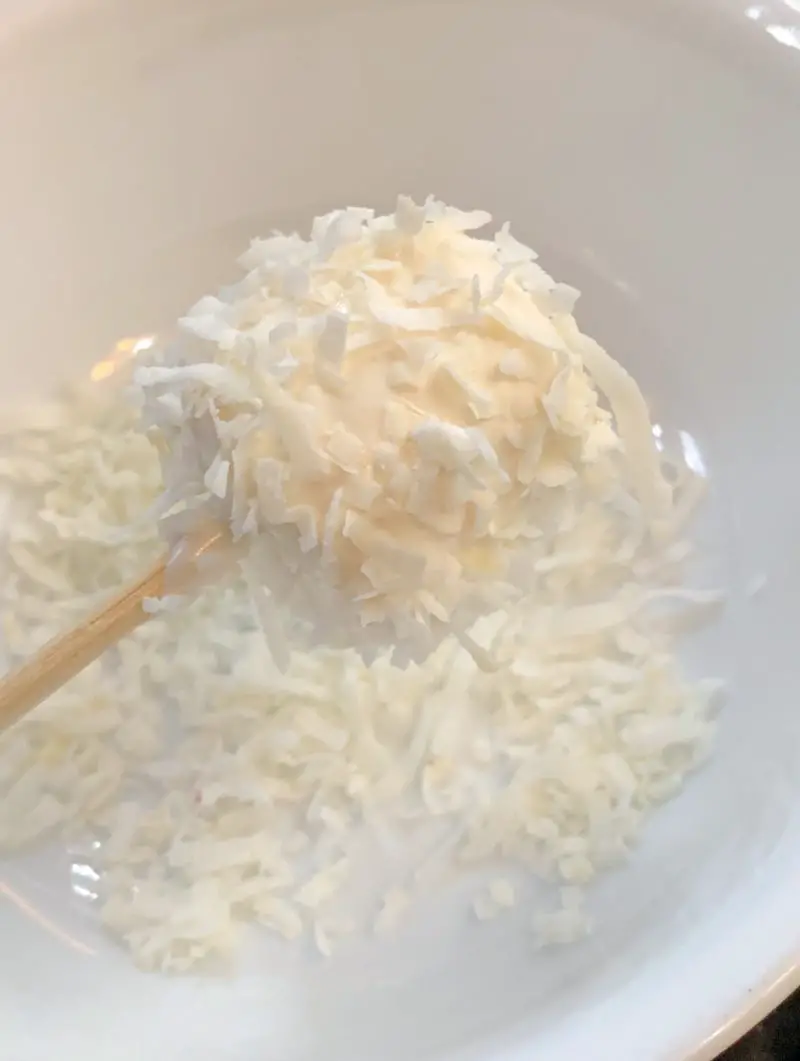
- Place a second marshmallow on a skewer and again dip it in the chocolate.

- Hold this over a second bowl and coat it with the coconut.
- Use a food grade paintbrush to brush a little bit of the pearl dust in the cheek areas.
- Now place the coconut covered marshmallow on top of the red sugar covered marshmallow. This is Santa's head.

- Place the candy eyes on his face and place a red cinnamon candy on his face for his nose.
- Make two small slices in the red marshmallow on either side of the buttons for Santa's mittens. Insert one M & M candy into each hole.
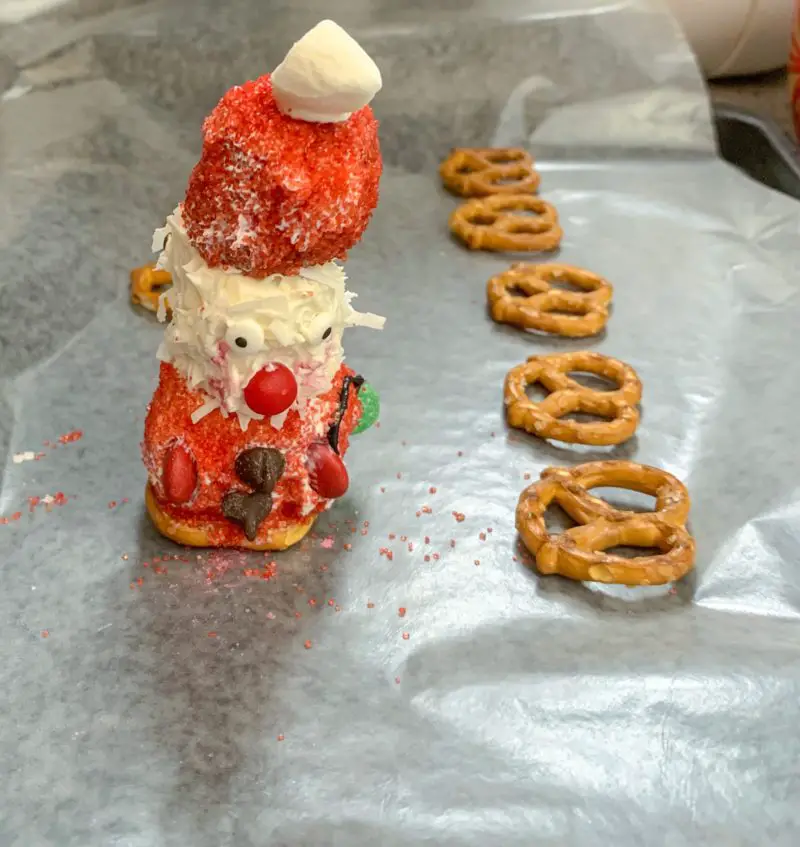
- Place a gumdrop on Santa's back and once you know it is secure, refrigerate the Santa to allow the chocolate to fully harden.
- Repeat steps 3 through 13 for each of the remaining Santa's you are going to make. Microwave the candy for 10 seconds are at time to melt it as needed throughout the process or simply keep the double boiler on low so the chocolate remains melted.
- While the Santa's are in the refrigerator, dip the chocolate covered cherries in the melted chocolate one at a time and then roll them in the red sugar crystals to coat them.
- Dip a miniature chocolate marshmallow in just enough chocolate to coat the bottom, then dip the chocolate coated bottom into the red sugar crystals.
- Place the miniature marshmallow on top of the hat, red sugar crystal coated side down.

- Once the Santa's are all done and the chocolate is hardened, remove them from the refrigerator and use a little chocolate to attach the hats to the top of each Santa's head.
- Then pipe a little black icing from Santa's hand to the top of the gumdrop bag.
- Pipe some of the Wilton Sparkle Gel around the edge of Santa's hat and around the edge of his mittens.
- Place the Santa's back into the refrigerator to allow the hat to fully harden.
- Once the chocolate is completely hardened, they are ready to eat.
Notes
* If the marshmallows are not centered on the pretzel, they will fall over.
Final Thoughts About This Santa Claus Shaped Marshmallow Candy Recipe
This was my first attempt at making this marshmallow candy recipe.
At first I was frustrated that things did not go exactly as I thought they would.
However after consideration, this is a recipe I would make again.
The Santa Claus shaped marshmallows are super cute and I am sure kids would love them.
They really are not that difficult in retrospect, they just take time and patience to get right.
I hope you will give them a try.
I highly recommend the following articles:
- How To Make Marshmallows From Scratch
- Easy, Elegant Chocolate Desserts On-A-Stick Recipe
- Christmas Recipes And DIY Ideas
- Sous Vide Cherry Cinnamon Ice Cream Recipe
- Try This Lemon Mousse For An Elegant Brunch Dessert
Use the buttons on the right hand side of the screen to share this article with friends or family who might find it useful. Pin the picture below to your pinboard on Pinterest for future reference.