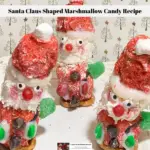
Santa Claus Shaped Marshmallow Candy Recipe
- Prep Time: I hour 20 minutes
- Total Time: 0 hours
- Yield: 10 santas 1x
- Category: Desserts
- Method: No Bake
Ingredients
Scale
- 10 small pretzel twists
- 1 bag Wilton white candy melts
- 20 large marshmallows
- 1/4 cup red sugar crystals
- 20 miniature chocolate chips
- 40 candy eyes
- 20 red and green M & M's
- 1/2 cup shredded coconut
- 1/4 teaspoon orchid pink pearl dust
- 10 red hot cinnamon candies
- 10 chocolate covered cherries
- 10 miniature marshmallows
- 5 green spice drops or gum drops
- Black icing
- Wilton Sparkle Gel in white
Instructions
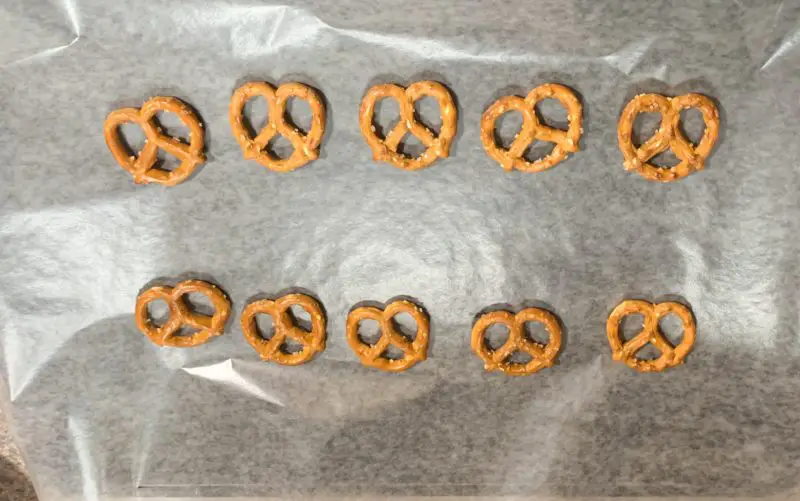
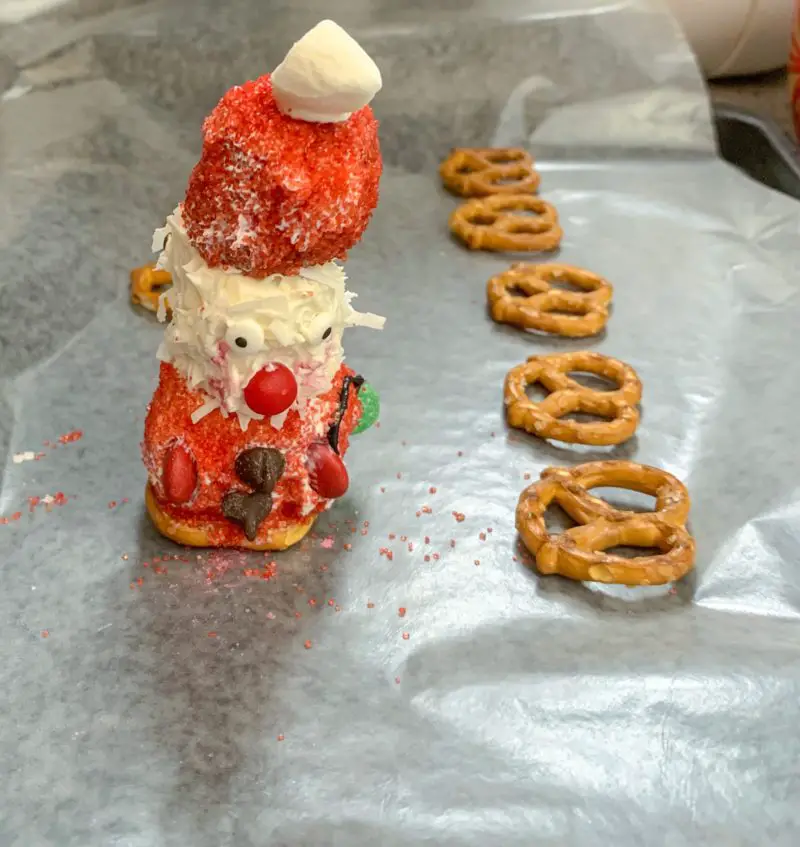
- Cover a cookie sheet with parchment paper and place 10 small pretzel twists on top of the parchment paper. Look at the pretzel twists carefully and make sure they sit level because this is the part that will hold the Santa's upright.
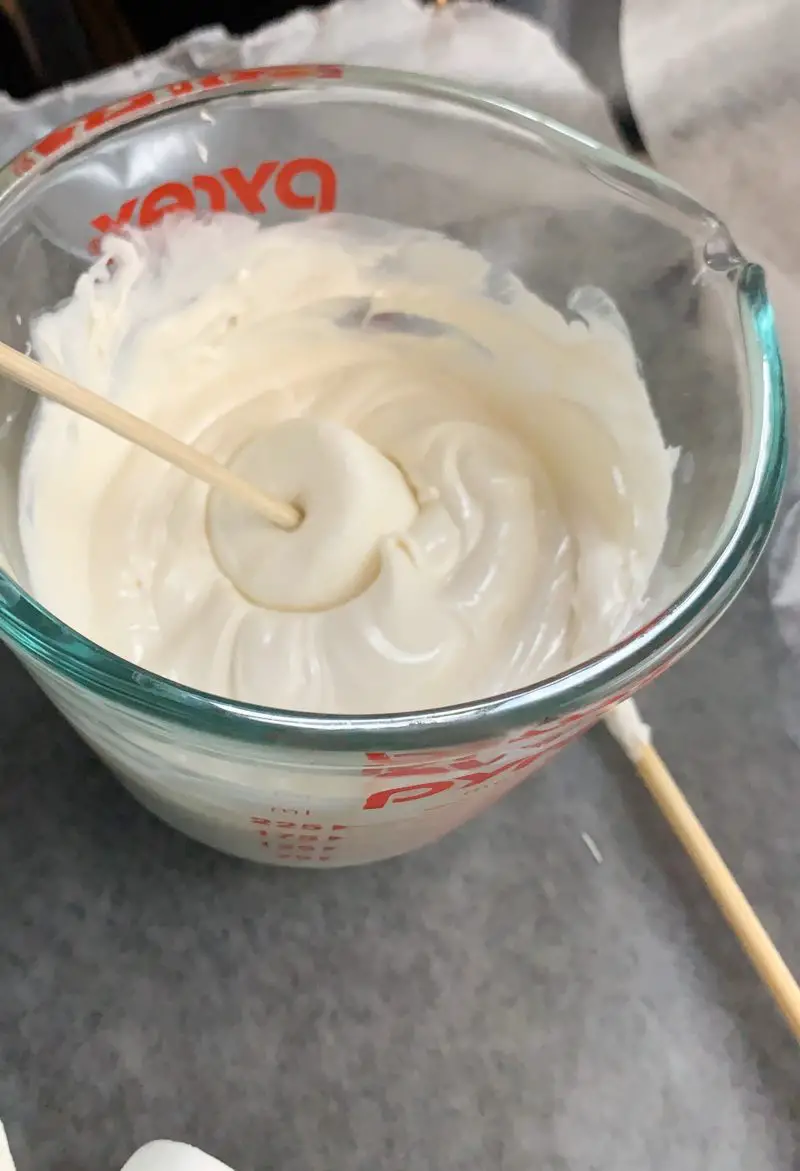
- Microwave the candy melts for 30 seconds, stir and then place them back in the microwave for 10 seconds and stir again. If the candy melts are not melted, return them to the microwave for 10 seconds, stir and repeat this process until they are melted. Alternatively you can melt the candy melts in a double boiler.
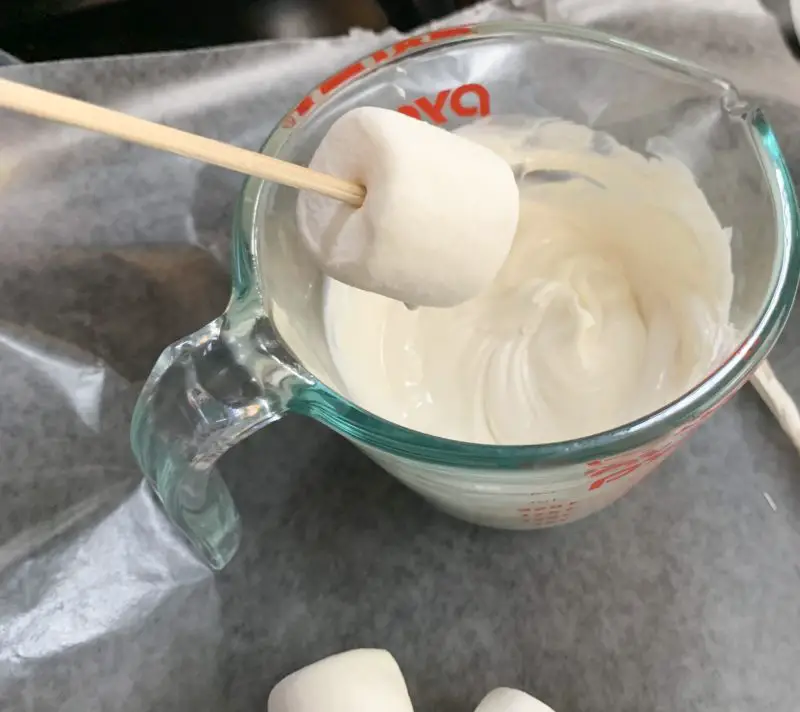
- Insert a wooden skewer through the large marshmallow and dip it in the melted chocolate.
- Swirl it around so the chocolate covers the entire marshmallow, then lift it up, swirl it one last time.
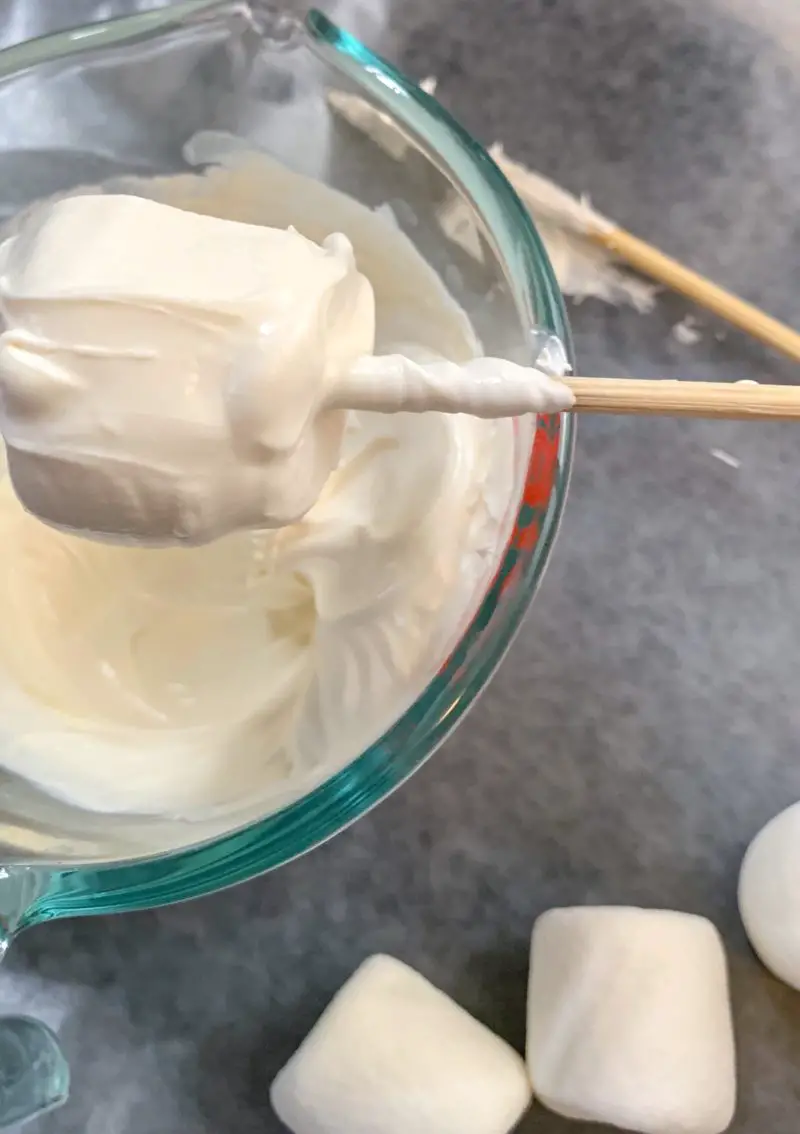
- Tap the skewer on the edge of the container to remove any excess chocolate.
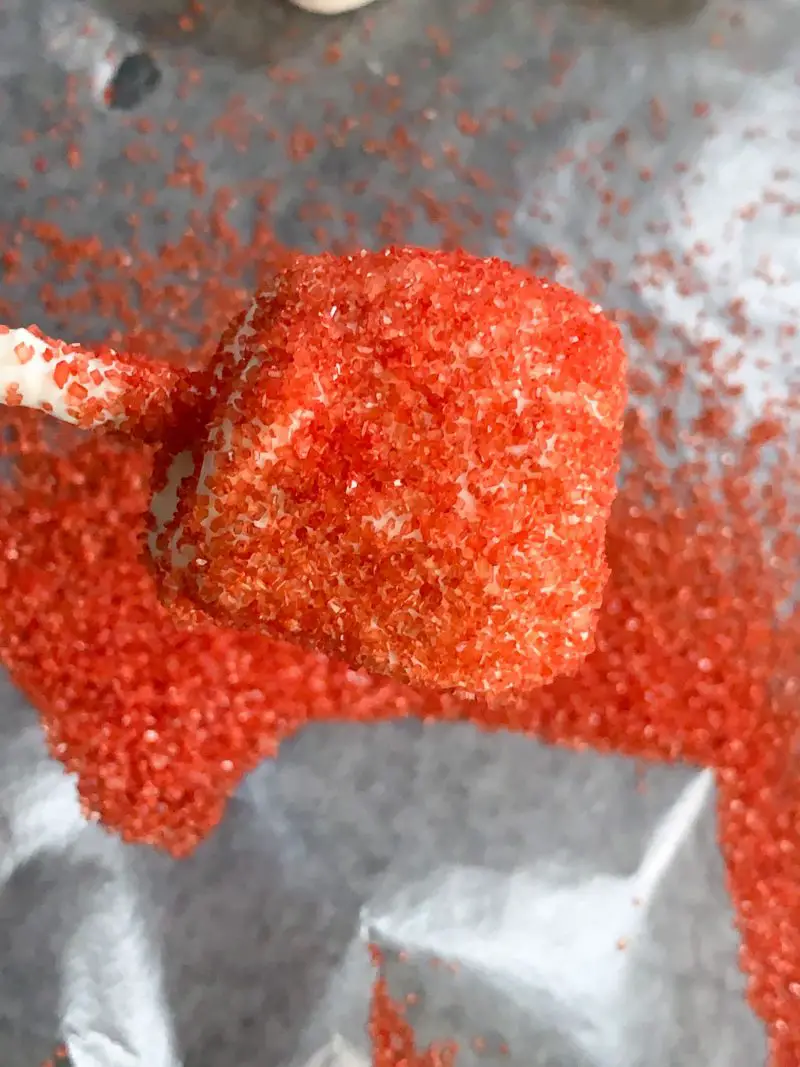
- Hold the chocolate covered marshmallow over a dish and sprinkle it with the red sugar crystals, again making sure to coat all sides.
- Place the marshmallow on top of the pretzel as close to center as possible*, but making sure that the front part of the pretzel is protruding just slightly. The pretzels are Santa's feet.
- Place two miniature chocolate chips in the center of the marshmallow to create buttons on Santa's shirt.
- Place a second marshmallow on a skewer and again dip it in the chocolate.
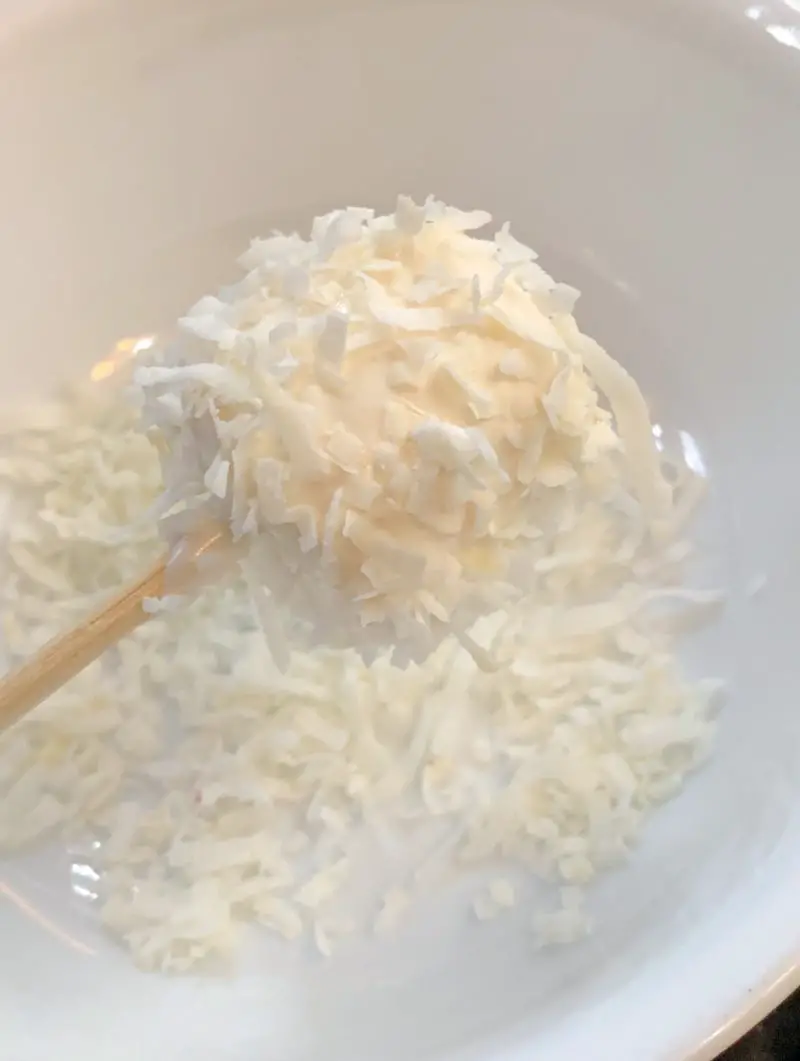
- Hold this over a second bowl and coat it with the coconut.
- Use a food grade paintbrush to brush a little bit of the pearl dust in the cheek areas.
- Now place the coconut covered marshmallow on top of the red sugar covered marshmallow. This is Santa's head.
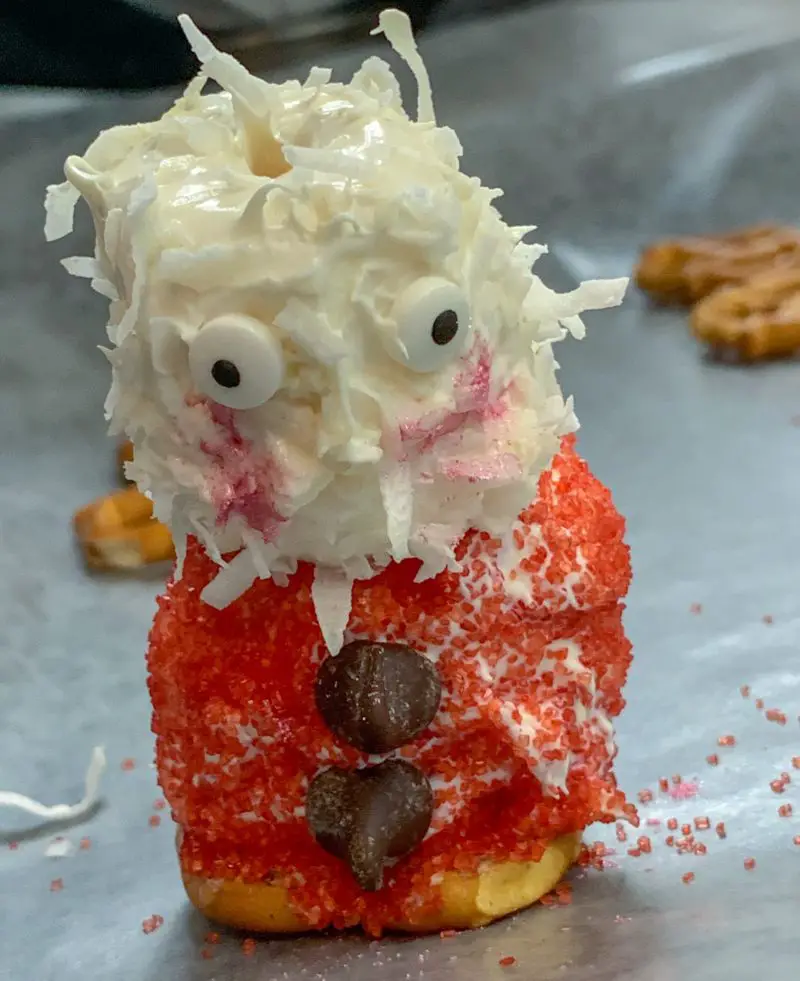
- Place the candy eyes on his face and place a red cinnamon candy on his face for his nose.
- Make two small slices in the red marshmallow on either side of the buttons for Santa's mittens. Insert one M & M candy into each hole.
- Place a gumdrop on Santa's back and once you know it is secure, refrigerate the Santa to allow the chocolate to fully harden.
- Repeat steps 3 through 13 for each of the remaining Santa's you are going to make. Microwave the candy for 10 seconds are at time to melt it as needed throughout the process or simply keep the double boiler on low so the chocolate remains melted.
- While the Santa's are in the refrigerator, dip the chocolate covered cherries in the melted chocolate one at a time and then roll them in the red sugar crystals to coat them.
- Dip a miniature chocolate marshmallow in just enough chocolate to coat the bottom, then dip the chocolate coated bottom into the red sugar crystals.
- Place the miniature marshmallow on top of the hat, red sugar crystal coated side down.
- Once the Santa's are all done and the chocolate is hardened, remove them from the refrigerator and use a little chocolate to attach the hats to the top of each Santa's head.
- Then pipe a little black icing from Santa's hand to the top of the gumdrop bag.
- Pipe some of the Wilton Sparkle Gel around the edge of Santa's hat and around the edge of his mittens.
- Place the Santa's back into the refrigerator to allow the hat to fully harden.
- Once the chocolate is completely hardened, they are ready to eat.
Notes
* If the marshmallows are not centered on the pretzel, they will fall over.
Find it online: https://experimentalhomesteader.com/marshmallow-candy-recipe/