How To Make Polymer Clay Christmas Ornaments
Have you ever wondered how to make polymer clay Christmas ornaments?

I started wondering the same thing and so the experiment began.
Along with the background story and tutorial below there are also links below to products I recommend from companies I have a referral relationship with. I will be compensated if you make a purchase after clicking on my links.
The Story Behind The Ornament
I decided to play with polymer clay to see if there was a way to make a polymer clay Christmas ornament for my tree.
I had the post all planned out - and was going to offer step-by-step instructions to teach you how to make a beautiful floral design Christmas ornament.
Then it happened.
The translucent clay was so hard that it refused to cooperate.
Design Saving Attempt
I used liquid clay to try to soften it.
I ground it up and soaked it in hot water.
I squished it together until my hands ached - but still it was not going to behave the way it needed to.
So - I went on to Plan B - after all, it is a well-known fact that I usually have a Plan A, a Plan B and a Plan C - you know, just in case.
Final Attempt
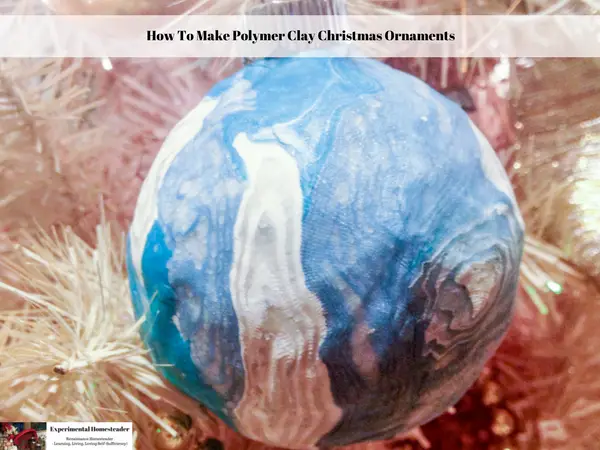
Plan B was to free hand the design.
I wasn't sure what I was going to come up with, but in the end it looks sort of like an odd globe.
There are shades of blue and shades of white - all combined in swirling patterns.
Maybe instead of a globe, I could refer to it as an undiscovered planet ornament.
Hmmm - what do you think?
By now, I'm sure you're wondering where this post might be going - and just how I managed to make the ornaments.
So, here is how I did it - and hopefully these directions will be clear enough that you can try to make some too.
Print Polymer Clay Christmas Ornaments
Ingredients
- 1 Blue Pearl Oven-Bake Clay
- 1 White Oven-Bake Clay
- 1 White Translucent Oven-Bake Clay
- 1 Blue Translucent Oven-Bake Clay
- 4 clear Christmas ornaments (with the metal top removed)
Instructions
- Set the clay conditioning machine to the number 2.
- Squish up one bar (remember there are 4 bars in each packet) of the blue pearl clay and run it through the clay conditioning machine.
- Set the conditioned clay aside on a non-stick surface.
- Run one bar of the white translucent clay through the clay conditioning machine.
- Lay the white translucent clay on top of the blue pearl clay, then run them through the clay conditioning machine together.
- Once they come out of the machine, roll the combined clays into a jelly roll.
- Slice both ends off to make sure they are flush, then set the jelly roll aside.
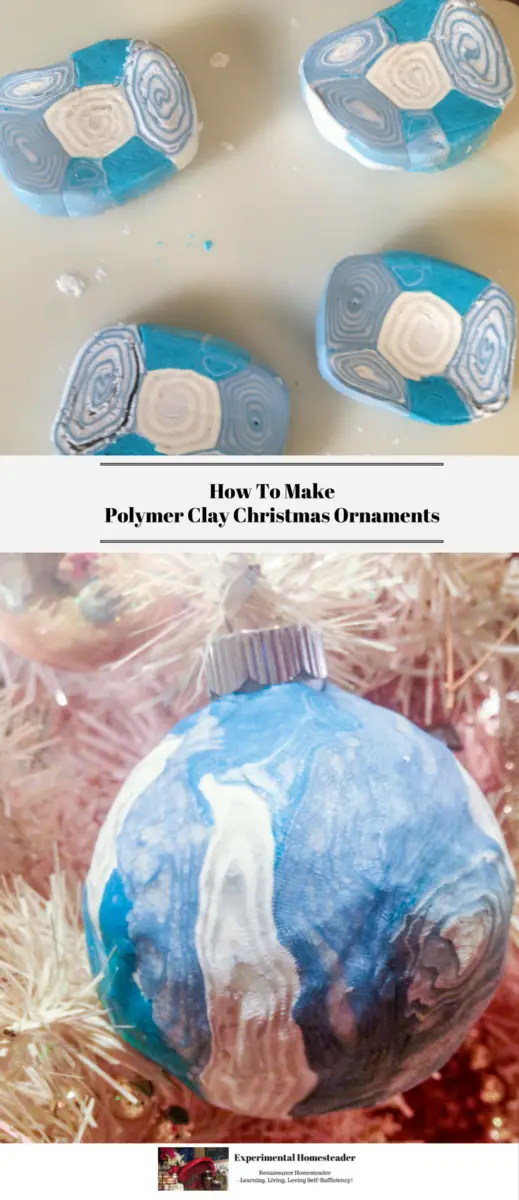
- Repeat steps 2 through 5 until you have a total of 6 jelly rolls.
- Here are the color combinations I used:
Jelly Roll 2 - white clay and translucent white clay
Jelly Roll 3 - blue pearl, white clay and the white translucent clay - be sure to put the blue clay in the center
Jelly Roll 4 - blue translucent clay and white translucent clay
Jelly Roll 5 - blue pearl clay and white clay
Jelly Roll 6 - I combined all the scraps of clay together to make this last jelly roll. - Once you have all six jelly rolls done, squish them together making sure to use the white jelly roll for the center.
- Press the combined jelly rolls against the non-stick mat, slolwy forcing the large round mass of clay jelly rolls into a square shape. Press one side against the mat, making sure to press the ends into a square shape too.
- Once you have a square of clay, cut the square into four equal pieces.
- Then re-cut each square into four more pieces.
- Run each piece through the clay conditioning machine to flatten them, then lay them onto a glass Christmas ornament making sure to press the clay against the side of the glass.
- Continue adding clay until the entire ornament is covered making sure to press the new clay into the old clay so the seams are invisiable.
- Line a disposable foil pan with aluminium foil
- Once you are finished covering the ornaments with clay, put them in the disposable foil pan.
- Put a foil tent over the top of the pan and bake the ornaments according to the manufacturer instructions on the oven-bake clay that you chose.
- When they are finished baking, leave them set in the pan until they cool, then remove them and hang them on your tree.
Notes
Note: A clay cutting knife and a clay conditioning machine is needed for this project.
I highly recommend the following articles:
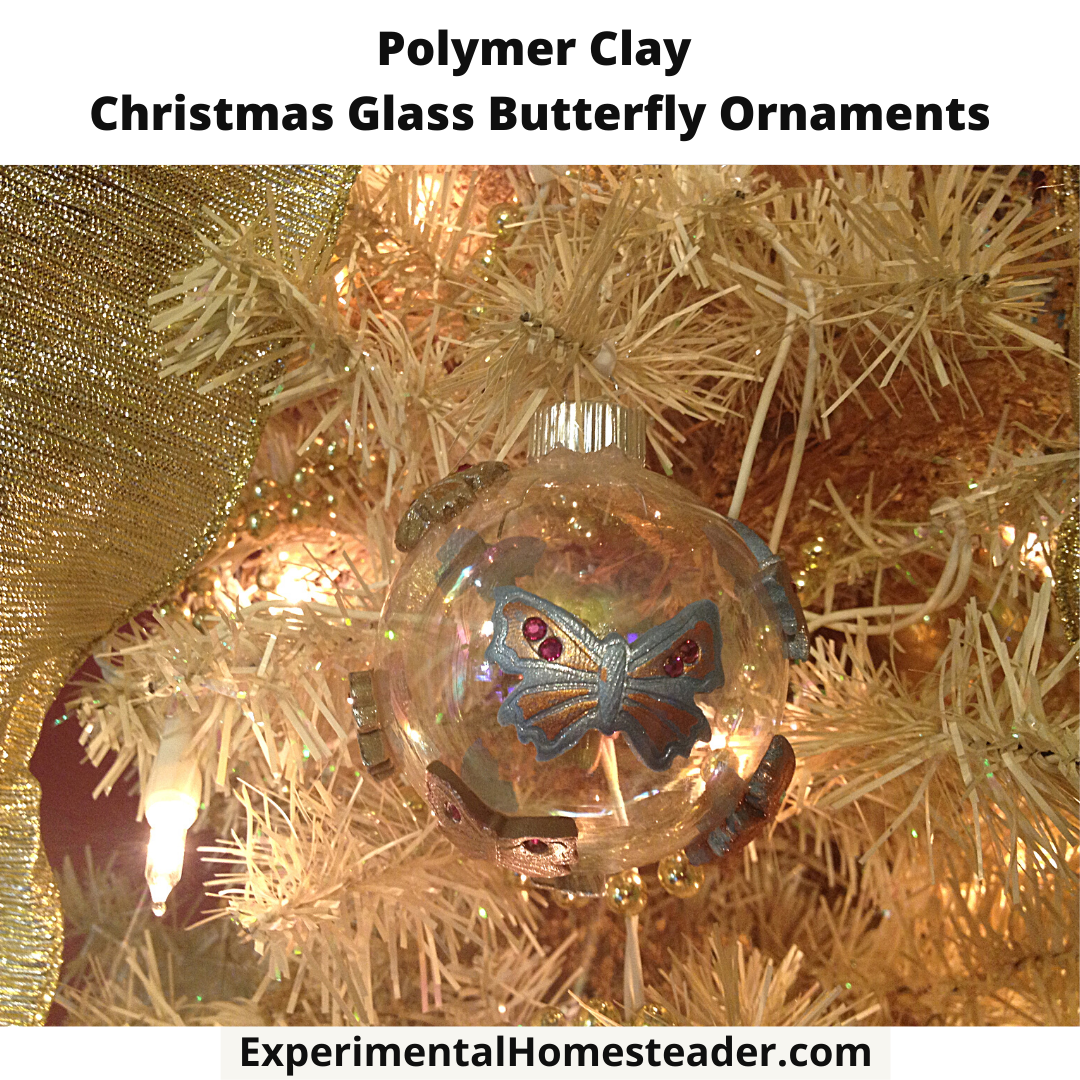
- Polymer Clay Christmas Glass Butterfly Ornaments
- DIY Feather Christmas Tree
- Artificial Christmas Tree Health Concerns
Use the buttons on the right side to share this article with friends or family who might find it useful. Pin the picture below to your pinboard on Pinterest for future reference.