Cast Iron Chicken Breast Recipe with Herbs | Oven Method
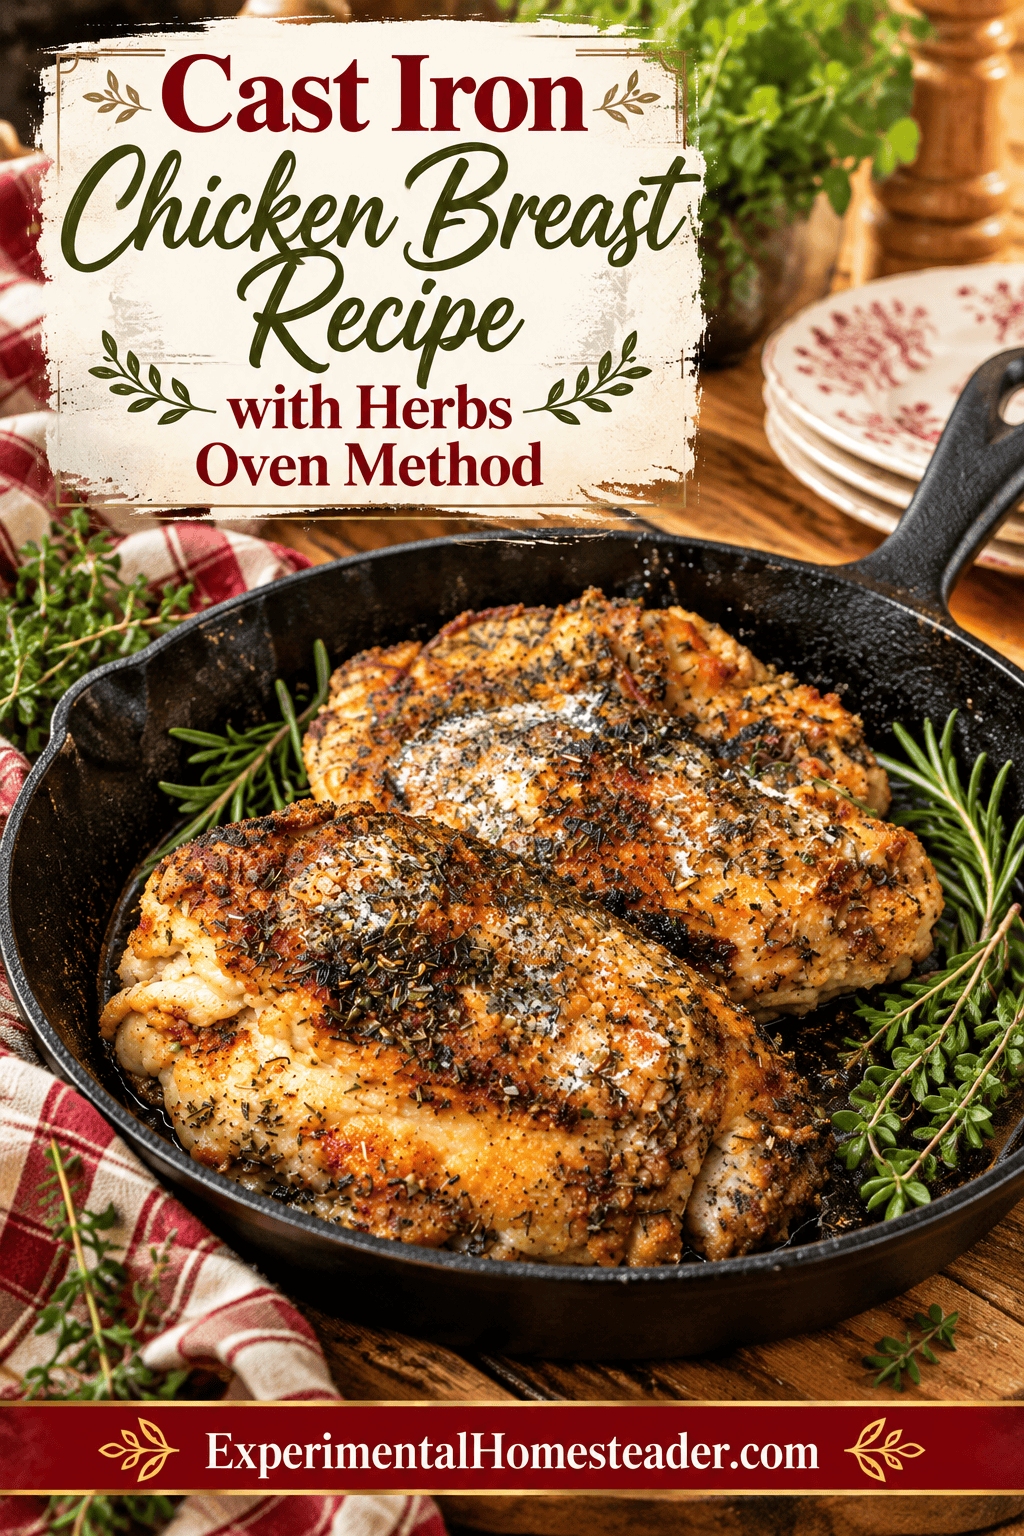
Black garlic and ginger warming in a cast iron skillet make the kitchen smell wonderful. This chicken breast recipe starts on the stovetop, where the chicken develops a golden-brown coating, then finishes covered in the oven with butter and fresh herbs. Rosemary, thyme, pineapple sage and smoked paprika give it a flavor that is anything but ordinary.
I especially like that the same pan goes from the burner to the oven, leaving me free to prepare the rest of supper. This recipe uses a light corn flour coating rather than a heavy breading, so the finished chicken is tender and flavorful instead of extra-crunchy. If you have fresh herbs growing, it's a lovely way to bring a little of the garden into supper.
In This Article
Why Finish Chicken Breasts in a Cast Iron Skillet?
Cast iron is useful for a recipe that begins with browning and ends with oven cooking. For more ideas using the same cookware, browse my cast iron skillet recipes. A properly heated skillet develops color on the chicken while the heavy pan retains heat when the lid goes on. You also keep the flavorful bits from the garlic, ginger and chicken in the same pan instead of transferring everything to a baking dish.
There is a difference between browning the outside and cooking the center. The five minutes per side in the original recipe is the browning stage, not proof that the chicken is fully cooked. The oven finishes the job. Because chicken breasts vary widely in thickness, a thermometer is much more reliable than time alone.
What Makes This Chicken Breast Recipe Different?
The flavor comes from layers rather than one seasoning blend. Black garlic brings a mellow, savory sweetness. Ginger adds a warm, slightly sharp note. Smoked Spanish paprika lends a subtle smoky quality, while French thyme and rosemary provide a familiar herbal backbone. Pineapple sage contributes a fragrant accent that makes this version especially interesting when the herb is available.
The coating uses actual corn flour: finely milled flour made from corn. It is not cornmeal, cornstarch, almond flour or wheat flour. The fine texture is important to the way the chicken is coated before browning. The ground corn flour coating is another distinguishing feature. It gives the surface something to brown in the oil before the covered oven stage. Use finely milled corn flour as specified in the original recipe. Cornmeal is more coarsely ground, while cornstarch is a different product made primarily from the starch portion of corn; neither is the same ingredient. They have different textures and can behave differently in a coating.
Choosing the Chicken
The recipe calls for two chicken breasts. Bone-in, skin-on and boneless, skinless pieces can differ significantly in size, thickness and cooking time. The original instructions mention browning the skin, so that wording is most relevant when using skin-on chicken. Whatever cut you choose, cook the thickest part to a measured internal temperature of 165°F (74°C). Avoid touching bone with the thermometer probe.
For even cooking, choose pieces of roughly similar size. If one breast is substantially thicker than the other, start checking both separately near the end of cooking. The smaller one may be ready first.
Fresh Herbs and Practical Substitutions
Fresh rosemary and pineapple sage add aroma as the chicken cooks. If you grow herbs, this is a good way to use a small harvest in a substantial dinner. Pineapple sage is less common in grocery stores, so don't let its absence stop you from making dinner. You can omit it and let the thyme and rosemary carry the herbal flavor, although the result will not taste exactly the same.
Black garlic is not the same as raw garlic. Its soft texture and sweet-savory flavor are distinctive. Ordinary garlic can be used for a different variation, but it is more pungent and can brown quickly in hot oil. Watch the pan carefully while cooking the aromatics.
Before You Start: Skillet, Lid and Oven
Choose an oven-safe cast iron skillet large enough to hold the chicken without crowding. A fitted oven-safe lid is important because this recipe finishes covered. Check that the lid's handle and any accessories are rated for the oven temperature. A wooden or otherwise non-oven-safe handle is not suitable.
Set out the herbs, butter, flour and seasonings before heating the skillet. Patting the chicken dry before coating can help the flour cling more evenly. Use separate utensils and surfaces for raw chicken, and wash your hands after handling it. Do not rinse raw poultry, which can spread bacteria around the sink.
The original method places the covered skillet in the oven and then turns the oven to 400°F. That is a cold-oven start, so the stated baking time is tied to that approach. If you preheat the oven instead, the timing may change. Cast iron is generally designed for oven use, but extreme thermal shock and manufacturer limitations should still be avoided. Follow the care instructions for your particular pan rather than assuming every skillet or lid behaves identically.
How to Get Better Results
Brown the Chicken Without Burning the Aromatics
Start with medium heat as the original recipe directs, but adjust if the garlic or ginger begins to darken too quickly. The goal is to build flavor, not scorch the aromatics. Add the flour-coated chicken carefully using tongs, keeping your hands away from splattering oil. Give the chicken room to brown rather than packing the skillet tightly.
Use the Baking Time as a Guide, Not a Guarantee
The original recipe calls for browning about five minutes per side, then baking covered for 50 minutes after turning the oven to 400°F. That describes how the recipe was written, but the actual cooking time depends on breast size, whether the pieces have bones, the skillet and the oven. Check for 165°F in the thickest part before serving. If the chicken is below that temperature, return it to the oven and check again.
Keep the Coating and Juices in Mind
Covered cooking traps moisture, which is helpful for keeping the chicken from drying out but does not produce the same crisp crust as uncovered frying. Expect a flavorful, browned coating rather than an extra-crunchy fried-chicken finish. If the skillet seems unusually dry during cooking, pay attention to the pan and avoid allowing the garlic or flour to scorch.
The printable recipe below has the ingredient amounts and complete cooking instructions.
Print
Cast Iron Chicken Breast Recipe with Herbs | Oven Method
Chicken breasts browned in cast iron with black garlic and ginger, then finished covered in the oven with butter, rosemary, thyme, pineapple sage and smoked paprika.
- Total Time: 1 hour 5 minutes
- Yield: 2 servings 1x
Ingredients
- 2 chicken breasts
- ½ cup Ground Corn Flour
- 6 Tablespoons Olive Oil
- 2 Tablespoons butter
- 2 Teaspoons crushed ginger
- 3 cloves Black Garlic
- 8 Pineapple Sage leaves
- 1 Tablespoon Herbs de Providence
- 1 teaspoon French Thyme
- ½ teaspoon freshly ground black pepper
- ½ teaspoon Smoked Spanish Paprika
- 4 sprigs fresh rosemary
Instructions
- Add the olive oil, the black garlic cloves and the crushed ginger to the cast iron skillet.
- Turn the burner to medium heat.
- Using a spatula, stir to lightly toast and combine the three ingredients.
- Place the ground corn flour in a sealable plastic bag.
- Place one chicken breast at a time in the plastic bag with the corn flour and shake until well coated.
- Carefully put the corn flour coated chicken breast in the cast iron skillet. It is best to use tongs to sit the chicken breast in the hot oil. Remember the oil is hot and might splash you when you put the chicken breast in the skillet so use caution.
- Cook for 5 minutes per side - just long enough to lightly brown the skin of the chicken.
- Sprinkle the remaining spices on the chicken, cut up and dot with butter and then lay fresh rosemary on top.
- Put the lid on the skillet.
- Place it in the oven and then turn the oven on to 400 degrees Fahrenheit.*
- Bake covered for approximately 50 minutes using the cold-oven start described above. I did not turn mine or remove the lid during this time. Check the thickest part of each breast with a food thermometer and continue cooking if needed until the chicken reaches 165°F (74°C).
- Remove the skillet from the oven using oven mitts. Check that the chicken has reached 165°F (74°C) in its thickest part before serving.
Equipment
 Buy Now →
Notes
The original recipe uses a cold-oven start. Place the covered, oven-safe cast iron skillet in the oven, then set it to 400°F. Timing varies with the size and type of chicken breast, the pan and the oven. Use a food thermometer and cook chicken to 165°F (74°C). Follow the manufacturer's guidance for your skillet and lid. Avoid extreme thermal shock, and make sure the lid handle is oven-safe.


Eight Experimental Homesteader recipes, conveniently collected in one downloadable cookbook. Choose how you'd like to get your copy.
The recipes are also available individually on Experimental Homesteader. This PDF brings them together for easy reference.
What to Serve with Cast Iron Chicken Breasts
Because the chicken has such a fragrant mixture of herbs and seasonings, I like the idea of serving it with a simple side that doesn't compete with those flavors. Potatoes are a natural fit, especially if you want the kind of hearty meal that makes cast-iron cooking so appealing. My Easy Dutch Oven Potatoes Recipe is one option. Steamed green beans, roasted carrots or a straightforward green salad would also balance the plate.
If you are cooking for company, bring the skillet to the table only if you have a safe heatproof trivet and plenty of space. Cast iron stays hot long after it leaves the oven. For everyday meals, transferring the chicken to a serving platter may be easier and safer.
Potatoes That Belong Beside a Cast Iron Skillet
Potatoes are an easy companion because they are mild enough to let the herbs in the chicken stand out. A baked potato, mashed potatoes or oven-roasted potatoes can all work. If you want another substantial homestyle dish, try my Easy Dutch Oven Potatoes Recipe. The combination makes sense for a meal built around dependable cookware and straightforward ingredients.
Timing is worth considering. The chicken occupies the oven while it finishes cooking, and the original method starts in a cold oven. A side that requires a different oven temperature may be awkward to prepare at exactly the same time. Potatoes that can be cooked ahead and kept warm, or made on the stovetop, make dinner easier. If you do roast vegetables or potatoes in the oven, plan their timing around the chicken rather than assuming everything will finish together.
Vegetables to Balance the Herbs and Butter
Green beans are a natural choice, especially when they are fresh and need little more than careful cooking and a bit of seasoning. I have a separate guide to preparing fresh green beans if you are working with a harvest or a bag from the market. Carrots, broccoli, asparagus or a green salad can also work. Choose the vegetable you actually have and prepare it in a way that keeps its flavor clear rather than burying it under another heavy sauce.
And Something Sweet Afterward
There is no reason a simple skillet supper cannot end with dessert. After a meal centered on garlic, herbs and chicken, I would lean toward something fruit-forward or lightly sweet rather than another particularly heavy course. Fresh berries, baked apples or a modest homemade dessert make a pleasant finish. For a more unusual fruit idea, my balsamic strawberries with black pepper offer a sweet-tart contrast that can make an everyday meal feel special.
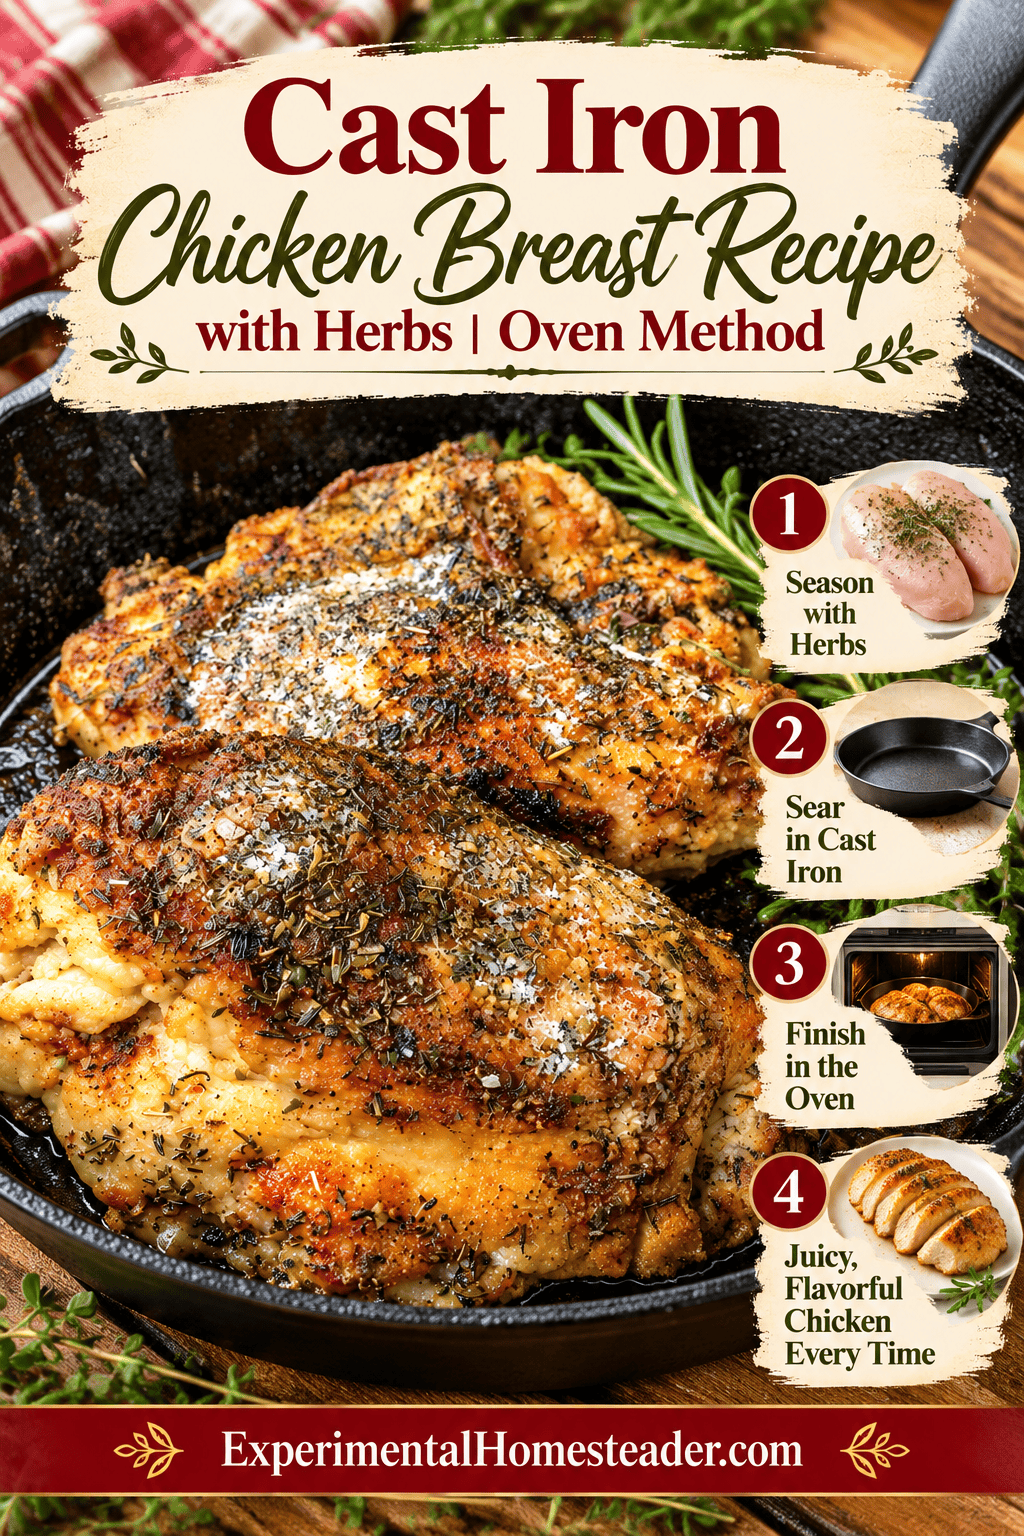
Save the step-by-step image below to Pinterest so you can find this cast iron chicken breast recipe again when you're planning supper.
Common Questions About Oven Chicken in Cast Iron
Can I use boneless chicken breasts?
Yes, but boneless breasts can cook faster than large bone-in pieces. The original recipe mentions browning the skin, so some instructions may need adapting for skinless chicken. Begin checking doneness sooner and use a thermometer rather than relying only on the original 50-minute baking time.
Do I have to use a lid?
The original recipe is a covered oven method. Leaving the lid off changes moisture retention and browning, so it becomes a variation rather than the same recipe. If your skillet has no oven-safe lid, use a suitable oven-safe cover according to its manufacturer's instructions, and monitor the results carefully.
Can I use a different flour for the coating?
Different flours absorb moisture and brown differently. The recipe specifies actual corn flour, finely milled from corn. It is not cornmeal, cornstarch or almond flour. A substitution may work, but expect changes in texture and watch the coating closely during browning.
How do I know when the chicken is done?
Insert a food thermometer into the thickest part of each chicken breast. Chicken is safely cooked when it reaches 165°F (74°C). Color, juices and the length of time in the oven are not dependable substitutes for a temperature reading.
How should I store leftovers?
Refrigerate cooked chicken promptly in shallow, covered containers within two hours of cooking, or within one hour if the surrounding temperature is above 90°F. Use refrigerated leftovers within three to four days, or freeze them for longer storage. Reheat leftovers to 165°F.
More Cast Iron Cooking and Chicken Recipes
If you enjoy using the same pan for stovetop and oven cooking, there are plenty of ways to build on this technique. My fried chicken cast iron skillet recipe uses the pan in a different way, while the cast iron steak recipe offers another hearty main dish. You can also explore how to cook in cast iron pans and the benefits of cast iron cooking if you are still getting comfortable with your cookware.
For more supper ideas, browse my collection of chicken recipes.
- Fried Chicken Cast Iron Skillet Recipe
- Cast Iron Steak Recipe
- Easy Dutch Oven Potatoes Recipe
- How To Cook In Cast Iron Pans
- Benefits Of Using Cast Iron For Cooking
- The Ultimate Collection Of Best Ever Chicken Recipes