How To Make Awesome Lego Candy With Silicone Molds!

Disclaimer: I received this product for free or at a reduced price in exchange for my honest, unbiased review. All opinions are my own.
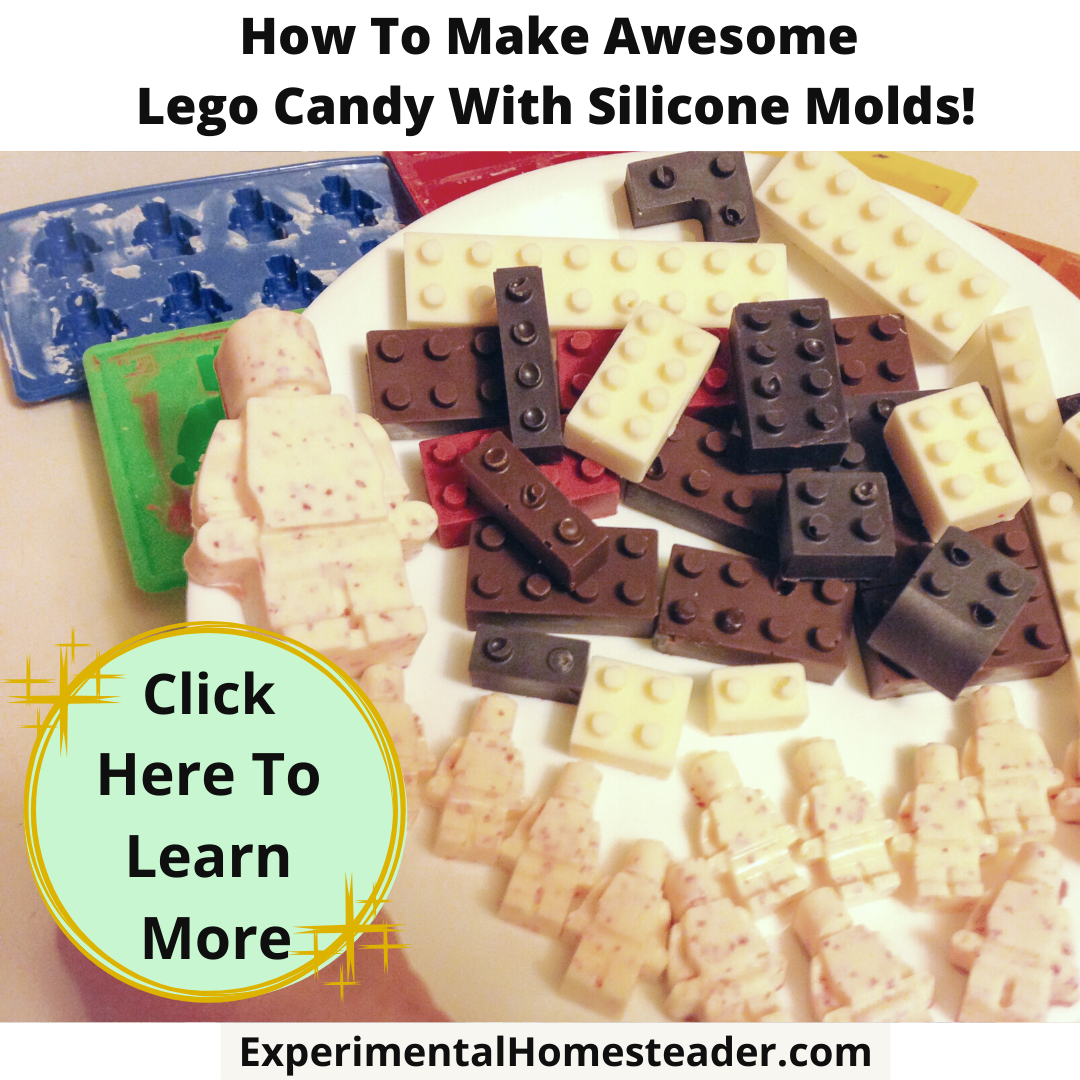
I love molding chocolate and when I saw these Lego Silicone Molds I knew I had to have them. Lets face it little kids - and big ones - alike love Legos. They are classic - and what better way for the whole family to enjoy them than to make ones that are edible?
These were the first silicone molds I had ever tried and I have to say I am impressed. They were so easy to unmold - and clean. The chocolate Legos came out perfectly - well almost perfectly. I didn't get some of the bubbles out of the chocolate so there was a few spots where they were not fully molded but that was my fault. So now let me tell you how easy this was.
The first step was to wash the molds then make sure they were good and dry. I suggest letting them air dry overnight. Believe me it's a lot easier to let them dry naturally than to try to get in those tiny areas of the mold to manually dry them. Next, melt your chocolate. I used Wilton Candy Melts. They melt easily and taste great plus they come in some really cool colors. You can even get flavored ones. Just pour them in a double boiler and let them melt. I stir mine from time to time and if they are real thick I add a little bit of vegetable oil to thin them down. Just be sure to stir it in real good.
While you are melting the chocolate, lay out the silicone molds. Once the chocolate is melted, spoon it into the molds, then gently bounce the molds on a solid surface to help remove the bubbles that might be in the chocolate. Do this several times before the chocolate begins to cool. You might even want to fill the molds part way, bounce them a little bit and then finish filling them before repeating the process of bouncing the molds. Just don't do it hard enough that the chocolate bounces out of them.
Once the molds are filled with chocolate and you are happy that you have removed as many bubbles as possible, set the molds on a plate or cookie sheet and put them in the freezer for 15 minutes. You do not need to cover them. Be sure to remove them after the 15 minutes is up and unmold the chocolate immediately. It really is that easy.
So what did I think of the Lego silicone molds? I loved them. I could use them for chocolate, ice cubes, jello, candy, fondant, gum paste and many other foods. For crafting I could use them for crayons, candles, soap, clay jewelry and more! They come 5 to a set and are made of 100% pure food grade silicone. They are BPA free and non-toxic. They are easy to clean thanks to the flexible molds, safe up to 450 degrees Fahrenheit and safe to use in the freezer, refrigerator, dishwasher, oven or microwave. Plus they have the seal of approval from the FDA, SGS & LFGB.
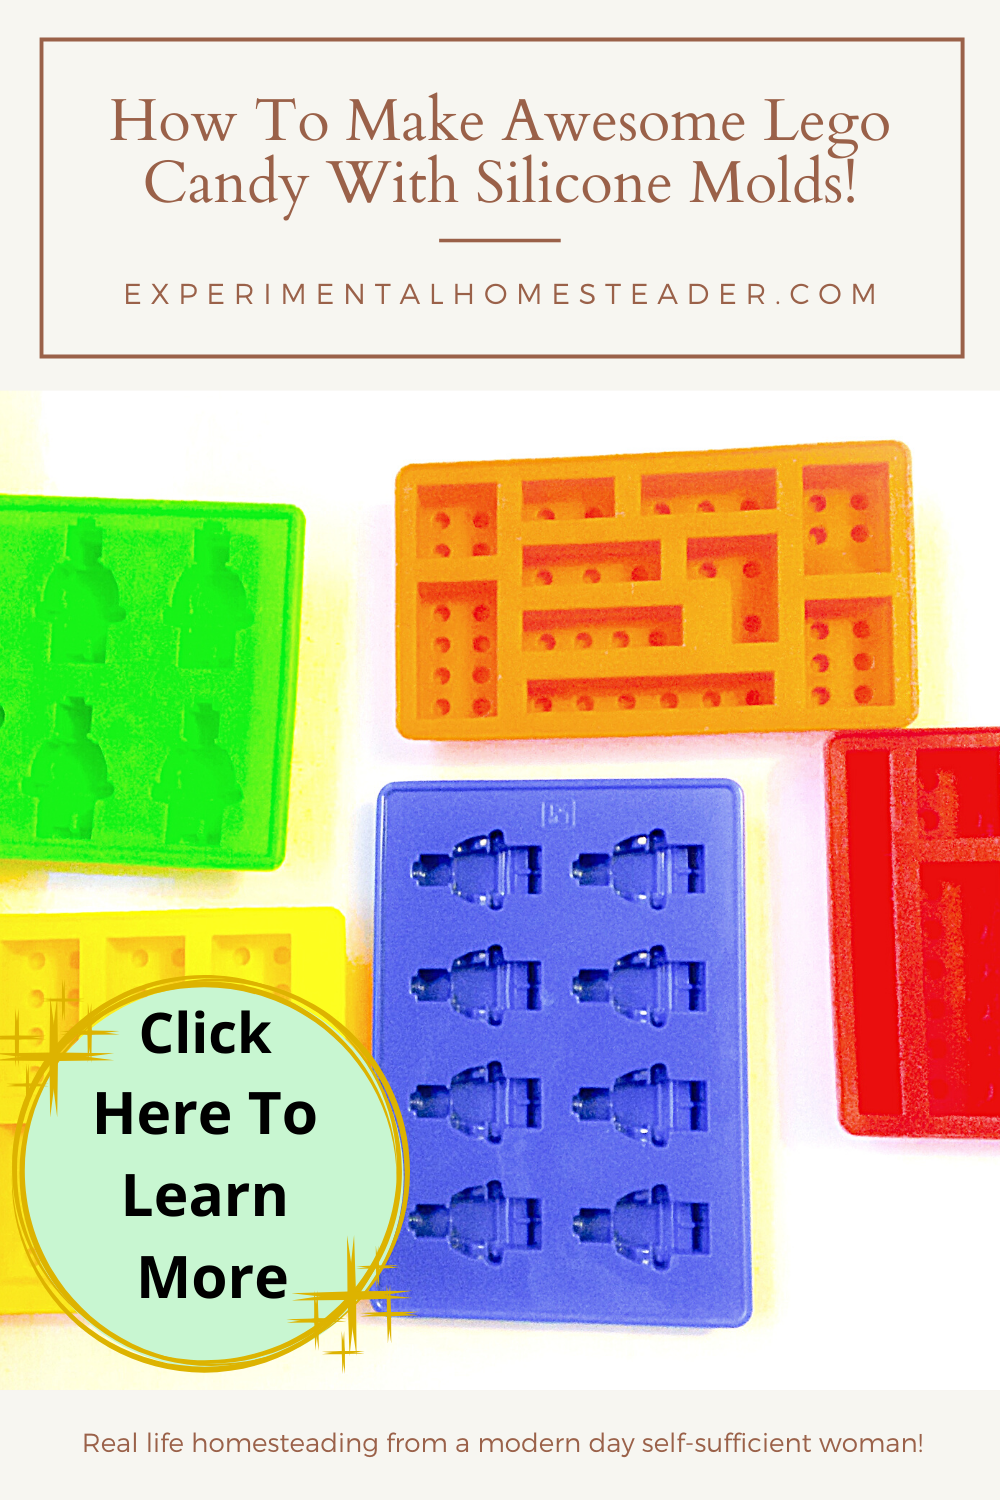
- A YELLOW color tray that makes 10 Lego or Duplo styled bricks (each measuring 2.5 x 5 x 1.5 cm).
- A BLUE color tray that makes 8 small Lego men (each measuring 4cm in height).
- A GREEN color tray that makes 1 big Lego man (9cm in height) and 4 small Lego men (each measuring 4.5cm in height).
- A RED color tray that makes 7 Lego or Duplo styled bricks (assorted sizes).
- An ORANGE color tray that makes 10 Lego or Duplo styled bricks (assorted sizes).