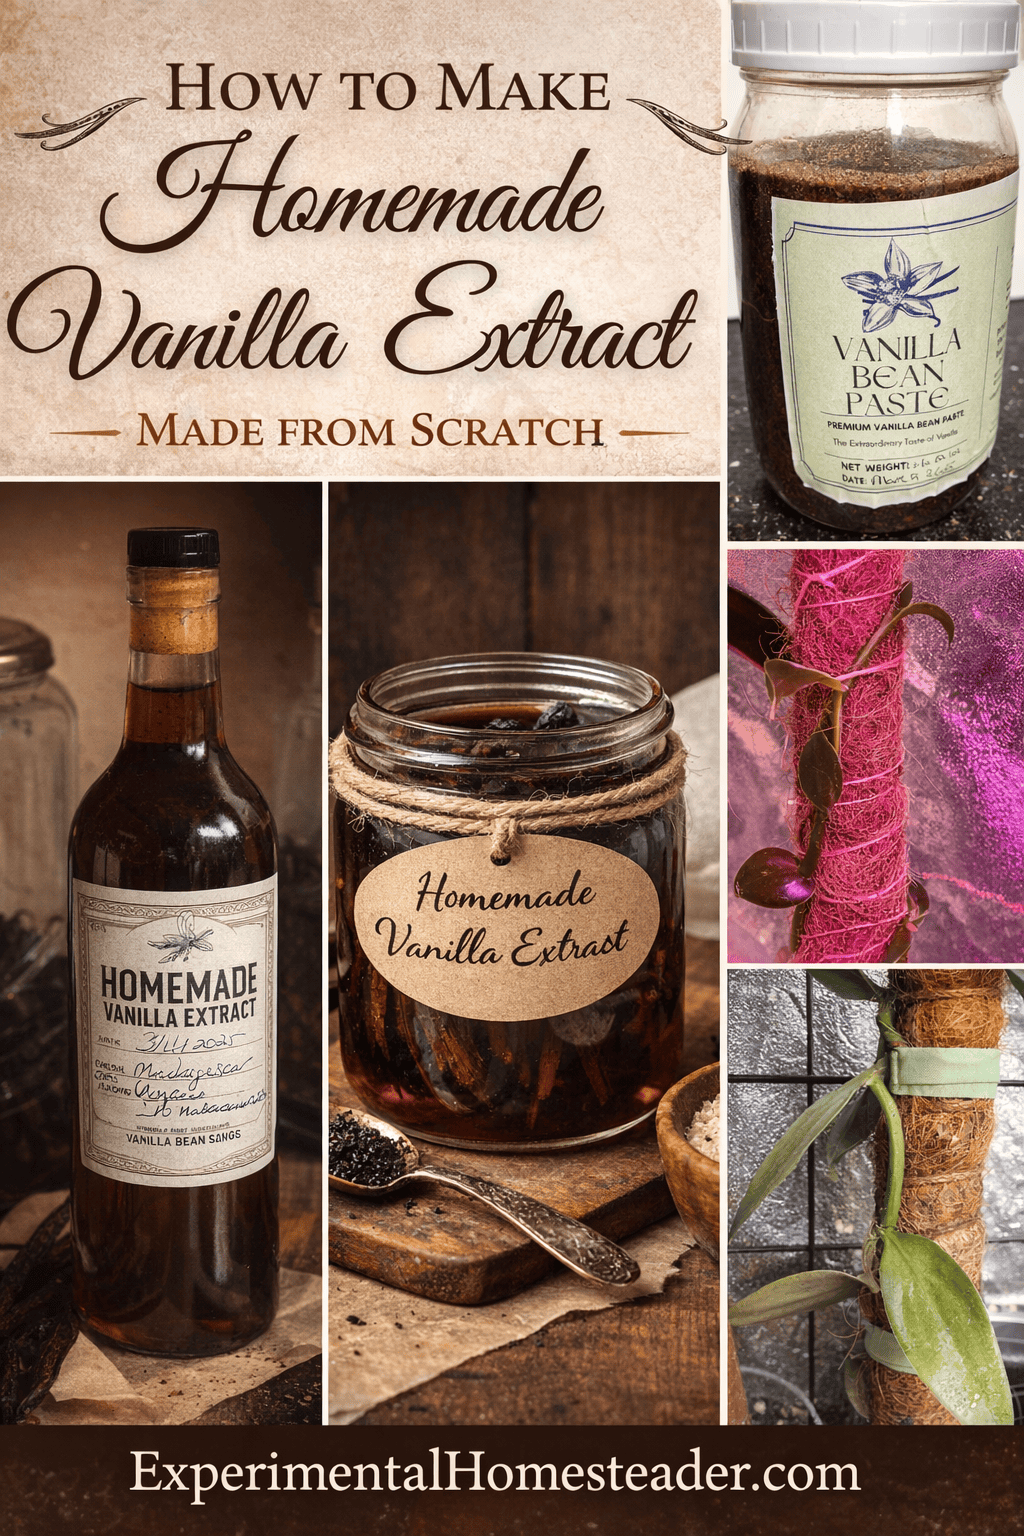
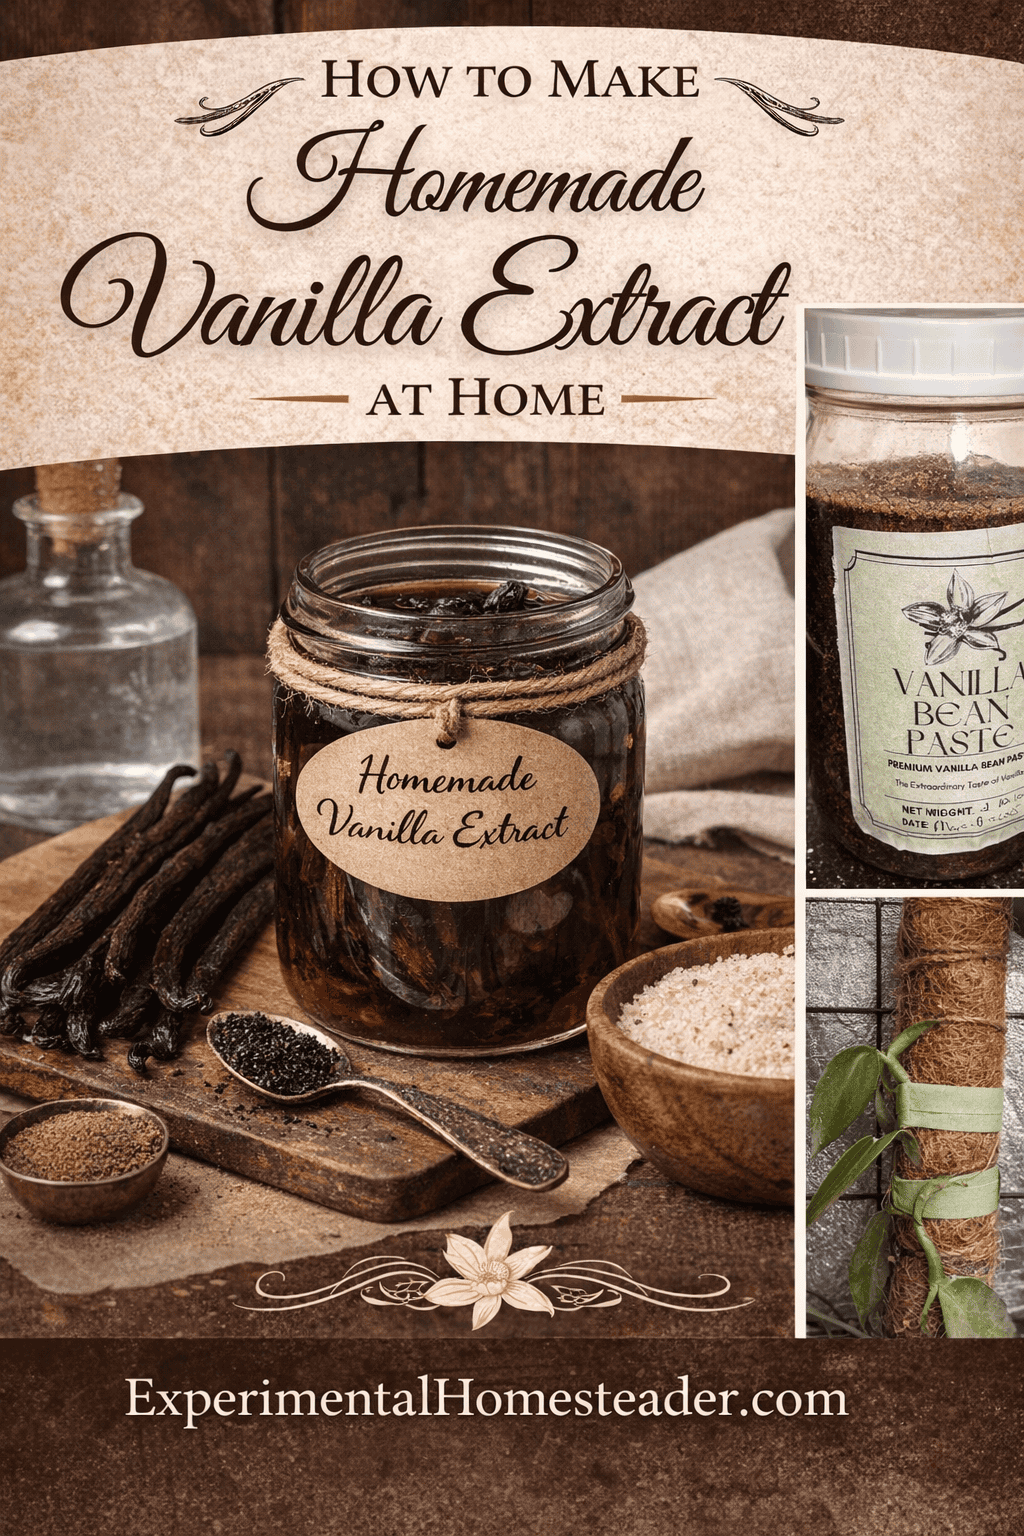
How To Make Homemade Vanilla ExtractHow to Make Homemade Vanilla Extract (The Homesteader Way)
Homemade vanilla extract is one of those simple, old-fashioned pantry staples that feels almost magical once you start making it yourself. It's rich, fragrant, deeply flavorful - and once you've used homemade vanilla extract in your baking, it's very hard to go back to the store-bought version.

For me, vanilla extract isn't just another ingredient. When I'm baking from scratch - whether it's my M&M Cookie Recipe or a simple batch of muffins - I want the very best ingredients I can reasonably make or source myself. Vanilla plays a bigger role in flavor than most people realize, and cutting corners there almost always shows up in the final result.
Most store-bought vanilla extract simply cannot hold a candle to homemade vanilla extract. And if you've ever tried the real thing, you already know exactly what I mean.
This is one of those homesteading skills that feels both practical and indulgent at the same time. It saves money in the long run, improves your baking, and gives you something beautiful and useful sitting on your pantry shelf - all with very little effort.
Why Homemade Vanilla Extract Is Better Than Store-Bought
If you've ever glanced at the label on a bottle of vanilla extract at the grocery store, you may have noticed something surprising: a lot of what's sold as "vanilla" isn't really vanilla at all.
Many commercial products are made with imitation vanilla flavoring, which is often derived from synthetic compounds rather than real vanilla beans. While imitation vanilla can be inexpensive, it lacks the depth, warmth, and complexity that true vanilla extract provides.
Homemade vanilla extract, on the other hand, is exactly what it sounds like:
-
Real vanilla beans
-
Real alcohol
-
Time
That's it.
When you make your own, you control the quality of the ingredients, the strength of the extract, and even the flavor profile depending on the alcohol you choose. Over time, the alcohol slowly pulls the flavor compounds from the beans, creating a rich, dark extract that enhances everything from cookies and cakes to homemade ice cream, coffee, and even savory dishes.
A Homesteader’s Perspective on Vanilla Extract
From a homesteading standpoint, homemade vanilla extract just makes sense.
It's:
-
Shelf-stable
-
Easy to make
-
A long-term pantry investment
-
Perfect for gifting
-
Ideal for baking from scratch
This is also one of those skills that connects us to how things were done generations ago. Vanilla extract wasn't always something you grabbed off a store shelf - it was something you made, tucked away, and patiently waited for.
And honestly? There's something deeply satisfying about reaching for a jar of vanilla extract you started months - or even years - ago and knowing it's still getting better with time.
What You Need to Make Homemade Vanilla Extract
Before we get into the step-by-step process, let's talk ingredients and equipment. The beauty of homemade vanilla extract is how simple it really is - and how many options you have to customize your own vanilla extract instead of simply relying on what's on a store shelf.
Vanilla Beans
When choosing vanilla beans, you want plump, flexible vanilla beans, not dry or brittle ones. Beans with good moisture content contain more of the natural oils and compounds that give vanilla its rich, complex flavor - exactly what you want when making homemade vanilla extract.
If a vanilla bean bends easily without snapping and feels slightly oily to the touch, that's a good sign. Dry, cracked beans can still be used, but they tend to produce a weaker extract and won't last as long through multiple refills.
If you grow Vanilla planifolia yourself, making homemade vanilla extract is one of the best ways to preserve and use your harvest long-term. And if you don't grow your own, don't worry - high-quality vanilla beans are readily available to purchase and work beautifully for extract-making.
What many people don't realize is that not all vanilla beans are the same. Different growing regions and species produce beans with noticeably different flavor profiles.
Common Vanilla Bean Varieties
Madagascar (Bourbon) Vanilla Beans
These are the most widely used vanilla beans and what most people think of as "classic" vanilla flavor.
-
Rich, creamy, and sweet
-
Strong, traditional vanilla aroma
-
Excellent all-purpose choice
Madagascar vanilla beans are ideal if you want a dependable, versatile homemade vanilla extract that works well in nearly every recipe.
Mexican Vanilla Beans
Mexican vanilla beans are considered by many to be the original vanilla and have a slightly different character.
-
Warm, bold flavor
-
Subtle spice and wood notes
-
Slightly less sweet than Madagascar beans
These beans are especially nice for chocolate desserts, baked goods, and recipes where vanilla plays a supporting but noticeable role.
Tahitian Vanilla Beans
Tahitian vanilla beans are quite different from the others and are often used for specialty applications.
-
Floral and fruity aroma
-
Notes of cherry or anise
-
Milder vanilla flavor overall
While Tahitian beans are wonderful for custards, ice cream, and no-bake desserts, they produce a lighter extract. Some homesteaders prefer to blend Tahitian beans with Madagascar beans when making vanilla extract.
Homegrown Vanilla (Vanilla planifolia)
If you're growing vanilla yourself, your beans will likely fall under Vanilla planifolia, the same species used for Madagascar and Mexican vanilla.
-
Flavor varies based on growing conditions and curing
-
Often deeply aromatic after proper curing
-
Ideal for extract, paste, sugar, and infused products
Homegrown beans may not look uniform, but their flavor can be exceptional, especially when cured carefully and given time to mature.
Choosing the Right Vanilla Beans for Extract
For most homesteaders, Madagascar or homegrown Vanilla planifolia beans are the easiest and most reliable choice for homemade vanilla extract. They create a rich, balanced extract that improves with age and stands up well to repeated refilling.
If you enjoy experimenting, you can:
-
Blend different varieties in one jar
-
Keep separate jars labeled by bean type
-
Match bean varieties to specific baking styles
If you enjoy understanding why certain vanilla beans pair better with certain spirits - or you like experimenting beyond basic vanilla - this is one of the books I reach for again and again. The Art of Extract Making goes far beyond "put beans in alcohol and waiting." It helped me think more intentionally about flavor, sweetness, and how different spirits bring out different notes in vanilla and other ingredients. I especially appreciate how approachable it is, even when it dives into more creative combinations
I also appreciate that Paul and Jill Fulton don't just write about extracts - they actively support people making them. The Making Vanilla Extract by VanillaPura private Facebook group is a great place to see what others are experimenting with, ask questions, and learn from real-world experience, and they source and sell a wide variety of vanilla beans as well. That combination of shared knowledge and quality ingredients makes it easier to experiment with confidence.
No matter which variety you choose, the most important factors remain the same: quality beans, sufficient alcohol, and patience. With those in place, homemade vanilla extract becomes one of the most rewarding staples in a from-scratch kitchen.
Alcohol Choices for Homemade Vanilla Extract
Vodka is the most commonly used alcohol for homemade vanilla extract because it has a neutral flavor that allows the vanilla to shine. When you're making extract, the alcohol's job is to pull flavor compounds from the vanilla beans, not compete with them.
For best results, you'll want:
-
Alcohol that is 80 proof or higher
-
A good-quality option that is clean and smooth
(It does not need to be expensive - mid-range works perfectly.)
The reason proof matters is simple: alcohol below 80 proof does not extract flavor as effectively and can result in a weak or inconsistent vanilla extract over time. Higher-proof alcohol ensures proper preservation and full flavor extraction during the long curing process.
Using Vodka for Vanilla Extract
Vodka is ideal if you want a classic, all-purpose vanilla extract. Because it has very little flavor of its own, it allows the natural complexity of the vanilla beans to come through clearly. This makes vodka-based vanilla extract especially versatile for:
If you want one jar of vanilla extract that works for just about everything, vodka is usually the best place to start.
Using Bourbon (or Other Spirits)
You can also substitute bourbon for vodka, which adds a warmer, slightly caramel-like note to the extract. This depth can be especially lovely in fall and winter baking and pairs beautifully with:
-
Chocolate
-
Spices like cinnamon and nutmeg
-
Brown sugar-based recipes
In fact, any alcohol that is over 80 proof can be used to make homemade vanilla extract. This opens the door to experimenting with flavor profiles that suit your baking style and personal taste.
Some homesteaders enjoy using:
-
Rum for a sweeter, richer undertone
-
Brandy for a fruit-forward warmth
-
Whiskey for a deeper, more robust flavor
The key is choosing an alcohol you wouldn't mind tasting on its own. If you enjoy the flavor in a glass, chances are you'll enjoy what it brings to your vanilla extract as well.
A Note on Experimenting
If you like to experiment in the kitchen, there's no reason you can't keep multiple small jars going at once - each with a different alcohol. Over time, you'll discover which version you reach for most often and which pairs best with your favorite recipes.
No matter which alcohol you choose, the process remains the same: real vanilla beans, 80 proof alcohol, and plenty of time. The result is a homemade vanilla extract that's richer, more flavorful, and far more satisfying than anything you'll find on a store shelf.
Glass Jar
Choose a glass jar with a tight-fitting lid. A jar about the size of a pint - but slightly taller and thinner - is ideal so the beans can remain mostly intact without excessive cutting. There are jars specifically designed for making vanilla extract
How to Make Homemade Vanilla Extract
Below is the exact method I use for making homemade vanilla extract. This is a slow process, but it's incredibly easy and well worth the wait.
Print
How To Make Homemade Vanilla Extract
Learn how to make your own homemade vanilla extract. This is perfect to add to all those vanilla recipes you are making from scratch in your kitchen.
- Total Time: 10 minutes
- Yield: 8 ounces 1x
Ingredients
- 3 vanilla beans
- Vodka (or other alcohol), 80 proof or higher
Instructions
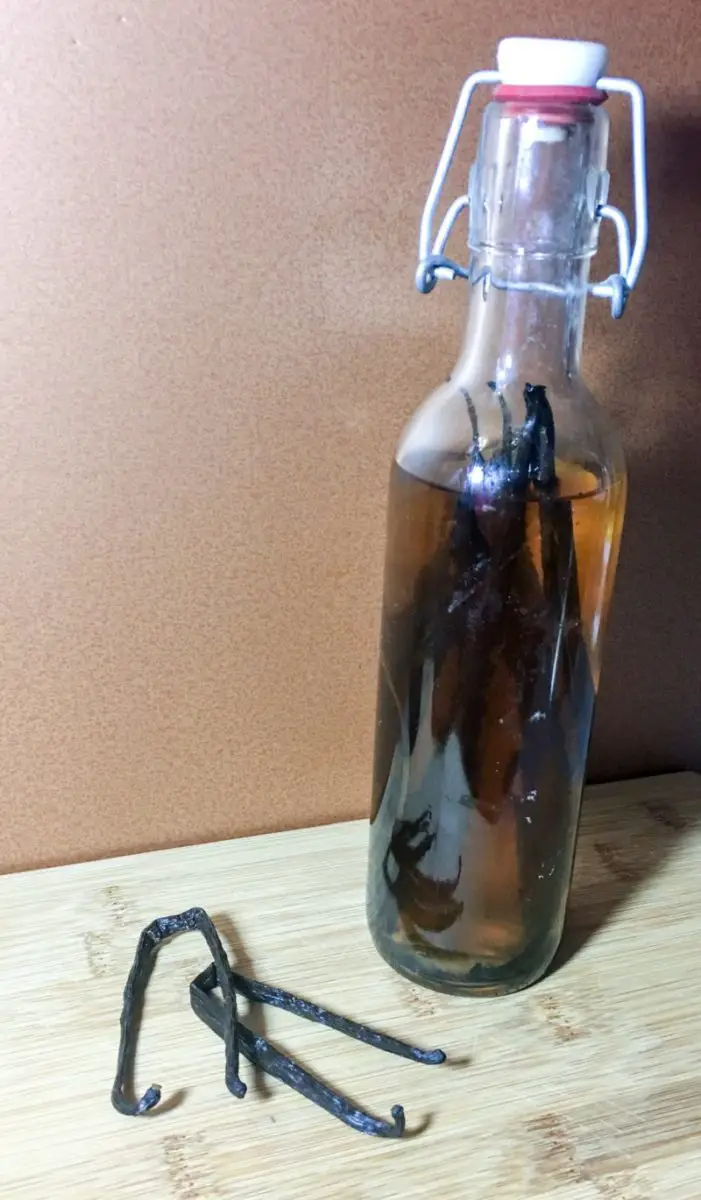
- Begin by choosing three plump vanilla beans, split them in half and put them in a sealable jar large enough to allow the beans to be covered completely in liquid. A jar about the size of a pint, but a little taller and thinner, unless you want to cut the beans down in size, will work.
- Once the beans are cut in half lengthways, put them in the jar. If they are too tall, you will need to cut them down so they fit in the jar. The beans should be covered by the vodka.
- Cover the beans with premium vodka, 80 proof or higher. Fill the jar to the top with the vodka. Seal the jar and put in a cool dark place for six months.

- When the six months are up, use this as you would any other type of vanilla extract. Do not remove the vanilla beans.
- The vanilla beans can be used over and over again to make a new batch of extract for seven years.
- When the vanilla extract you made begins to run low, simply pour the remaining vanilla extract into a different glass container, fill the old bottle up with vodka again and wait six months for a new batch to cure.
Notes
You can substitute Bourbon for Vodka.
- Prep Time: 10 minutes
- Category: Condiments
How Long Homemade Vanilla Extract Lasts
One of the best things about homemade vanilla extract is its longevity.
The vanilla beans can be reused over and over again - often for up to seven years - as long as they remain submerged in alcohol.
When your jar starts to run low:
-
Pour the remaining extract into another glass container.
-
Refill the original jar with vodka.
-
Seal and return it to storage.
-
Wait another six months for the new batch to mature.
Over time, your extract develops deeper flavor, and many people find older batches to be even better than the first.
Tips for the Best Homemade Vanilla Extract
After making homemade vanilla extract for years, here are a few tips that make a real difference:
-
Use enough beans. Weak extract usually means too few beans. 1 ounce of beans to 8 ounces of 80 proof alcohol is good for a single fold extract. For a richer, double-fold extract, use 2 ounces of beans to 8 ounces of 80 proof alcohol.
-
Keep the beans submerged. Exposure to air can affect flavor.
-
Be patient. Six months is the minimum - 12 to 18 months is even better.
-
Store it properly. A cool, dark place is key.
-
Label your jars. Include the start date so you know when it's ready.
Using Homemade Vanilla Extract in Your Baking
Once your extract is ready, use it exactly as you would store-bought vanilla - only expect better results.
Homemade vanilla extract shines in:
-
Cookies and brownies
-
Cakes and cupcakes
-
Pancakes and waffles
-
Ice cream and custards
-
Coffee and hot chocolate
It's one of those quiet ingredients that doesn't call attention to itself - but when it's missing or low quality, you can absolutely tell.
A No-Waste Vanilla Project: How to Use Every Last Bit of the Vanilla Bean
One of the best things about homemade vanilla extract is that it doesn't stop being useful once the extract is finished. Vanilla beans are far too valuable to waste, and even after years of soaking, they still have plenty of flavor left - especially if you know how to use them.
In a from-scratch kitchen, vanilla is a stretch ingredient. One bean can be used again and again in different forms, each time adding a little more warmth and depth.
Make Vanilla Bean Sugar
Used vanilla beans are perfect for making vanilla sugar or even vanilla salt.
-
Allow the beans to dry slightly if they're very wet
-
Bury them in a jar of granulated sugar or salt
-
Seal and let sit for several weeks, shaking occasionally
The sugar absorbs the remaining aroma and flavor and becomes wonderful for baking, coffee, tea, or sprinkling over baked goods.
Make Vanilla Bean Paste
Vanilla beans removed from extract can also be turned into vanilla bean paste.
-
Add 8 ounces of vanilla beans (after removed from vanilla extract) to a blender.
-
Add 8 ounces dark brown sugar, 40 ounces of 80 proof alcohol (dark spiced rum is wonderful), 2 ounces honey, ¼ teaspoon of xantham gum powder (optional).
-
Blend until smooth - approximately 2 minutes.
- Let sit for 12 months for the best flavor - although you can use it right away.
This creates a thick, fragrant paste that works beautifully in recipes where you want visible vanilla flecks.
Flavor Baking Blends, Cocoa Powder Or Coffee
Even beans that are nearing the end of their useful life can still add subtle flavor.
-
Use them to scent baking mixes
-
Tuck them into containers of cocoa powder or coffee
Vanilla is surprisingly versatile, and a single bean can flavor far more than most people expect.
Dry Used Vanilla Beans
After removing vanilla beans from extract, allow them to dry completely.
- Shake off the vanilla bean as you remove it from the jar to remove any excess liquid.
-
Lay them on a clean plate or drying rack.
-
Air-dry until fully dry and brittle.
-
You can also use a dehydrator on a very low setting.
Once dry, the beans are ready for their next purpose.
Make Vanilla Bean Powder
Vanilla powder is one of the most useful - and overlooked - ways to reuse vanilla beans.
-
Break dried beans into small pieces
-
Grind them in a spice grinder or high-powered blender
-
Sift if desired for a finer powder
Vanilla powder can be used anywhere you want vanilla flavor without adding liquid, such as:
-
Dry baking mixes
-
Sugar cookies
-
Frostings
-
Pancake or waffle mixes
This is especially handy when moisture matters in a recipe.
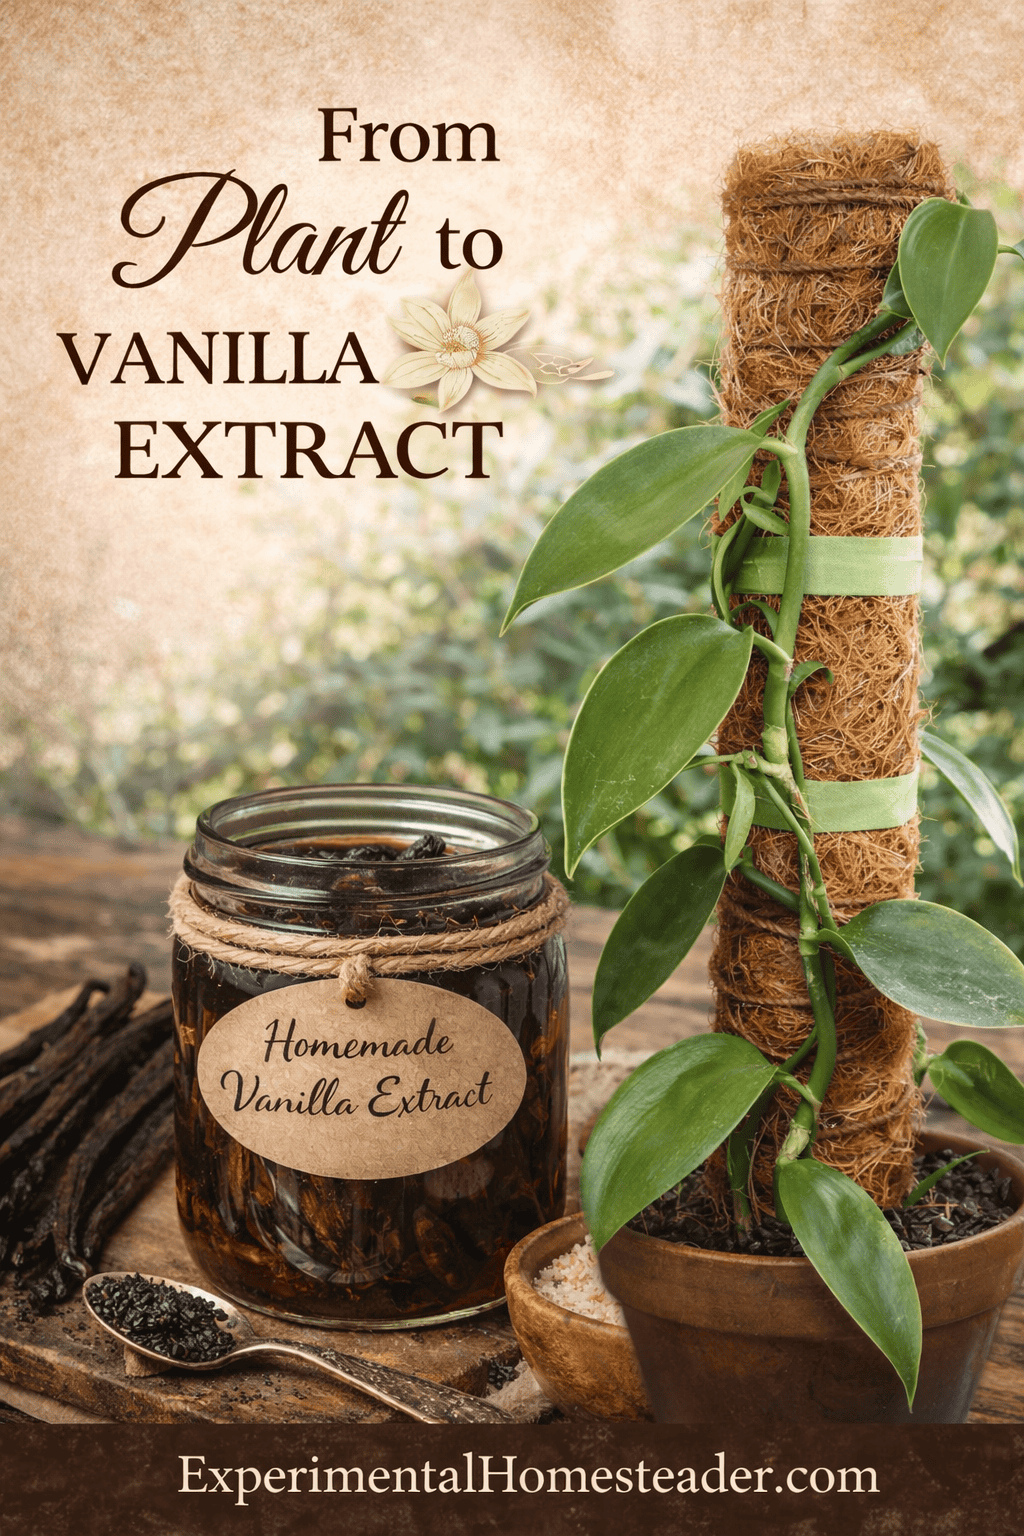
Growing Your Own Vanilla Beans
If you're one of the homesteaders growing Vanilla planifolia, you may already be wondering what to do with your harvest. Making homemade vanilla extract is one of the easiest and most rewarding ways to preserve those beans long-term.
If you don't grow your own, that's perfectly fine too. Purchased vanilla beans work just as well, and this process allows you to stretch a relatively small investment over many years.
Either way, learning how to make homemade vanilla extract is a skill that fits beautifully into a self-sufficient kitchen.
Why This Is Worth Doing
Homemade vanilla extract is one of those projects that requires very little hands-on effort but pays you back again and again.
It:
-
Improves the flavor of your food
-
Reduces reliance on processed ingredients
-
Saves money over time
-
Makes thoughtful, practical gifts
-
Adds a touch of old-fashioned simplicity to your kitchen
And perhaps most importantly, it reminds us that some of the best things really do just take time.
If you've never made your own before, this is a wonderful place to start. And if you already have a jar tucked away in a cupboard somewhere, consider this your reminder to start another one today.
What to Do With Homegrown Vanilla Beans
If you are one of those people who grow Vanilla planiflora you may already be wondering what to do with all the vanilla beans you will be harvesting. If you do not grow your own, do not fear, you can buy vanilla beans ready to use. Either way it is easy to learn how to make vanilla extract at home.
Growing your own vanilla beans is both exciting and a little intimidating the first time you see those long green pods developing. After all that patience - hand pollinating flowers, tending the vine, and waiting months for the beans to mature - it's natural to want to make the very best use of them.
When you harvest vanilla beans from your own plants, it's important to understand that fresh green beans have very little aroma. The familiar vanilla scent and flavor develop slowly through a traditional curing process. While this sounds complicated at first, it's really a series of simple steps that rely more on patience than precision.
Below is a straightforward overview of the four main stages of curing vanilla beans at home.
Basic Vanilla Bean Curing Timeline at a Glance
-
Day 1: Harvest and blanch
-
Weeks 1 to 2: Sweating phase
-
Weeks 3 to 8: Drying phase
-
Months 3 to 6+: Conditioning and aging
Once conditioning is complete, beans can be split and used immediately for homemade vanilla extract - or stored whole until needed.
No matter how you choose to use them, homegrown vanilla beans are incredibly valuable. Turning them into homemade vanilla extract allows you to preserve that value long-term while creating something you'll reach for again and again in your kitchen.
Blanching (Stopping Growth and Starting the Process)
Blanching is the first step after harvest and serves to stop the bean from continuing to grow while activating the enzymes that begin flavor development.
-
Freshly harvested beans are briefly submerged in hot water (usually around 150-165°F).
-
Beans are blanched for 30 seconds to 3 minutes, depending on size.
-
After blanching, beans are removed and drained.
Timeline:
Day 1 (immediately after harvest)
Blanching is quick, but it sets the stage for everything that follows.
Sweating (Developing Flavor and Aroma)
Sweating is where the magic really begins. This stage encourages enzymatic activity and fermentation, which is what creates vanilla's signature aroma.
-
Blanched beans are wrapped in cloth or towels.
-
They are kept warm - 110-120°F (43-49°C) - traditionally in insulated boxes or warm environments.
-
Beans are unwrapped daily, aired briefly, then rewrapped.
-
During this phase, beans darken, soften, and begin to smell unmistakably like vanilla.
Timeline:
7 to 14 days
For home growers, sweating often happens in a warm room, a cooler with towels, or a sun-warmed space during the day.
While it may seem like a sous vide machine would be perfect for sweating vanilla beans because of its precise temperature control, it isn't ideal for this stage of curing. Sweating vanilla beans isn't about holding them at a steady temperature - it's about warm, humid conditions with airflow and daily handling. Beans need to be wrapped, unwrapped, aired, and gently warmed again so enzymes can continue developing flavor. A sealed, constantly wet environment can trap moisture, limit airflow, and risk stalling or flattening the flavor rather than improving it. For vanilla, simple warmth and patience work better than precision equipment.
Drying (Reducing Moisture Slowly)
Drying removes excess moisture while preserving flavor. This is a slow, careful process.
-
Beans are laid out to dry for a few hours each day.
-
They are brought back inside and wrapped or stored overnight.
-
The goal is flexibility, not brittleness - beans should remain supple.
-
Drying continues until beans lose most of their moisture but are still pliable.
Timeline:
3 to 6 weeks
Rushing this step can result in mold or poor flavor, so slow and steady really matters here.
Conditioning (Aging for Full Flavor)
Conditioning is the long-term aging phase that deepens and rounds out the flavor.
-
Fully dried beans are stored in airtight containers.
-
Containers are kept in a cool, dark place.
-
Beans are checked occasionally for mold and wiped if needed.
-
Over time, flavor becomes richer and more complex.
Timeline:
3 to 6 months (or longer)
This is where patience pays off. Well-conditioned beans have a deep aroma and are perfect for making homemade vanilla extract.
Why Homemade Vanilla Extract Is Worth the Wait
Homemade vanilla extract is one of those quiet kitchen projects that rewards patience more than effort. It asks very little of you at the beginning - just good vanilla beans, the right alcohol, and time - but it keeps giving long after that first batch is ready. Better flavor is part of it, of course, but there's also something deeply satisfying about opening a jar you started months (or even years) ago and knowing exactly what went into it.
Whether you're working with homegrown Vanilla planifolia or carefully sourced beans, using them fully - from extract to paste, powder, sugar, and beyond - turns vanilla into a true pantry staple instead of a single-use ingredient. In a from-scratch, self-sufficient kitchen, homemade vanilla extract isn't just about baking better desserts. It's about slowing down, paying attention, and building flavor the old-fashioned way - one jar at a time.
Homemade vanilla extract also shines when it comes to thoughtful gift giving and long-term pantry stocking. A small bottle tucked into a holiday basket, paired with a favorite recipe, or labeled with the date it was started makes a gift that feels personal and useful - something that will actually be used, not set aside. On the pantry side, keeping one or two jars curing year-round ensures you're never caught without it, especially during baking season. It's one of those staples that quietly supports a self-reliant kitchen, ready when you need it and better with every passing month.

Homemade Vanilla Extract FAQs (Answers Most Recipes Skip)
Q. How long does homemade vanilla extract really need to sit before it's usable?
A. Homemade vanilla extract can be used after about 8 weeks, but it will not reach full flavor until at least 6 months. For the deepest, richest vanilla flavor, many experienced extract makers prefer aging it for 12 months or longer.
Q. Does homemade vanilla extract ever go bad?
A. Properly made homemade vanilla extract does not spoil as long as it contains enough alcohol (80 proof or higher) and the vanilla beans remain fully submerged. It can last indefinitely and often improves with age.
Q. Why is my homemade vanilla extract lighter in color than store-bought?
A. Color varies based on the type of vanilla beans used, the alcohol chosen, and how long the extract has aged. Lighter color does not mean weaker flavor. Homemade vanilla extract naturally darkens over time.
Q. Can vanilla beans be reused after making extract?
A. Yes. Vanilla beans can be reused multiple times. As long as they are still aromatic and pliable, they can be topped off with fresh alcohol for a new batch or repurposed into vanilla paste, powder, sugar, or salt.
Q. How many times can vanilla beans be reused?
A. With proper care, vanilla beans can be reused for several years. Many people successfully reuse beans for five to seven years, occasionally adding fresh beans to maintain flavor strength.
Q. Why must vanilla beans stay completely covered by alcohol?
A. Keeping vanilla beans fully submerged prevents mold, drying, and off flavors. It also ensures even extraction and long-term shelf stability.
Q. Is vodka really the best alcohol for homemade vanilla extract?
A. Vodka is commonly used because it has a neutral flavor that allows the vanilla to shine. However, any alcohol over 80 proof can be used, including bourbon, rum, or brandy, each creating a slightly different flavor profile.
Q. Can different vanilla bean varieties be mixed in one extract?
A. Yes. Mixing vanilla bean varieties can create a more complex and layered extract. Many extract makers intentionally blend beans from different regions to balance flavor notes.
Q. Why does homemade vanilla extract smell strongly of alcohol at first?
A. Early in the process, the alcohol scent is more noticeable because the vanilla compounds have not fully extracted. As the extract ages, the vanilla aroma becomes stronger and more balanced.
Q. Can homemade vanilla extract replace store-bought vanilla in recipes?
A. Yes. Homemade vanilla extract can be used in the same quantity as store-bought vanilla. Some bakers find they need slightly less due to its fuller flavor.
Q. Is homemade vanilla extract gluten-free?
A. Homemade vanilla extract is gluten-free as long as the alcohol used is gluten-free. Most distilled spirits are considered gluten-free, but checking the manufacturer is recommended if gluten sensitivity is a concern.
Q. Can homemade vanilla extract be made without alcohol?
A. Alcohol is necessary to create true vanilla extract. Alcohol-free versions made with glycerin are technically flavorings and will not have the same depth, strength, or shelf life.
Q. Why does homemade vanilla extract improve over time?
A. Vanilla extraction is a slow process. Time allows flavor compounds to fully develop and mellow, creating a richer and more complex extract than quick methods can achieve.
Quick Answers About Homemade Vanilla Extract
Q. How long should vanilla beans soak in alcohol?
A. Vanilla beans should soak in alcohol for at least 6 months for full flavor, though they can be used earlier with a lighter taste.
Q. What proof alcohol is best for homemade vanilla extract?
A. Alcohol that is 80 proof or higher is required to properly extract and preserve vanilla flavor.
Q. Can homemade vanilla extract be used right away?
A. Homemade vanilla extract can be used after about 8 weeks, but flavor improves significantly with longer aging.
Q. Why is homemade vanilla extract better than store-bought?
A. Homemade vanilla extract is made with real vanilla beans and fewer additives, resulting in richer, more natural flavor.
Q. How do you know when vanilla extract is ready?
A. Vanilla extract is ready when it has a deep aroma, balanced vanilla flavor, and the alcohol smell has softened.
Q. Can you make vanilla extract with rum or bourbon?
A. Yes, rum and bourbon can be used to make vanilla extract as long as they are 80 proof or higher.