Ripple-Cut Cheese Slicer for Easy Snacks and Charcuterie Boards
Disclaimer: I received this item for free or at a reduced price in exchange for my honest, unbiased review. All opinions are my own.
I love kitchen tools that do one simple job well, especially when they make foods I already prepare easier to portion, store, and serve. The Blue Iguazu ripple-cut gourmet cheese slicer is one of those tools for me.
I use it with both homemade and store-bought cheese. It gives the slices that pretty ripple-cut edge that makes even an ordinary block of cheese look a little more special, but what keeps me reaching for it is the practical side. I can slice a block, portion the slices, seal them up, and have cheese ready for quick snacks instead of cutting into the same block every single time.
That works especially well on a homestead because there are plenty of days when I need something fast. A few slices of cheese with crackers, fruit, nuts, or something from the pantry can become a quick snack without turning into another kitchen project.

In This Article
Why I Still Like This Ripple-Cut Cheese Slicer
When I first tried this slicer, I was drawn to the way it made cheese look. The ripple cut is attractive, and it immediately makes a cheese tray look more intentional. Years later, I appreciate it even more because it is useful for everyday food prep too.
There is nothing wrong with slicing cheese with a knife, of course. I do that too. But a cheese slicer like this gives me more consistent slices, and the textured edge makes them easy to arrange on a plate, snack tray, or charcuterie board.
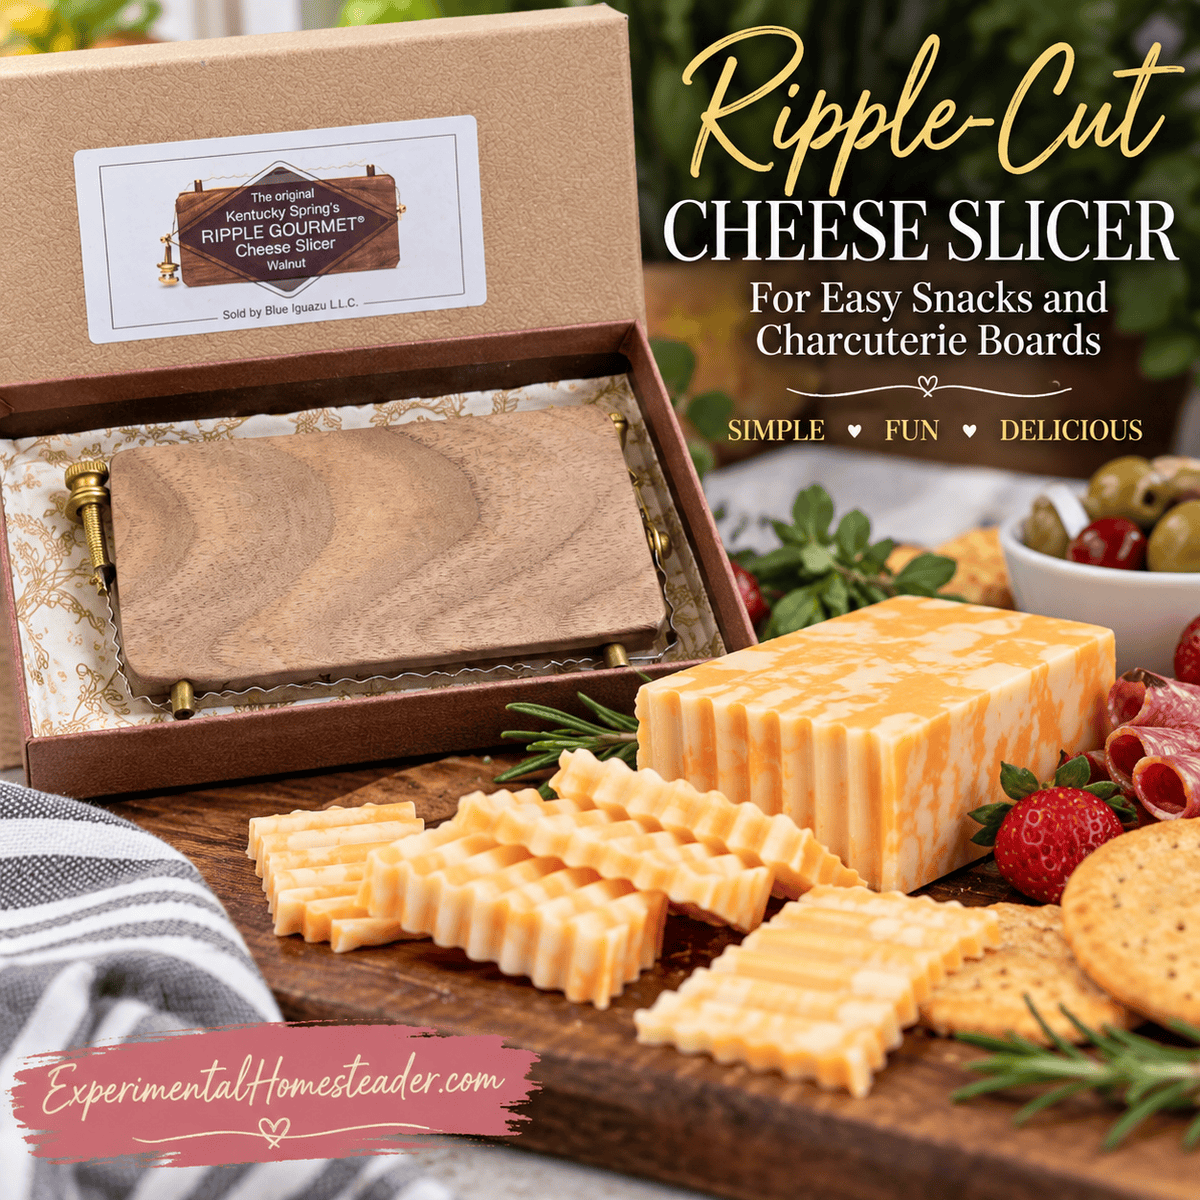
I chose the walnut version of the slicer. Black walnut fits the rustic look I like, and having black walnut trees here on the property made that choice feel especially appropriate. The wooden handle is comfortable in my hand, while the stainless-steel cutting wire does the actual slicing. The brass hardware lets the wire tension be adjusted when needed.
Homemade Cheese Or Store-Bought Cheese: I Use It For Both
One of the things I want to make clear is that you do not need to make your own cheese for a tool like this to be useful.
I love the connection between homesteading and homemade dairy, and when I have homemade cheese to slice, naturally I enjoy using it for that. But I also buy cheese. Homesteading does not mean pretending the grocery store does not exist.
A good block of cheddar, Colby, Monterey Jack, Swiss, or another firm cheese can usually be much more versatile than packages of individually wrapped slices. I can cut what I want, decide how thick the pieces need to be, and package them in amounts that actually make sense for us.
The ripple-cut slicer simply makes that process a little nicer.
My Favorite Practical Use: Slice It, Seal It, And Grab It Later
This is probably the part I appreciate most now.
I like to slice cheese ahead of time and then seal it so I have quick snacks ready to go. I do not have to pull out a block of cheese, a cutting board, and a knife every time I want a few slices.
That sounds like a very small convenience until you are busy.
When there are animals to care for, garden work to do, food to preserve, content to create, or simply one of those days when everything seems to need attention at once, having food already portioned is useful. I can grab a package of cheese and pair it with crackers, fruit, nuts, a hard-boiled egg, or whatever else I have available.
I also like that slicing and sealing portions ahead of time makes it easier to see what is actually available. Instead of finding half a forgotten block shoved behind something else in the refrigerator, I have ready-to-use portions.
You can portion the slices according to the way your household eats. Maybe that means enough for one person's snack, enough for lunches for a couple of days, or a larger package that can go straight onto a snack tray.
A Cheese Slicer Makes Charcuterie Boards Easier
This is where the ripple cut really shines.
A charcuterie board does not need to be complicated or expensive. It can be as simple as cheese, crackers, a little meat, fruit, pickles, nuts, preserves, or other things you already have in the refrigerator and pantry.
For a homesteader, that can also mean pulling from what you have preserved or produced yourself. Think homemade cheese, summer sausage, dried fruit, apple butter, pickles, relishes, jams, fresh fruit in season, herbs, or even edible flowers when you have them.
Ripple-cut cheese adds texture to the board without requiring any special decorating skills. I can slice a block, fan the pieces across the board, tuck in crackers and other foods, and it already looks more inviting.
I also have a Charcuterie Board Options Printable in the Experimental Homesteader Shop. It includes ideas for boards, bowls, meats, cheeses, crackers, fruits, condiments, and garnishes. The printable is currently listed in my Christmas printables section, but the ideas themselves work for charcuterie boards throughout the year.
Building a Charcuterie Board?
Take the guesswork out of deciding what to add. My Charcuterie Board Options Printable gives you an easy reference for cheeses, meats, crackers, fruit, condiments and more so you can mix and match a board that works for you.

Keep it handy when you're planning appetizers, holiday snacks, parties or an easy grazing board at home.
Get the Charcuterie Board PrintableAvailable from the Experimental Homesteader Shop
Charcuterie Does Not Have To Mean Fancy Ingredients
I think people sometimes see elaborate charcuterie boards online and assume they need a dozen expensive cheeses and specialty meats. You do not.
One of the best things about making your own board is using what you already like to eat.
If your favorite cheese is cheddar, use cheddar. If you have homemade goat cheese, use that. If there are crackers in the pantry, sliced apples in season, a jar of homemade jelly, pickles you canned last summer, or nuts tucked away for baking, those foods can all become part of the board.
The ripple-cut slicer helps the simple cheeses look just as appealing as the expensive ones.
For me, that is much more in line with homesteading anyway. I would rather make good use of what I have than buy a list of ingredients simply because somebody else's board says I should.
Snack Boards Are Useful Beyond Parties
I do not save this idea just for entertaining.
A smaller snack board can be lunch. It can be something to set out when everyone is working on a project and nobody wants a heavy meal. It can be an easy way to use small amounts of several foods before they are forgotten in the refrigerator.
Having cheese already sliced makes that even easier.
Pull out the cheese, add a few other foods, and you are done. There does not have to be a recipe involved every time you need to feed people.
Ways I Use Ripple-Cut Cheese Slices
The obvious use is a cheese tray, but the slices are handy in quite a few everyday situations.
- Quick snacks: Pair a few pieces with crackers, fruit, nuts, or cured meat.
- Charcuterie boards: The ripple pattern adds visual interest without extra work.
- Lunches: Pre-sliced cheese is easy to add to a packed lunch or a simple lunch plate at home.
- Sandwiches: Slice cheese in advance so it is ready when you are assembling sandwiches.
- Burgers and hot sandwiches: Cut slices to fit instead of relying on individually wrapped processed slices.
- Snack trays for gatherings: Prepare the cheese ahead of time and store it until you are ready to assemble the tray.
- Homestead work days: Keep a few grab-and-go portions available for the days when stopping to make a full meal is unrealistic.
It Can Also Help With Portioning A Larger Block Of Cheese
Buying cheese in a larger block can make sense when you use it regularly, but a big block is not very convenient if you are constantly opening it just to cut off two or three pieces.
I would rather do some of that work once.
I can slice part of the cheese for snacking, leave part of it in a block for shredding or cooking, and seal the portions separately. That gives me options without committing the entire block to one use.
This is the same general approach I use throughout the homestead kitchen: do a little work ahead when it saves time later.
How Thick Should You Slice The Cheese?
There is no single correct thickness because it depends on what you plan to do with it.
For snacking or a charcuterie board, I like a slice that is substantial enough to pick up easily without being so thick that it overwhelms everything else on the board.
For sandwiches, thinner slices usually make more sense. For a cheese tray where cheese is one of the main foods, you may want them a little thicker.
The nice thing about starting with a block is that you control this. You are not stuck with whatever thickness came in a pre-sliced package.
Making Homemade Cheese Look Special Without Extra Work
When you have put the time into making cheese from your own milk, there is something satisfying about serving it in a way that shows it off.
That does not mean it needs to look like restaurant food. Homemade food does not need to hide where it came from.
But a clean, even ripple slice lets people see the cheese itself. Arrange those slices with a few simple accompaniments and the result can be beautiful without being fussy.
This is especially nice when you are sharing homemade cheese with somebody who may never have tasted cheese made from fresh homestead milk before.
What To Put With Cheese On A Simple Homestead Board
I like thinking in categories rather than following a strict board recipe. That way I can use what is available.
- Cheese: homemade or store-bought, one variety or several.
- Something crisp: crackers, toasted bread, homemade crackers, or crisp vegetables.
- Something fresh: apples, pears, grapes, berries, or seasonal produce.
- Something preserved: pickles, jam, jelly, chutney, relish, or dried fruit.
- Something savory: cured meat, smoked meat, nuts, olives, or roasted seeds.
- Something extra: honey, mustard, herbs, or another condiment that works with the cheese you chose.
You certainly do not need something from every category. These are simply options that make it easy to look around the kitchen and build a board from what you already have.
Why A Simple Cheese Tool Earns Space In My Kitchen
I have used a lot of kitchen gadgets over the years, and not every one deserves permanent space.
The tools I like best usually have three things in common: they are easy to use, they solve a real problem, and they fit the way I actually cook.
This cheese slicer does that for me.
It slices homemade cheese. It slices store-bought cheese. It makes pretty ripple-cut pieces for charcuterie boards and entertaining, but it is also useful when I am simply prepping snacks for later.
That combination of practical and pretty is probably why I still enjoy it so much.
The Original Blue Iguazu Ripple-Cut Cheese Slicer Review
I originally received the Blue Iguazu hand-crafted ripple-cut gourmet cheese slicer to review. The version I chose had a walnut handle, stainless-steel cutting wire, and brass hardware. At the time, one of the things that stood out immediately was how easily it turned an ordinary block of cheese into uniform wavy slices.
That first impression has held up for me. The pretty slices were what caught my attention, but the ability to prepare cheese ahead for snacks and serving is what makes the tool genuinely useful in my kitchen.
Final Thoughts
A ripple-cut cheese slicer is not something you absolutely need to survive in a kitchen. A knife will slice cheese.
But I am also a big believer that a useful tool can be worth keeping when it saves time, makes a repetitive job easier, and helps you enjoy the food you already make.
I love being able to slice cheese, seal it in useful portions, and have it ready for quick snacks. I love the way the ripple slices look on a charcuterie board. And I like that the tool works just as well whether the cheese came from my own kitchen or the grocery store.
That is the kind of kitchen tool I am happy to make room for.