DIY Light-Up Canvas Art with Cricut and Micro LED String Lights
Disclaimer: The reviewer has received the product/service at a reduced price or for free. All opinions contained in this post are my own and are my honest thoughts based on my own experience with this product.
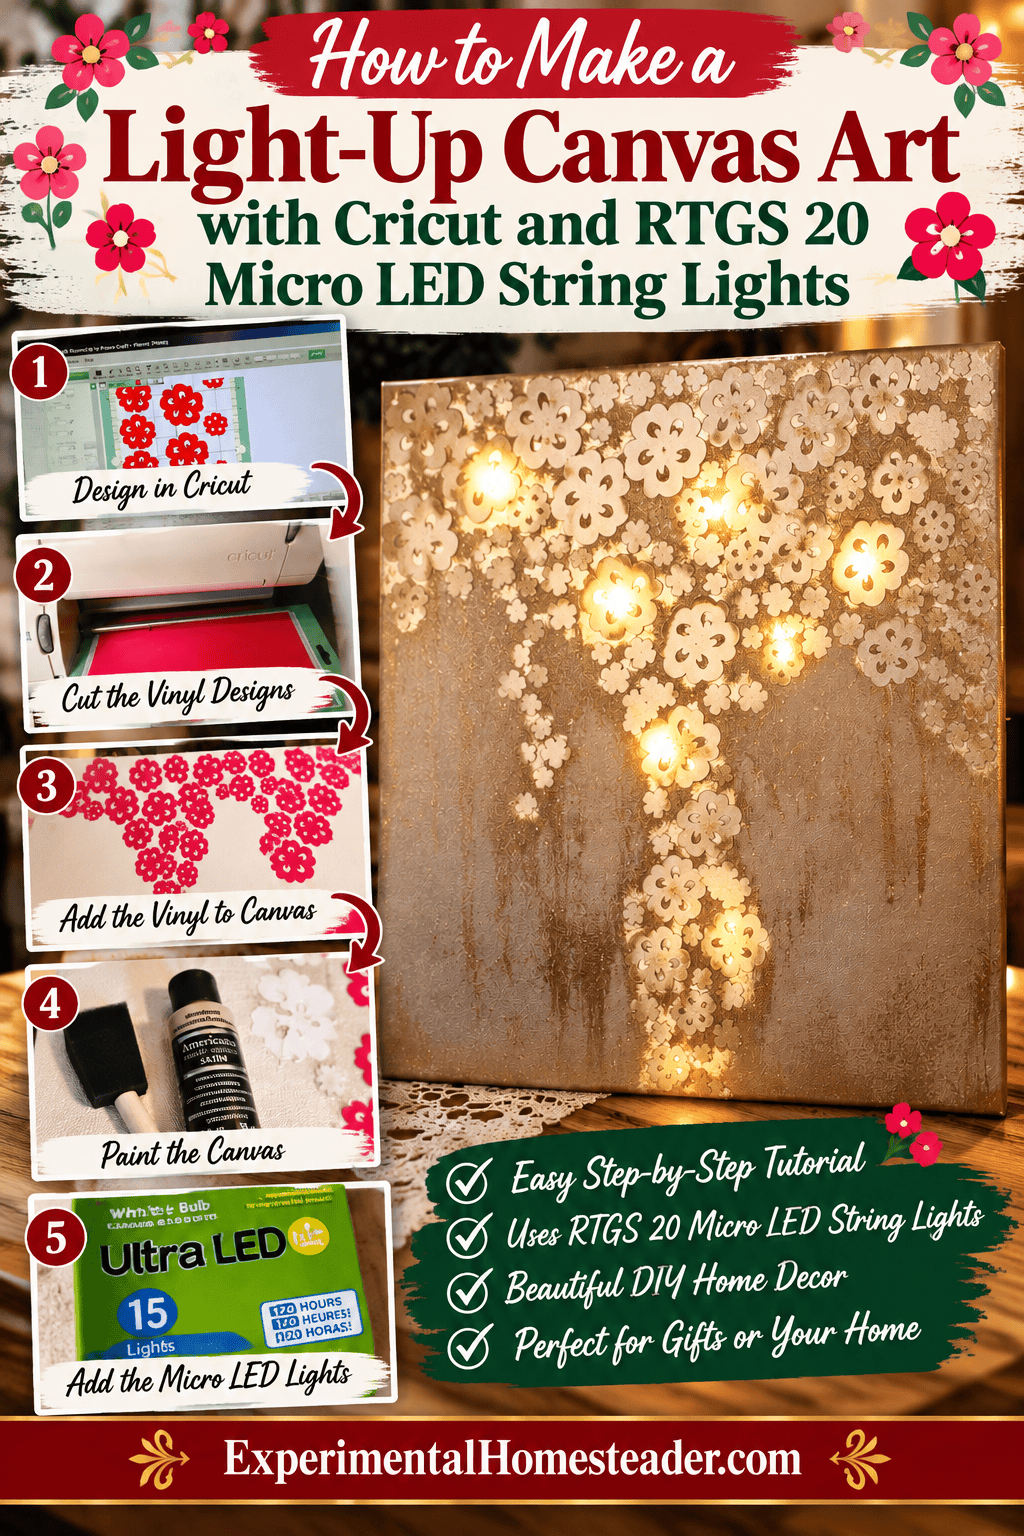
DIY light-up canvas art is one of those projects that is just as much fun to experiment with as it is to display. I wanted to turn an ordinary painted canvas into something that looked lovely during the day and had a little unexpected glow after dark. My Cricut helped me make the design, and a strand of tiny battery-operated lights supplied the magic. My first attempt was not perfect. I made mistakes on the canvas, and the first set of lights I bought was disappointingly dim. But that is part of the fun of making something yourself: trying an idea, seeing what works, and figuring out how to make it better. When I tried a different strand of micro LED lights, the change was remarkable. Suddenly the lighted design had the effect I had been hoping for. If you enjoy Cricut crafts, painted canvases, or homemade decorations that are a little different, this is a project worth trying. You can adapt the shapes, paint colors, and lighting arrangement to suit a room, a holiday, or a handmade gift. The printable Create Card below has the basic instructions; here I want to share what I learned while making mine, including the little details that can make a big difference.
In This Article
Why Make Your Own Light-Up Canvas Art?
For me, the appeal of this project is that it is not just another picture to hang on a wall. It changes when you switch on the lights. During the day, you have a piece of handmade painted art. In the evening, the glow brings out details that were easy to overlook before. I love projects that surprise people a little, especially when the supplies are simple and you can make the finished piece your own.It is also a wonderful excuse to spend an afternoon making something instead of buying another decoration. You can experiment with colors, make mistakes, change your mind, and learn as you go. My canvas was not perfect, but I enjoyed making it. The fun was in seeing whether the idea in my head would actually work, and then watching the project come alive when I found lights bright enough to show it off.
A Handmade Gift That Feels Personal
A light-up canvas would make a thoughtful birthday, Christmas, housewarming, or just-because gift. Instead of choosing a mass-produced sign, you can make something based on the recipient's interests. Think about the colors they love, the room where they might hang it, and a design that would mean something to them. A flower lover might appreciate a botanical silhouette. Someone who loves the night sky might enjoy stars and a moon. A person who decorates for the holidays could have a canvas made specifically for that season.For a child, consider a favorite animal, a simple woodland scene, or their initial surrounded by stars. For grandparents, a handmade piece from the grandchildren could become a keepsake. A newly married couple might appreciate a design that fits their first home. The gift does not have to be elaborate. In fact, a clean, simple design is often easier to light successfully and can look more polished than a canvas crowded with tiny details.If you plan to give the canvas as a gift, finish it early enough to test the lights, check that the switch is easy to reach, and include the correct batteries if appropriate. Tell the recipient how to switch the lights off and replace the batteries. It is a decorative lighted craft, not a night-light intended to stay on unattended.
Decorating a Child's Bedroom or Playroom
One of my favorite possibilities is making a canvas for a child's room. Imagine a row of softly glowing stars over a reading corner, a butterfly design above a dresser, or a woodland animal near a bookshelf. The beauty of making it yourself is that you can match the child's favorite colors and interests instead of settling for whatever is available in a store.
For younger children, hang the finished canvas securely out of reach and keep the battery compartment and wiring inaccessible. Do not position it where a child could pull it down, and do not treat a homemade battery-powered craft as a sleep light. If you want something for nighttime use, choose a purpose-built, safety-tested night-light instead.
Adding a Little Glow to Your Homestead
There are plenty of places around a homestead where a handmade lighted canvas could add personality. I can picture a botanical design in a kitchen, a chicken or goat silhouette in a mudroom, a collection of herbs near a pantry shelf, or a floral canvas in a craft room. You could even make a seasonal series and change the artwork as the year goes by.Think of the colors and subjects already around you. Sunflowers and garden flowers are lovely for summer. Leaves, pumpkins, and harvest colors suit fall. Evergreen branches and stars work for winter. Seedlings, birds, and fresh green leaves are a natural fit for spring. A handmade canvas is a simple way to bring those outdoor interests into the house without needing to redecorate an entire room.Keep the artwork indoors in a dry location unless every component is specifically rated for outdoor use. A barn, greenhouse, or damp porch can be hard on ordinary craft materials and battery-operated decorative lights. For a homestead-themed design, the subject can be rustic without exposing the electrical parts to moisture or weather.
More Places to Display Your Finished Canvas
Try it on an entryway wall where visitors will notice the glow, in a guest room as a personal welcome, or in a home office where you want a little color. A craft room is especially fitting because the canvas becomes an example of what you can make with the tools you already own. It can also be part of a holiday mantel arrangement, provided you keep it away from candles, heat, and anything that might damage the wiring.You do not have to hang every canvas, either. A securely supported piece on a shelf can look lovely beside books or other decorations. Just make sure the stand is stable, the lights and battery pack are not pinched, and the artwork cannot easily tip over.For more inspiration from the garden, browse ways to use garden flowers in craft projects and easy nature crafts.
Ideas for Personalizing the Design
If you are wondering what to put on your canvas, begin with something you already enjoy looking at. Gardeners could use flowers, herbs, butterflies, bees, or leaves. Animal lovers might choose cats, dogs, horses, or chickens. A child could help choose stars, clouds, dinosaurs, or a favorite shape. For the holidays, consider snowflakes, ornaments, autumn leaves, or a simple heart.
Think about the light as part of the design rather than an afterthought. A star pattern makes sense when a few points glow. A flower arrangement might look lovely with small lights scattered behind the blossoms. A moon or night scene could use a cluster of bulbs in one area. You do not need to illuminate every shape equally. Sometimes leaving part of the artwork darker gives it more depth.
What I Would Do Differently Next Time
I would test the lights before getting too far into the canvas. That one step would have saved me the disappointment of discovering that my first strand was too dim. I would also decide early where the battery pack would sit, because reaching around behind a finished canvas to switch it on and off can become frustrating if the pack is in the wrong place.I would keep the design simple enough that the glow has room to work. It is tempting to add more shapes, more colors, and more detail, but the lights are most effective when there is a clear focal point. Most of all, I would remind myself that this is supposed to be fun. A handmade gift or decoration does not need to look as though it came from a factory.If you want more ideas for practical handmade products, see my homesteader's crafting gift guide for tools and supplies that can support other projects.
Turn Light-Up Canvas Art Into a Homestead Craft to Sell
If you are looking for a handmade product to sell for extra income, light-up canvas art is worth experimenting with. It combines a familiar craft supply with the personal touches that make handmade goods appealing. A customer might want a sunflower design for a farmhouse kitchen, a horse silhouette for a child's room, or a personalized piece for a birthday. You could make a few examples in different styles, photograph them both with the lights on and off, and see which designs attract interest before buying a large quantity of supplies.Start by making a sample and tracking every expense: canvas, vinyl, paint, LED lights, batteries, packaging, selling fees, and the time you spend designing, cutting, painting, assembling, and communicating with customers. Do not price the finished piece based only on the supplies. If the materials cost $12, packaging and selling fees add $5, and the project takes two hours, a $25 selling price would leave just $8 for your labor before other expenses and taxes. That is only an illustration, but it shows why pricing matters.You might test a small selection at local craft fairs, holiday bazaars, or through an online handmade shop. Offer a few standard designs first rather than promising unlimited custom orders. Personalized names and dates can be attractive, but each custom request takes additional time and may involve extra design work. Make sure you have permission or an appropriate commercial license for any Cricut design, font, or graphic you plan to sell. A design being available for personal crafting does not automatically mean it is licensed for products offered for sale.Because this craft contains battery-operated lights, inspect each finished piece carefully and follow the lighting manufacturer's instructions. Keep the battery compartment accessible, provide basic use and battery-replacement instructions, and check any product safety, labeling, and marketplace requirements that apply before selling. Take extra care with items marketed for children's rooms, which can raise additional safety considerations. The goal is to make something people enjoy and can use responsibly, not to rush through assembly just to produce more inventory.
Use This Project for a Homeschool Art Lesson
This could also be a memorable homeschool art project because it brings several skills together in one finished piece. Children can explore color choices, composition, positive and negative space, silhouettes, and the way light changes what we see. They can sketch a design on paper first, choose a color palette, and predict which parts of the canvas will appear brighter once the LEDs are placed behind it.For younger children, an adult can handle the Cricut, the delicate vinyl removal, and all work with the battery-operated lights while the child helps choose shapes and paint the canvas. Older students can take on more of the planning and assembly with appropriate supervision. Keep small batteries and loose electrical components out of reach of young children, and never leave children unsupervised with the lighting materials.To make it a fuller lesson, ask students to create two small design sketches before choosing one. Have them explain why they placed shapes in certain areas, then photograph the finished canvas in daylight and in a dim room. What changed? Which shapes stand out? Does the paint color affect the glow? A student who enjoys math can measure the canvas, work out spacing, and calculate the cost of supplies. A student interested in entrepreneurship could even design a pretend product listing and price the project as though it were going to a craft fair.What I especially like about this idea is that students end up with something they can display or give as a gift. It is more than a one-afternoon exercise that gets put away in a folder. Every time they turn on the lights, they get to see how their decisions about art, placement, and materials came together.
What Is Light-Up Canvas Art?
Light-up canvas art combines a painted stretched canvas with small lights positioned behind it. Rather than displaying the lights as a visible strand, you use them to illuminate selected areas of the artwork. The effect can be subtle in daylight and surprisingly dramatic in a dim room.For my project, I cut shapes from vinyl with my Cricut, arranged them on the canvas, and painted over them. Once the paint was dry, I peeled the vinyl away to reveal the design. I then worked with battery-operated lights behind the canvas to see how the design looked when illuminated. You do not need to make the same design I did. Flowers, stars, silhouettes, seasonal shapes, and simple lettering could all inspire a version of your own.
Planning Your Cricut Canvas Design
Start by thinking about where you want the glow to appear. A design with clearly defined shapes is easier to plan than one packed with tiny details. If you are new to this technique, choose a simple arrangement and leave some space between the shapes. Remember that the lights will be behind the canvas, so the way the project looks with the room lights on may be quite different from how it looks in the evening.Cut your chosen shapes from suitable removable adhesive vinyl. Arrange them on the clean, dry canvas before painting, and take time to check the spacing. Press the edges down carefully so the paint is less likely to creep underneath. Test your paint and vinyl on a scrap surface first if you are uncertain how they will behave together. The goal is to make the project enjoyable, not to discover after painting that the vinyl is difficult to remove.
Painting the Canvas and Revealing the Design
Once the vinyl shapes are in place, paint the canvas in the colors you want. You can keep the background simple or experiment with a blend of colors. Try not to overload the edges of the vinyl with wet paint. Allow the paint to dry fully before carefully lifting the shapes, and take your time with narrow points and delicate details.My own canvas had mistakes, and I have never tried to pretend otherwise. A handmade project does not have to look machine-perfect to be worth making. Sometimes the imperfections are what teach you how you want to approach the next one. In this case, the bigger surprise came when I started testing the lighting.
Choosing Micro LED String Lights for Canvas Art
The number of bulbs is not the only thing that matters. Two strands with 20 lights can behave quite differently. Consider how bright the bulbs appear, whether the wire is easy to position, what batteries the compartment requires, and how you will reach the switch once the canvas is displayed. Choose a battery-operated set intended for decorative use, and follow its instructions.I first bought a strand at a craft store. It worked, but it did not produce much light behind my canvas. At first, I assumed that was simply how these tiny lights were supposed to look. Later I tried a second 20-light strand and found that the result was noticeably brighter. That experience convinced me to test lights before permanently arranging them on a craft project.
How to Position the Lights Behind the Canvas
Before securing anything, switch the lights on and hold them behind the canvas. Look at the design from the front in a dim room. Move the bulbs around until the glow reaches the areas you want to emphasize. A bulb that looks well positioned from the back may create an unexpected bright spot from the front, so it pays to check repeatedly.Keep the battery compartment where you can reach it without dismantling the artwork. Use a gentle, appropriate attachment method that does not damage the wiring or strain the connections. Avoid puncturing, sharply creasing, or tightly twisting the wires, and do not trap the battery pack against wet paint or adhesive. Turn the lights off when you are finished enjoying the display.
Printable DIY Light-Up Canvas Instructions
The instructions below brings the basic process together in one place so you can refer to it while crafting. You can choose your own design and paint colors, and you do not need any particular brand of micro LED lights.
My Original RTGS Micro LED String Lights Review
I've been playing around a bit with lighted canvas. I used my Cricut to cut images out and then arranged them on the canvas and painted over them. Once the paint was dry, I peeled the vinyl stickers off that I had created with the Cricut. The idea was to then attach small, battery operated lights to the back of the canvas so they would light it up at night. I went to the craft store and bought some battery operated LED lights. They were not very bright at all, but I thought that was the way they were designed to be. Then I had the opportunity to trial these Rtgs 20 Micro LEDs String Lights. The light strings are the same size with the same number of lights. The big difference is the Rtgs 20 Micro LEDs String Lights require three double A batteries while the other lights require 2. Another difference is the Rtgs 20 Micro LEDs String Lights say the batteries only last 48 hours. I know the batteries last much longer in the other set of lights. There is also a difference in electrical cord size of the two sets of lights. The biggest difference however is the amount of light the two produce.
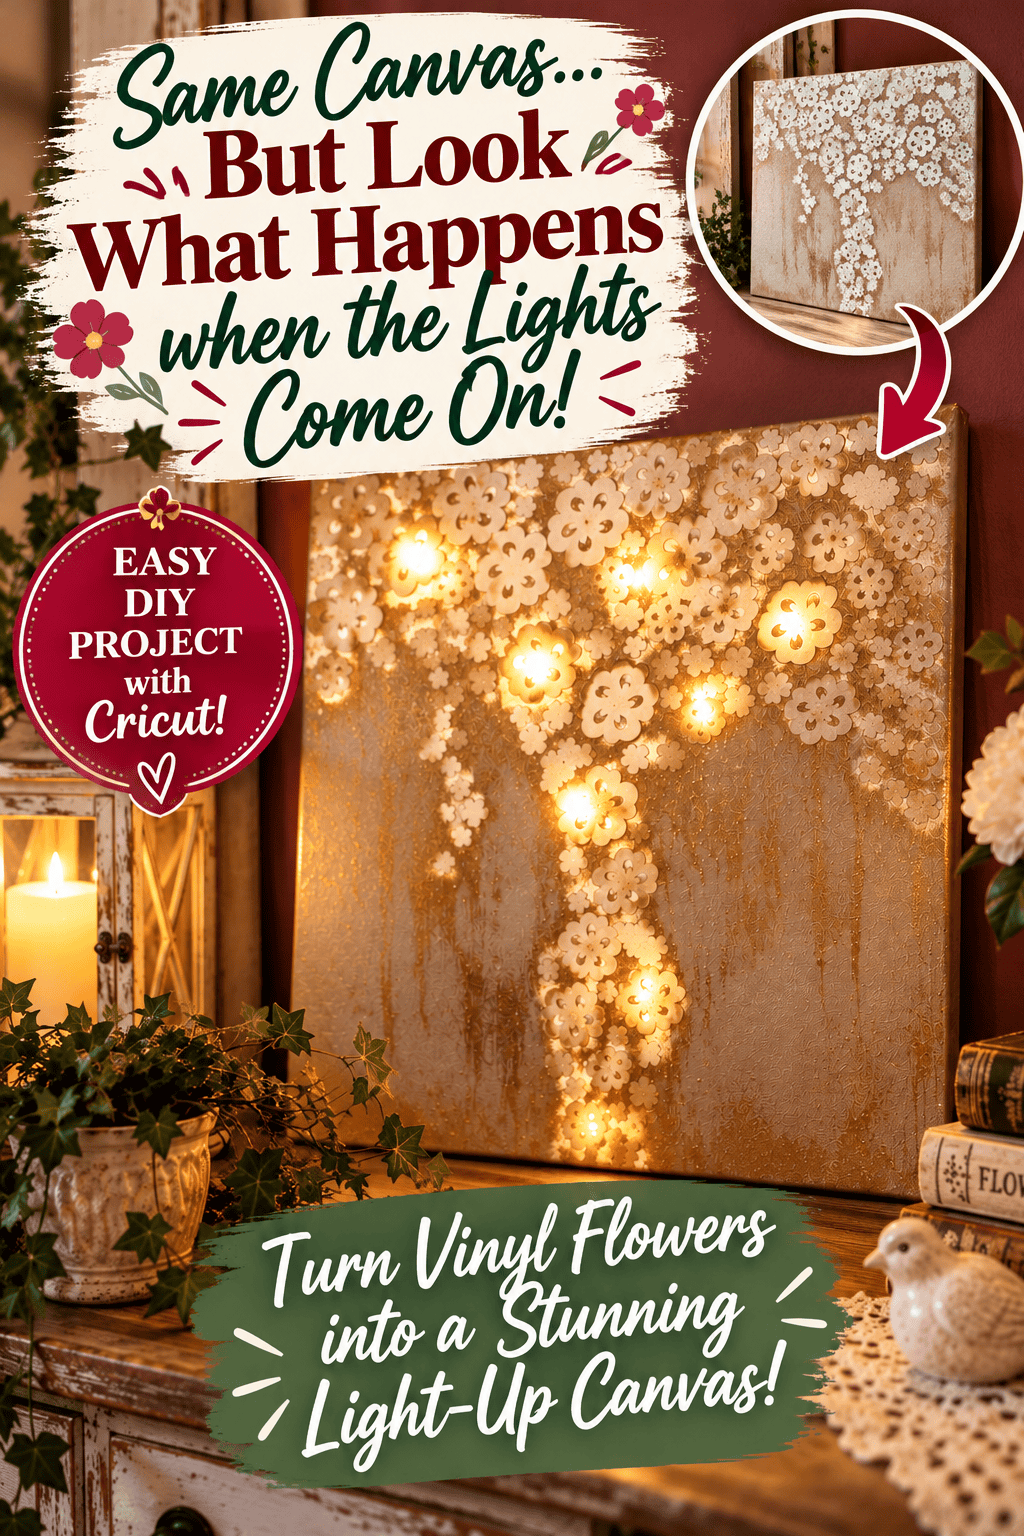
This is the canvas I created - and yes, I did make some mistakes as you can clearly see. The first photo is the canvas lighted using the set of lights I bought. I then removed those two batteries and added them to a third battery (all rechargeable batteries) and took a photo of the canvas lighted using the Rtgs 20 Micro LEDs String Lights. Both photos were taken using LongExpoPro iPhone app. My settings were set to Low Light with a 16 second exposure. You can clearly see the difference in the amount of light produced. I am much happier with the results the Rtgs 20 Micro LEDs String Lights produced. Since the batteries only last for 48 hours, rechargeable are the way to go with these lights.
The next thing I noticed as soon as I saw the lights was how thin the electrical cord on them was. It is literally thin as wire. The lights are secured in the cord. My other lights have a plastic coated cord and the lights are attached similar to Christmas tree lights. At first I was concerned about the thinness of the wire and if the wire was going to break as I was attaching it to the canvas. The lights are very light weight and felt fragile in my hands. The wire was quite strong however and survived numerous re-positionings while I fiddled with the lights wrapping them around the other lights so the two were as close together as possible. The lights have worked for close to a month now with no issues.
I like these lights better because they are brighter. I wish they flashed and would love to see them in various colors, but that is simply something I would like and in no way should deter you from buying these lights if you are in the market for battery operated lights for a craft or home decor project. I really do like them and feel they work even better than the first ones I bought. Be sure to check these lights out and the other cool items from #rtgsproducts.

How to Make a DIY Light-Up Canvas Art with Cricut
Materials
- Blank stretched artist canvas
- DecoArt Americana Acrylic Paint - assorted colors
- Adhesive vinyl
- Transfer tape
- 20 Micro LED String Lights - battery-operated
- Batteries for LED string lights
- Painter's tape
Tools
- Cricut cutting machine
- Cricut cutting mat
- Cricut weeding tool
- Foam paint brushes
- Craft scissors
- Pencil
- Awl or small hole-making tool
- Ruler or measuring tape
Instructions
- Choose a design and cut removable adhesive vinyl shapes with your Cricut.
- Arrange the vinyl shapes on a clean, dry stretched canvas and press down the edges so paint does not seep underneath.
- Paint over the canvas and vinyl shapes. Allow the paint to dry completely before gently peeling away the vinyl.
- Install the batteries specified for your 20 micro LED string lights and test the lights before attaching them.
- Turn the canvas over and experiment with positioning the lights behind the cutout-style design until the illuminated areas look the way you want.
- Secure the light string to the back of the canvas without puncturing or sharply bending its wires. Keep the battery compartment accessible for switching off the lights and replacing batteries.
- Turn the lights on, check the effect in a dim room, and adjust their placement as needed before displaying the canvas.