Cast Iron Apple Crisp Recipe
This cast iron apple crisp recipe turned out to be one of those desserts that disappeared almost as soon as I served it. I made it with home-canned apples, including a batch seasoned with red hots, and baked it in cast iron for a comforting homemade dessert. The combination gave the apples plenty of flavor without making the crisp overly sweet.

There are only two people in our household, yet by the end of the evening we had just one slice left. That tells you how much we enjoyed it! I especially liked the way the different apple preserves worked together in the filling.
I do not often see a dessert disappear quite this quickly. If you have home-canned apple wedges on the pantry shelf, this is a wonderful way to turn them into something special without starting with fresh apples every time.
Home Canned Apples In This Cast Iron Apple Crisp Recipe
For this apple crisp, I chose two kinds of home-canned apple wedges rather than relying on just one jar. Using two different flavors gave me a chance to balance the sweetness of the plain apples with the stronger cinnamon flavor of the red hot apples.
I used one pint of plain apple wedges canned in an ultralight syrup and one pint of my red hot apple wedges. Those jars were already prepared, so I could focus on assembling the dessert rather than peeling and cutting apples.
The red hot apple wedges brought an extra cinnamon note to the filling, while the plain apple wedges helped keep that flavor from becoming too strong. I wanted the apples themselves to remain the star of the dessert.
The combination worked exactly the way I had hoped. The different jars complemented one another, and the finished apple crisp had more depth of flavor than I would have expected from using only one type of canned apple.
The cinnamon flavor was noticeable but not overpowering, which is important when serving a dessert that already has a sweet topping. I wanted a warm apple flavor rather than a filling that tasted only of cinnamon candy.
It was sweet enough to feel like a proper dessert without being sugary sweet. The balance of the two apple fillings made this a recipe I would gladly make again, especially when I want to use the jars of apples I have preserved.
The printable recipe card below has the ingredients and directions for making this cast iron apple crisp. For another way to prepare apple crisp outdoors or in cast iron, see my Dutch oven apple crisp recipe. You can also browse my cast iron skillet recipes for more ideas.
Print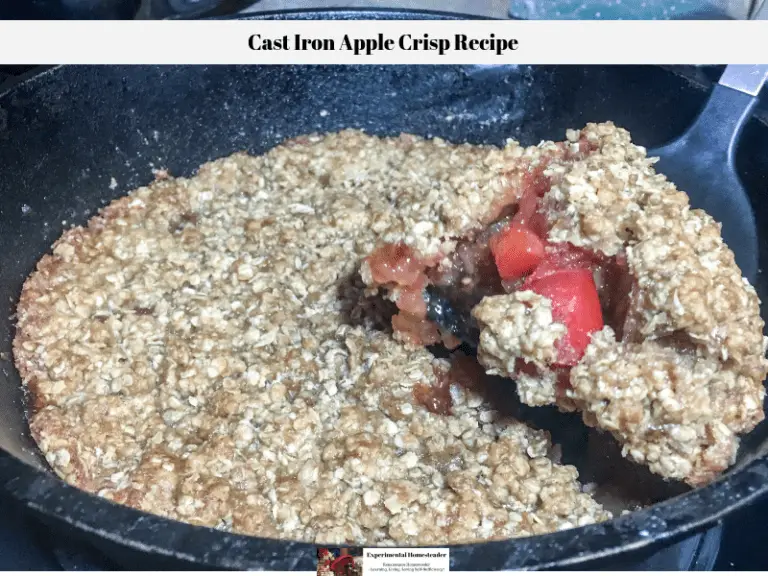
Cast Iron Apple Crisp Recipe
This cast iron apple crisp recipe is a delicious dessert that is quick and easy to make. Plus since it is made in a cast iron skillet, clean up is easy!
- Total Time: 45 minutes
- Yield: 8 servings 1x
Ingredients
- 1 pint plain apple wedges*
- 1 pint red hot apple wedges*
- 2 Tablespoons butter
- 2 Tablespoons light brown sugar
- 2 Tablespoons cornstarch
- 1 Tablespoon vanilla paste
- 1 cup old-fashion oatmeal
- ½ cup flour
- ½ cup brown sugar
- ¼ cup cane sugar
- 8 Tablespoons butter
- ½ teaspoon cinnamon
- ½ teaspoon nutmeg
- ¼ teaspoon kosher salt
Instructions
- Put 2 Tablespoons butter in a large cast iron skillet and turn the heat to medium.
- Drain the apples, unless you are using pre-made pie filling.
- One the butter is melted, add the apples or the pre-made pie filling.
- Cook the apples or premade pie filling for three minutes.
- Add the light brown sugar, cornstarch and vanilla paste to the top of the apples and stir to combine.
- Turn the heat off, but leave the skillet on the burner.
- Combine all the ingredients for the topping in a large bowl.
- Use a fork to mix the butter into the dry ingredients.
- Once the butter is well incorporated into the dry ingredients, spread the mixture on top of the apple mixture making sure it is evenly spread out.
- Cover the cast iron skillet with a piece of aluminum foil.
- Place the cast iron skillet into the oven and turn the temperature to 350 degrees Fahrenheit.
- Once the oven is preheated, set the timer to 15 minutes.
- When the 15 minutes is up, remove the aluminum foil and set the timer to 20 minutes.
- When the timer goes off, check the top of the apple crisp to see if the oatmeal is browned, if not, bake the apple crisp for an additional 10 minutes.
- Once the oatmeal topping is slightly brown, remove the cast iron skillet from the oven and let it cool for ten minutes.
- Then slice and serve.
Notes
*You can use two cans apple pie filling instead of the two pints of apples if you prefer.


Eight Experimental Homesteader recipes, conveniently collected in one downloadable cookbook. Choose how you'd like to get your copy.
The recipes are also available individually on Experimental Homesteader. This PDF brings them together for easy reference.
Final Thoughts On My Cast Iron Apple Crisp Recipe
As mentioned above, this apple crisp recipe did not last long.
I had two slices and my husband ate the rest, except for a small piece he left to take to work with him today.
This recipe was definitely a hit in our house and I am sure it will be in your house too.
I encourage you to give it a try, just be sure to use a well seasoned cast iron skillet.
I highly recommend the following articles:
- How To Make Candy Yams - An Easy, Delicious Recipe
- Cast Iron Skillet In Oven Roasted Brussels Sprouts Recipe
- Best Cast Iron Skillet Recipes
- How To Cook In Cast Iron Pans
- Apple Crisp Dutch Oven Recipe