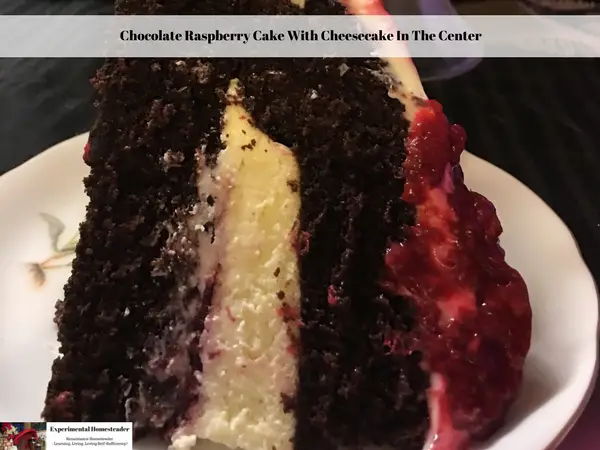
Chocolate Raspberry Cake With Cheesecake In The Center
Disclaimer: This is a sponsored post on behalf of Love Cooking Company and US Family Guide. All opinions are my own. There are also links to products I recommend from companies I have a referral relationship with. I will be compensated if you make a purchase after clicking on my links.

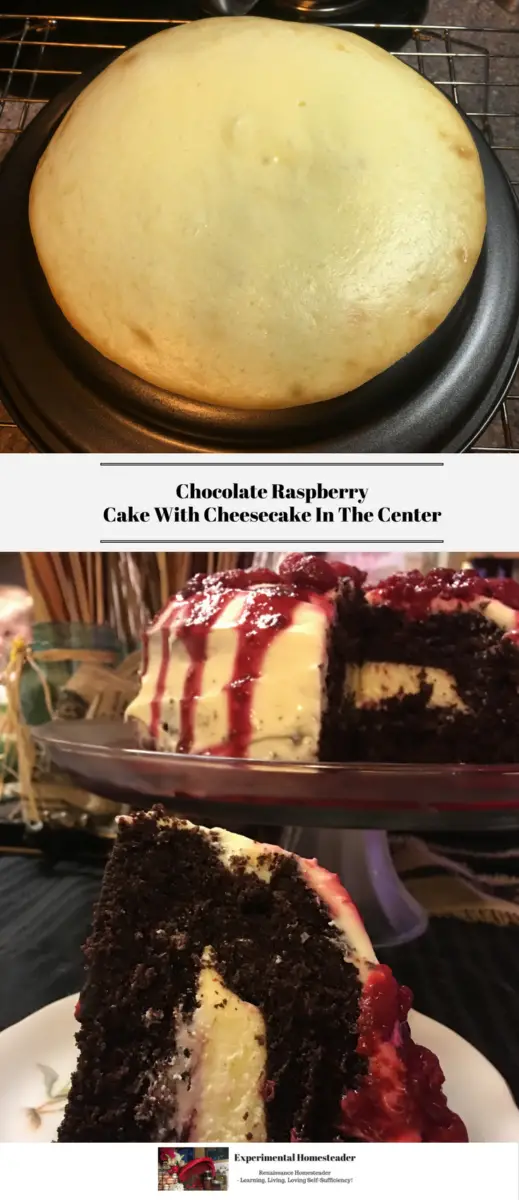
To make this chocolate raspberry cake with cheesecake in the center easily, I used the Mrs. Fields Flip And Bake Pan.
About Mrs. Fields Flip And Bake Pan
Using the Mrs. Fields Flip and Bake Pan made the whole process really easy.
The pan I received was round, but the new pans are square.
The pan was easy to clean up when I was done and to be honest looked like it hadn't even been used yet, which is great.
I look forward to using this pan for many years to come!
Print Chocolate Raspberry Cake With Cheesecake In The Center
Rich chocolate cake with a baked cheesecake center drizzled with fresh raspberries is the perfect dessert for any special occasion.
For this recipe I used Mrs. Fields Fill-N-Flip pan, from Love Cooking Company. I did receive this pan for free for review purposes and I love it!
- Total Time: 1 hour 55 minutes
Ingredients
Cheese Cake Ingredients:
- 1 8 oz pack of cream cheese (softened to room temperature)
- ¼ cup white sugar
- ½ teaspoon vanilla extract
- 1 egg (at room temperature)
Raspberry Sauce:
- 1 10 oz package of raspberries washed and dried - reserve half of the raspberries for the middle and top of the cake
- 2 ½ tablespoons white sugar
- 2 teaspoons cornstarch
- ½ cup water
Chocolate Cake Ingredients:
- 2 cups white sugar
- 1 ¾ cups all-purpose flour
- ¾ cups cocoa
- 1 ½ teaspoons baking powder
- 1 ½ teaspoons baking soda
- 1 teaspoon salt
- ½ cup vegetable oil
- 2 ½ teaspoons vanilla extract
- 2 eggs
- 1 cup milk
- 1 cup freshly brewed black hot coffee (I used Coffee Beanery's Chocolate Raspberry Coffee)
Cream Cheese Frosting:
- 1 80 z package cream cheese softened
- 4 Tablespoons butter (softened)
- 1 cup & ¼ powdered sugar
- 1 Teaspoon vanilla
Instructions
Cheesecake Directions
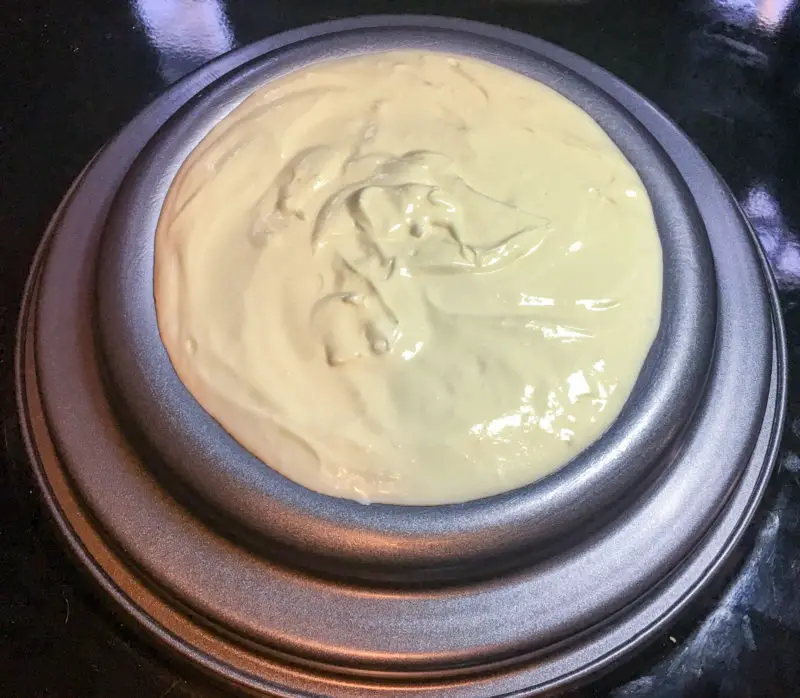
- Preheat your oven to 325 degrees Fahrenheit.
- Use spray butter to grease the pan.
- Beat the cream cheese until smooth.
- Add the sugar and vanilla, mixing the mixture is lump-free.
- Add the egg and mix until all the ingredients are well incorporated.

- Pour the mixture into the pan and bake for 20 to 25 minutes. When the cheesecake is ready, the edges will be golden and the middle only slightly wiggly - not runny.
- Remove the cheesecake from the oven, allow it to sit on a cooling rack for 5 minutes to cool
- To remove from the pan, run a knife around the edge to loosen it.
- Place a plate on the top of the cheesecake and flip it so the plate is on the bottom.
- Once the cheesecake is loose, cover it with Saran Wrap and place in the refrigerator.
Raspberry Sauce Directions
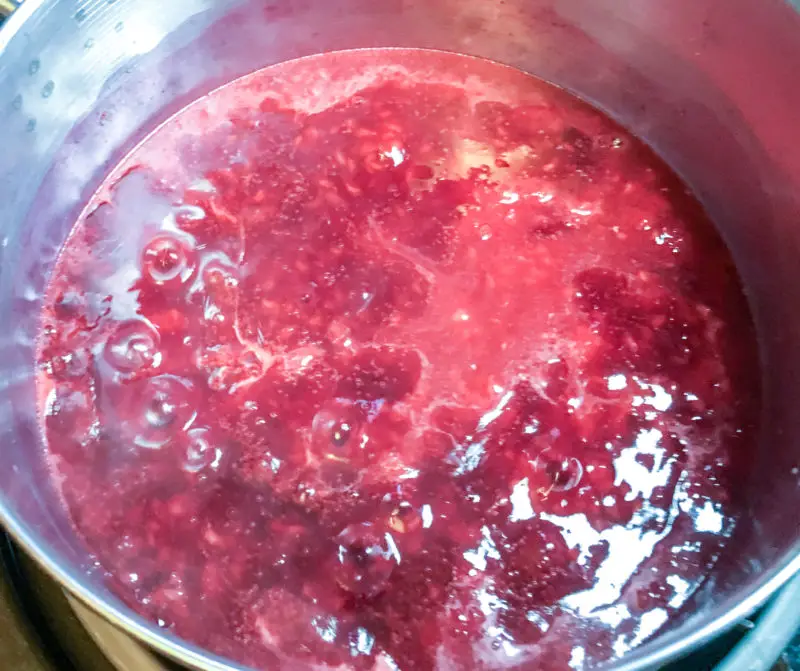
- Place half the raspberries and all of the raspberry sauce ingredients in a stainless steel saucepan.
- Cook the mixture over medium heat, stirring constantly.
- Once the mixture begins to boil, turn down the heat to medium-low and cook for an additional five minutes making sure to stir the mixture occasionally.

- Press the mixture through a sift to remove the seeds (optional). Reserve the sauce and discard the seeds.
- Cover the sauce with Saran Wrap and refrigerate.
Chocolate Cake Directions
- Preheat your oven to 350 degrees Fahrenheit.
- Spray butter on the pan to grease it if you did not already do this.
- Flour the pan then turn it upside down to discard the excess flour.
- Sift the flour, cocoa, baking powder, baking soda, and salt together in a separate bowl to make sure they are well-blended.
- Add the oil, eggs, milk, and vanilla to a mixer bowl and blend.
- Add half of the dry ingredients to the mixer bowl and blend.
- Add the hot coffee to the mixture and blend again.
- Add the remaining dry ingredients and continue blending until the mixture is lump-free.
- Pour the batter into the cake pans making sure to leave space in the pan for the batter to rise. It is ok if there is some leftover cake batter - you can use it to make cupcakes if you wish.
- Bake for 30 minutes or until a toothpick inserted into the center comes out clean.
- Remove the cake from the oven, set it on a cooling rack and allow it to cool completely before trying to remove it from the pan.
Cream Cheese Frosting Directions
- Place the cream cheese and butter in a mixing bowl and beat it until it is smooth.
- Add the powdered sugar and then the vanilla extract to the bowl and beat it again until all the ingredients are well combined and the mixture is free of lumps.
Assembly Instructions
- Place the cheesecake in the middle of the chocolate cake. With the Mrs. Fields Flip And Bake Pan, you will see the indentation where the cheesecake goes.
- Place some of the reserved raspberries on top of the cheesecake, then top them off with the raspberry sauce. Feel free to add a few fresh mint leaves to the top for garnish if you wish.
- Place the top half of the chocolate cake on top of the raspberries.
- Drizzle the remaining raspberry sauce on top of the cake and top with a few more fresh raspberries.
- Serve immediately or cover with Saran Wrap and refrigerate until you are ready to serve it.
Notes
- Prep Time: 40 minutes
- Cook Time: 1 hour 15 minutes
- Category: Desserts
- Method: Oven + Stovetop
I highly recommend the following articles:
- Easy To Make, Tasty Pumpkin Pecan Muffin Breakfast Menu Idea
- Decorated Homemade Cheesecake Recipe
- Mini-Pumpkin Cheesecakes with Salted-Caramel Crunch Topping Dessert For Brunch
- German Chocolate Cheesecake Recipe
- Ideas For Easter Brunch
Use the buttons on the right-hand side of the screen to share this article with friends or family who might find it useful. Pin the picture below to your pinboard on Pinterest for future reference.