Turkey Neck Gravy Recipe: Homemade Gravy While the Turkey Roasts
One thing I remember about my mother's homemade turkey neck gravy is that she started making it long before the turkey came out of the oven. She would put the neck in a pot with about four cups of water, add salt and pepper, and let it simmer on the stove for around four hours while the turkey roasted. It wasn't a complicated process, and it didn't involve a long list of ingredients. It was simply how she made gravy, using a part of the turkey that some people might otherwise throw away.
When the turkey was done, she used about half a cup of the drippings from the roasting pan, added enough flour to thicken them, and then stirred in the broth she had made from the neck. I wish I could tell you exactly how much flour she used, but I don't remember. What I do remember is the method, and that's a kitchen skill worth passing along. If you've ever pulled the neck out of a whole turkey and wondered what to do with it, this is a good reason to save it.

In This Article
Why You Shouldn't Throw Away the Turkey Neck
If you toss the turkey neck, you're throwing away the beginnings of a good homemade gravy. There's more to it than the little bit of meat on the bone. As the neck simmers, the bones and connective tissue give the water flavor and body, making a broth you can use with the drippings from your roasted turkey. That means you're not depending on the roasting pan to provide every bit of liquid for the gravy. Even if the turkey doesn't leave you with much in the way of drippings, the neck broth gives you something flavorful to work with instead of reaching for a carton of broth or a packet of gravy mix.
There's also the convenience of getting part of the job done while the turkey is still roasting. My mother simmered the neck on the stove for about four hours, which meant the broth was ready when it was time to make gravy from the pan drippings. If you've ever tried to finish the mashed potatoes, get everything onto the table, and make gravy at the same time, you know why that helps. You're still finishing the gravy at the end, but you aren't waiting until the turkey comes out of the oven to start building its flavor.
And, of course, it makes good sense to use more of the bird. Whether you've raised your own turkey or bought one for Thanksgiving, you've already put time, money, or both into getting that meal on the table. I don't see a reason to throw away something that can help feed your family. You can even pick the cooked meat from the neck if you want to use it, taking care to remove the small bones. For me, that's the real answer to why the neck is worth keeping: it gives you homemade broth, helps make the drippings go further, and puts a part of the turkey to work instead of in the trash. If you'd like to take that idea further, my article on making one meal feed the next shows how I stretch meat, broth, and leftovers into more food instead of treating dinner as a one-time event.
My mother's turkey neck gravy method
I've put the ingredients and directions in the Tasty Recipe card below so they're all together when you need them. The amount of water, the four-hour simmer, the salt and pepper, and the roughly half cup of drippings are the details I remember. The exact amount of flour was never written down as far as I know, so I have not invented a measurement and presented it as hers. Start with the drippings you have, work in the flour gradually, and add the broth until the gravy has the consistency you want.
Print
Homemade Turkey Neck Gravy (While the Turkey Roasts)
My mother's old-fashioned turkey neck gravy began with one turkey neck simmered in about four cups of water for roughly four hours, seasoned with salt and pepper. She thickened about half a cup of turkey roasting-pan drippings with flour and stirred in the neck broth. Exact flour measurements weren't recorded, so use the texture as your guide.
- Total Time: 4 hours 20 minutes
- Yield: Yield varies; roughly 2 to 3 cups
Ingredients
- 1 turkey neck, thawed if frozen
- About 4 cups water, with more if needed during simmering
- Salt and black pepper, to taste
- About ½ cup drippings from the roasted turkey pan (juices and some fat)
- All-purpose flour, a little at a time, enough to thicken the drippings into a smooth base
- Hot strained turkey-neck broth, as much as needed to reach the desired gravy consistency
Instructions
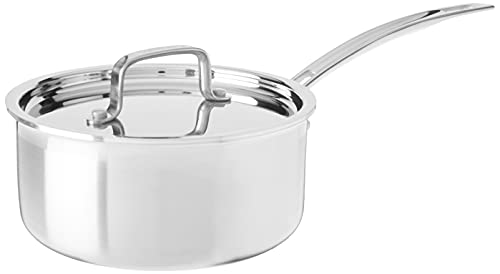
- Place the turkey neck in a saucepan with about 4 cups of water. Season with salt and pepper.
- Bring to a boil, lower the heat, partly cover, and simmer gently for about 4 hours while the turkey roasts. Add a little water as necessary to keep the neck covered.
- Remove the neck and strain the broth, keeping it hot. Carefully discard the bones; the meat may be saved if desired.
- When the turkey is cooked, transfer about ½ cup of its roasting-pan drippings to a saucepan. If they are mostly fat, skim off some excess fat; if there is very little fat, a little butter can help the flour mix smoothly.
- Warm the drippings and whisk in flour gradually, just until a smooth thickened base forms. Stir and cook briefly to remove the raw-flour taste.
- Gradually whisk in hot turkey-neck broth, adding a little at a time until the gravy has the consistency you like. Simmer while stirring for approximately 5 to 10 minutes.
- Taste, adjust salt and pepper, and serve hot. If desired, stir in finely chopped cooked neck meat after removing all bones.
Equipment
 Buy Now →
Notes
- The turkey neck, approximately 4 cups water, about 4 hours simmering, salt and pepper, approximately ½ cup turkey drippings, and flour added by feel are remembered family details. There was no recorded measurement for the flour.
- Amounts and finished yield vary depending on evaporation and the amount of drippings. Add broth gradually and judge the texture rather than relying on a fixed amount.
- If the drippings are very lean, a little butter can help form a smooth thickener; this is a practical option rather than a remembered part of the original method.
- Refrigerate gravy within 2 hours; use within 3 to 4 days or freeze. Bring leftover gravy to a rolling boil when reheating.
- Prep Time: 10 minutes
- Cook Time: 4 hours 10 minutes
Nutrition
- Serving Size: ¼ cup, approximate

A few things worth knowing about the broth
If you've never made broth from a turkey neck, don't expect it to look like finished gravy while it is simmering. What you're making at this point is the flavorful liquid that will go into the gravy later. I remember my mother's neck cooking for about four hours, but the size of the neck, the pot you're using, and how quickly the water evaporates all affect the amount of broth left at the end. If the water gets too low, add a little more so the neck stays covered. There's no benefit to letting the pot boil dry just because you're trying to follow a remembered cooking time.
A gentle simmer also makes more sense than boiling the water away as fast as possible. You want the liquid to take on flavor while the turkey roasts, not disappear before dinner is ready. If you end up with extra broth, you can strain it, cool it promptly, and save it for another meal. And if you choose to use some of the cooked neck meat, take your time removing the bones. There isn't a lot of meat on a neck, and the bones are small enough that you want to check carefully before adding any of it to the gravy. If making broth is something you'd like to do more often, I also have an Instant Pot poultry bone broth tutorial that takes you further into using bones for the kitchen.

What if your turkey doesn't give you much in the way of drippings?
One thing I've learned about cooking whole birds is that the amount of liquid left in the roasting pan isn't always predictable. A covered roasting pan can produce different results from an uncovered one, and some birds simply release more juice and fat than others. That's one reason I like the idea of having the turkey-neck broth ready. It gives you something to work with even if the pan doesn't offer as much liquid as you hoped. You may not have my mother's approximate half cup of drippings, and that's all right. The broth is still useful.
The balance of fat and juices matters, too. Flour needs enough fat to cook into a smooth thickener, but too much fat can leave the gravy greasy. If the pan drippings are mostly fat, you can separate some of it before making the gravy. If they're mostly flavorful juices without much fat, a little butter is one practical way to help the flour blend smoothly. That butter option is my suggestion for dealing with a different roasting-pan result, not something I'm claiming my mother used. I want to keep the distinction clear between the method I remember and the adjustments a reader might make in their own kitchen.
How to fix gravy that doesn't turn out quite right
If your gravy turns out lumpy, there's a good chance the flour didn't blend smoothly with the drippings before the broth went in. This is why it helps to add the liquid a little at a time, whisking as you go. If you already have lumps, you can try whisking them out or pouring the finished gravy through a fine-mesh strainer. Neither option is particularly complicated, and a few lumps certainly aren't a reason to throw the gravy away. I've always believed it's more useful to know how to fix something in the kitchen than to expect every recipe to turn out perfectly the first time.
If the gravy seems too thin, give it a little time to simmer and see whether it thickens. You can also add a small amount of flour mixed thoroughly with cold water, then simmer the gravy long enough for the flour to cook. Add extra thickener slowly because it's easy to go from thin gravy to something closer to paste. If you've made it too thick, gradually whisk in more hot turkey-neck broth until it pours the way you want. And if it tastes bland, check the salt and pepper before you make any big changes. Sometimes the broth or drippings simply need a little more seasoning.
Greasy gravy is a different problem. The roasting pan may have given you more turkey fat than you actually needed, particularly if the juices and fat weren't separated before thickening. Skimming some of the fat can help. The goal isn't to take every bit of richness out of the gravy; it's to keep the fat from overwhelming the flavor of the turkey. Once you understand what the broth, drippings, and flour each contribute, it's easier to make adjustments without feeling as if the recipe has gone wrong.
Can you make the broth ahead of Thanksgiving?
You don't have to simmer the turkey neck on Thanksgiving Day if your stove is already going to be crowded. One convenient way to prepare ahead is to simmer the neck, strain the broth, and refrigerate it until you're ready to make the gravy. When the turkey comes out of the oven, you can warm the broth, thicken the roasting-pan drippings with flour, and finish the gravy as usual. That way, you still get the flavor from the turkey neck without having another pot occupying the stove for four hours while you're preparing the rest of dinner. For more ideas on preparing homemade food ahead of time, my freezer meal prep guide shows how I keep useful portions ready for busy days.
If you make the broth ahead, divide it into shallow containers so it cools promptly, then refrigerate it at 40°F or colder. Plan to use refrigerated broth within three to four days, or freeze it if you're preparing it earlier. You can even freeze the broth in smaller amounts so you have some available for other meals. Making broth ahead changes the timing, not the way my mother finished the gravy: the neck broth is still the liquid that goes into the flour-thickened turkey drippings.
How to store leftover turkey neck gravy
Once Thanksgiving dinner is over, don't leave the gravy sitting on the stove or table for the rest of the evening. Transfer what you aren't serving into clean, shallow containers and put it in the refrigerator within two hours of cooking. Cover it for storage and keep the refrigerator at 40°F or below. Homemade turkey gravy is good in the refrigerator for three to four days, assuming it was handled and chilled properly. I like the idea of keeping it in smaller portions because you can take out what you need for another meal rather than reheating the entire batch every time.
You can also freeze leftover gravy. Use freezer-safe containers with a little room for expansion, label them, and freeze at 0°F. For best quality, aim to use frozen gravy within four to six months. That's the timeframe given in the USDA's gravy storage guidance, and it's useful when you want to save part of the Thanksgiving meal for later. Keep in mind that flour-thickened gravy can separate or become a little grainy after freezing, so it may need a good whisk and a splash of broth when it's reheated. Thaw it in the refrigerator instead of leaving the container on the counter. If you're building up your food-preservation skills, my home food preservation guide explains when freezing makes sense and how it fits alongside canning and dehydrating.
How to reheat leftover turkey gravy
The stovetop is my first choice for reheating homemade turkey gravy because you can watch the consistency as it warms. Put the portion you want in a small saucepan over medium-low heat, stir often, and add a tablespoon or two of water or turkey broth if it looks too thick. Once it's heating evenly, bring the gravy to a full, rolling boil, stirring so nothing sticks to the bottom of the pan. If it looks separated, whisking usually helps bring it back together. Give it a taste after reheating, because you may want to adjust the salt and pepper before serving it over turkey, potatoes, or noodles.
You can reheat gravy in the microwave, too. Put it in a microwave-safe dish, cover it loosely with a vented microwave-safe lid, and heat in short intervals, stirring between them so the middle doesn't stay cool while the edges get hot. It should be heated thoroughly and brought to a boil before you serve it. The FoodSafety.gov guidance for Thanksgiving leftovers also recommends bringing gravy to a rolling boil when reheating. If you've frozen your gravy, thawing it overnight in the refrigerator generally makes the process easier, although you can reheat it directly from frozen in a saucepan if you allow extra time and stir carefully. For the best texture, I would reheat only what you plan to eat.
A few questions about making gravy with a turkey neck
Do you need the giblets, too? No. You can make broth with just the neck. Some families cook the heart and gizzard along with it, while others use those parts separately. Liver has a stronger flavor, so it isn't something I would automatically add to this gravy. For the method I'm sharing here, the neck is enough. And if you have a home-raised chicken instead of a turkey, you can apply the same general idea to a chicken neck, keeping in mind that a smaller neck may make a smaller amount of flavorful broth.
Do you have to cook the neck for exactly four hours? That's approximately how long I remember my mother simmering hers while the turkey roasted. It isn't a rule that every turkey neck must cook for precisely that amount of time. The pot should stay at a gentle simmer, and you should watch the water level. If you're making the broth from a smaller neck or preparing it separately from a whole turkey dinner, the timing may differ. The important part is to get a well-flavored broth you can strain and use in the gravy.
Could you use cornstarch instead of flour? You can thicken poultry broth with cornstarch, but it isn't the same method my mother used. Cornstarch is usually mixed with cold liquid before being added to hot broth, while her gravy began with flour thickened into the pan drippings. If you want to make the gravy as close as possible to the way I remember it, flour is what belongs in the recipe. The card sticks with that approach rather than turning it into a collection of different gravies.
What to serve with homemade turkey neck gravy
Of course, turkey gravy belongs with the turkey itself, and it is hard to beat spooning it over a good helping of mashed potatoes. If you're planning a holiday meal, you might also want my guide to roasting a turkey and my recipe for Instant Pot mashed potatoes. I also like how gravy brings a plate together when you're serving several homemade dishes, and it can be useful with homemade noodles when you're working with leftovers. For the rest of the plate, you might also enjoy my homemade stuffing recipe and Thanksgiving side dish collection.
If you're still putting your menu together, my Thanksgiving recipes and DIY decorating ideas roundup has more ideas for the rest of the meal. And if you have a family way of making gravy that's a little different from mine, I'd genuinely love to hear about it. Was there a special ingredient, a pot that stayed on the stove all afternoon, or someone who never measured a thing? Those are exactly the kinds of kitchen skills and memories that deserve to be shared instead of forgotten. When you're ready for something sweet, you can stay here and explore my homemade pumpkin pie or cranberry pumpkin bread as well.
A note about the gravy method
The method in this article comes from what I remember of my mother's cooking, rather than a written recipe with exact measurements. For additional information about preparing poultry gravy and broth, see the University of Maine Cooperative Extension turkey gravy recipe and Illinois Extension's giblet stock for gravy. For poultry cooking temperatures and leftovers, FoodSafety.gov is another useful reference. I want the practical details here to help you make the gravy while still being clear about which measurements I remember and which parts you may need to adjust as you cook.