Candy Cane White Chocolate Covered Cherries Recipe
I had a wedding reception coming up, and I wanted something a little different to put on the dessert table. Then I spotted a photograph of white chocolate covered cherries on Pinterest. They looked elegant, easy to pick up and just right for a celebration. The question was whether I could make them look that good myself.
I had never made candy cane white chocolate covered cherries before. I bought half a pound of fresh sweet cherries, pulled out the candy cane flavored white chocolate and edible silver stars I already had, and decided to experiment. The first few took forever. By the time I finished, I had discovered a much quicker way to dip and decorate them - and a holiday dessert I was genuinely pleased to serve.
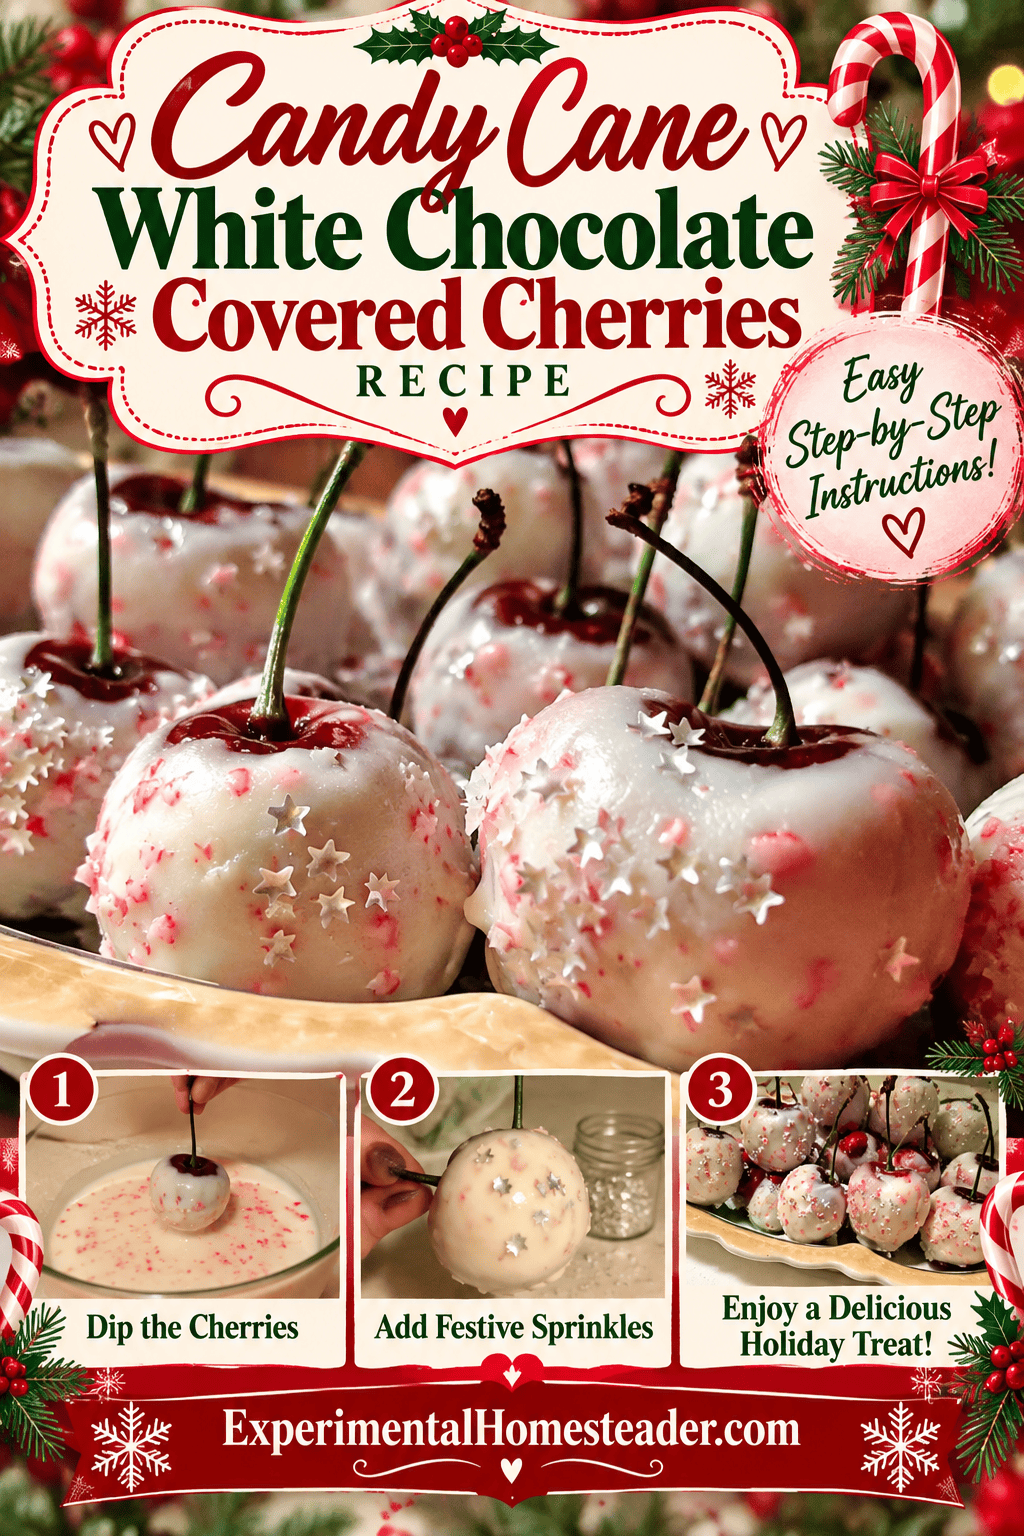
These are fresh cherries dipped in peppermint-flavored white candy coating and finished with edible silver stars. Below is the original recipe, the method that worked best for me, and the practical details that matter when you make them for a party.
In This Article
Why I Wanted These Cherries for My Wedding Reception
When I was looking through Pinterest for wedding reception finger foods, a photograph of white chocolate covered cherries caught my attention. They looked like the sort of little dessert that could dress up a table without requiring plates and forks. I already had candy cane flavored Candy Melts and edible silver stars, so buying half a pound of fresh sweet cherries seemed like a reasonable way to find out whether the idea would work.
I was not even certain I would like the fruit. Tart cherries in a pie were familiar to me, but fresh sweet cherries were another matter. That made this a real experiment, not a recipe I had made dozens of times. I wanted to see how the fruit tasted with the minty coating, whether the stars would stay in place, and how much work a tray of finished cherries would actually involve.
It was late, and I was tired, so I melted the coating in the microwave following the package directions instead of using the stove as I normally would. I used my Baby Cakes Chocolatier Chocolate Dipper to keep the coating warm while I worked. That detail made a difference because dipping one cherry at a time takes longer than you might expect, particularly when you are trying to make each one look picture-perfect.
What You Need to Know Before Dipping
The Tasty Recipes card below has the exact ingredient amounts and directions, so I am not going to make you read the recipe twice. There are, however, a few decisions worth making before you start. Choose cherries that are firm, sound and still have their stems attached. The stems give you a convenient handle, and undamaged fruit is easier to serve neatly. Wash the cherries, then let the surfaces dry completely. Even a little water can interfere with candy coating.
The original version uses Wilton Candy Cane Candy Melts. Despite the white chocolate wording in the recipe's name, Candy Melts are a confectionery coating rather than tempered white chocolate. That distinction matters. Coating wafers are designed to melt and set without the tempering process that real chocolate may require. Follow the directions for the product you actually have instead of assuming every white coating behaves the same way.
Set out your tray, parchment or wax paper, and decorations before melting the coating. The silver stars need to go on while the surface is still soft. Check the package to be sure the decorations are labeled edible, not merely non-toxic or intended for decorative use. Those labels are not interchangeable, especially when you are making something other people will eat.
Serving These Cherries at a Party
One of the things I liked about this idea for a reception was that each cherry was its own small serving. A tray of dipped cherries gives guests a sweet bite without committing them to a large slice of cake. The candy cane flavor and silver stars also make them especially appropriate for a Christmas gathering, although the same basic idea can be adapted for another celebration with a different coating or edible decoration.
If I were making a larger quantity, I would start with a small trial batch to see how the particular cherries and coating behave together. That is a better way to judge how much time to allow than assuming a half-pound experiment will scale up without any extra fuss. Arrange the finished cherries in a single layer when possible, keep them refrigerated, and bring out modest portions as guests are ready to eat them. Because the centers are fresh fruit, these are a make-close-to-serving-time dessert rather than a pantry-stable candy.
How My Original Cherry-Dipping Experiment Really Went
It is easy to look at a photograph of a finished dessert and imagine that making it will be just as effortless. My first batch taught me otherwise. I started with only half a pound of cherries because I wanted to find out whether the idea was worth making for a reception at all. I had the decorations and the candy cane coating on hand, but I did not know how neatly the coating would cover the fruit or how long it would take to decorate each cherry.
Holding each cherry by its stem sounded simple enough. The awkward part came after dipping, when I tried to keep holding it until the coating hardened. I was spending far too much time on one cherry while the rest waited. Eventually, I set the dipped cherries down on a plate instead. That meant the bottoms were not perfectly rounded, but I could always touch up the bases later if I wanted to. For a homemade dessert, that was a tradeoff I could live with.
That experience changed the way I thought about serving them. A Pinterest photograph shows the pretty finished side, not the waiting, dripping, setting and occasional imperfect bottom. When I make something for other people, I want it to look inviting, but I also need a method that is practical in my own kitchen. The recipe card gives you the basic process; the rest of this article explains what I would pay attention to before making a bigger batch.
Candy Cane Candy Melts Versus Real White Chocolate
The name of this recipe says white chocolate because that is how I originally described the white candy coating. The actual ingredient I used was Wilton Candy Cane Candy Melts. Those are not the same thing as a bar of real white chocolate. Candy coating is formulated to melt and set without tempering, which is especially convenient when you are dipping a lot of small pieces of fruit. Real white chocolate contains cocoa butter and behaves differently when melted and cooled.
If you substitute white chocolate, do not expect it to handle exactly like Candy Melts. Depending on the product, you may need to temper it for a firm finish and a clean release from the tray. White chocolate can also scorch if heated too aggressively. Use gentle heat, keep water away from the bowl, and follow the manufacturer's directions. The mint flavor will not automatically be there either, so the finished dessert will taste different unless you choose an appropriate chocolate-compatible flavoring.
There is another reason I like to explain the distinction: someone shopping for this recipe might buy white chocolate chips and wonder why their coating is thick or why the cherries do not set the way they expected. Baking chips are not necessarily made for dipping. Look for a product that specifically works as a coating, and test a few cherries before preparing an entire tray.
How to Choose and Prepare Fresh Cherries
Start with fresh sweet cherries that feel firm and have no split skins, soft spots or visible mold. I used dark sweet cherries with the stems left on. The stem makes it possible to dip the cherry without sticking a fork or toothpick into the fruit, and it also gives guests something to hold. Do not pull the stems off before dipping, because that removes the easiest handle and can expose the flesh.
Wash the fruit gently and inspect it as you go. Then dry it carefully, including around the stems. This is not a step to rush. Moisture on the skin can make coating slide, bead up or set unevenly. Water introduced into melted candy coating can also cause problems with texture. If the cherries have just come out of the refrigerator, watch for condensation and make sure their surfaces are dry before you begin.
Cherries also vary in size. A large cherry uses more coating than a small one, and a mixed batch can look less uniform on a serving tray. You do not need to sort every cherry by measurement, but grouping similar sizes together can make dipping and arranging them easier. The half-pound quantity in my original recipe is a useful small batch for learning how your particular fruit and coating work together.
Getting the Silver Star Decorations Right
The edible silver stars are what turn an ordinary dipped cherry into something that looks festive. The difficulty is that tiny decorations can come out of the container faster than you expect. Rather than trying to shake them directly over every cherry, place a few on a clean saucer and pick up what you need. That gives you more control and wastes less.
Work on one dipped cherry at a time, adding the stars before the coating firms. Once the surface has set, the decorations may not adhere. If you are serving these at a wedding, Christmas party or another special event, check the label on your decorating product. It must say edible. Some metallic decorations are sold only for decorative purposes and should not be eaten, even if they look nearly identical.
Making a Larger Batch Without the Stress
For a reception or holiday buffet, the temptation is to multiply the ingredients and assume the work will multiply just as neatly. Dipping fruit is a hands-on job, though, and the amount of time you spend depends on how quickly you can work while the coating remains fluid. A small melting pot that keeps the coating warm may be more convenient than repeatedly reheating a bowl. That is why I appreciated having my Baby Cakes Chocolatier Chocolate Dipper available during the original experiment.
Prepare the workspace first. Set a lined tray beside the melting area, put the edible stars in a small dish, and leave room for the cherries to sit without touching while their coating firms. If you are making several trays, work in manageable batches rather than washing every cherry and leaving the fruit sitting out for a long time. Refrigerate the finished cherries promptly, and keep them cold until they are ready to be served.
I would also resist making them days ahead just to cross a dessert off the list. Fresh fruit releases moisture, and the coating may lose some of its neat appearance as the cherries sit. Making a small test batch first tells you more about your timing and presentation than any photograph can. You will know whether you prefer a deep dip or a lighter coating, how quickly your stars need to be applied, and whether you care enough about the bottoms to touch them up.
What I Learned from Making These Cherries
My biggest mistake was trying to make every dipped cherry absolutely flawless. I was holding each one in my hand until it set, and the process felt endless. Once I accepted that a handmade dessert could have small imperfections, I worked much faster. I dipped, decorated and set each cherry down, then went back to touch up the bottoms if needed.
I really do not think anyone noticed the imperfections anyway. They were too busy eating them! For a reception, I would make a small test batch first, then plan enough time for the coating to set and the finished cherries to be chilled safely.

Troubleshooting White Chocolate Covered Cherries
Why is the coating too thick or clumpy?
Candy coating can thicken as it cools or become grainy if overheated or contaminated with moisture. Rewarm it gently according to the package directions. Do not add water. If the manufacturer recommends a particular thinning ingredient, use only the recommended amount.
Why won't the coating stick to the cherries?
The surface may still be wet, or the cherries may be too cold and covered with condensation. Dry the fruit thoroughly before dipping and work in a cool, dry kitchen. Avoid handling the dipped portion while it sets.
Why do the bottoms look flat?
Setting the cherries upright on a plate or tray can flatten the base. That happened to mine. Use parchment to make lifting easier, or touch up the bottoms after the first coat sets if the appearance matters to you.
Why are the silver stars falling off?
The coating may have set before the decorations were added. Have the stars ready in a saucer and add them immediately after dipping, while the surface is still tacky.
How to Store Chocolate Covered Fresh Cherries Safely
Because these are made with fresh fruit, treat them as perishable. Refrigerate the finished cherries promptly in a covered food-safe container at 40°F (4°C) or colder. For best appearance and texture, make them close to serving time and plan to eat them within a day or two. Do not leave them at room temperature for more than two hours, or more than one hour if the temperature is above 90°F (32°C).
My original recipe note advised against refrigeration because condensation can form when the cherries come back out of the refrigerator. That appearance concern is real, but it is not a reason to store fresh dipped cherries unrefrigerated. Keep them chilled, take out only what you are ready to serve, and avoid repeatedly warming and rechilling the whole batch.
Variations and Substitutions
If you cannot find candy cane flavored Candy Melts, you can use another coating intended for dipping fruit and follow its melting directions. For a mint flavor, choose a product formulated for chocolate or candy coating and add only the amount its maker recommends. Water-based extracts can cause some coatings to seize.
Dark chocolate is another option if you prefer a less sweet finish. Use chocolate suitable for dipping, and remember that real chocolate may need tempering for a firm, glossy shell. The result will taste different from the original candy cane version, but it pairs beautifully with cherries.

Here is the original Tasty Recipes card with the ingredient amounts and instructions. The tips above explain the adjustments I made while testing the recipe.
Print
Candy Cane White Chocolate Covered Cherries Recipe
- Total Time: 20 minutes
- Yield: 4 servings 1x
Ingredients
- ½ pound of fresh dark sweet cherries, stems on
- 1 bag Wilton Candy Cane Candy Melts
- 1 container Wilton Edible Glitter Silver Stars
Instructions
- Wash and thoroughly dry the cherries. Discard any damaged cherries.
- Melt the candy cane Candy Melts according to the package instructions, using a chocolate melting pot or double boiler.
- Hold each cherry by its stem and dip it into the melted coating to the desired depth.
- Gently turn and lift the cherry, allowing excess coating to drip off.
- While the coating is still soft, sprinkle with edible silver stars. Place a few stars on a saucer first to make them easier to control.
- Set the dipped cherries upright on parchment or wax paper until the coating firms. The bottoms may flatten slightly.
- Once the coating is set, refrigerate the cherries promptly in a covered container until ready to serve.
Notes
Storage: These are made with fresh cherries and are perishable. Refrigerate promptly in a covered container at 40°F (4°C) or colder. For best quality, serve within 1 to 2 days. Condensation may affect the appearance when removed from the refrigerator, but do not store fresh dipped cherries at room temperature to avoid condensation.
- Prep Time: 20 minutes

More Holiday Desserts and Cherry Recipes
If you are planning a holiday dessert table or reception menu, these other recipes and collections are worth exploring:
- White Mint Cake Recipe
- Cherry Pie from Scratch
- Decorating Store-Bought Holiday Cookies
- Christmas Party Drink Ideas
- Crescent Rolls with Apple Pie Filling
These cherries taught me that the prettiest party treats do not have to be perfect. The first few took patience, but once I stopped trying to hold each one until it dried, the process became much more enjoyable. If you try them, I would love to know whether you make the candy cane version or experiment with another coating.