How to Make a Quilled Baby Gift Tag with Paper Ducks
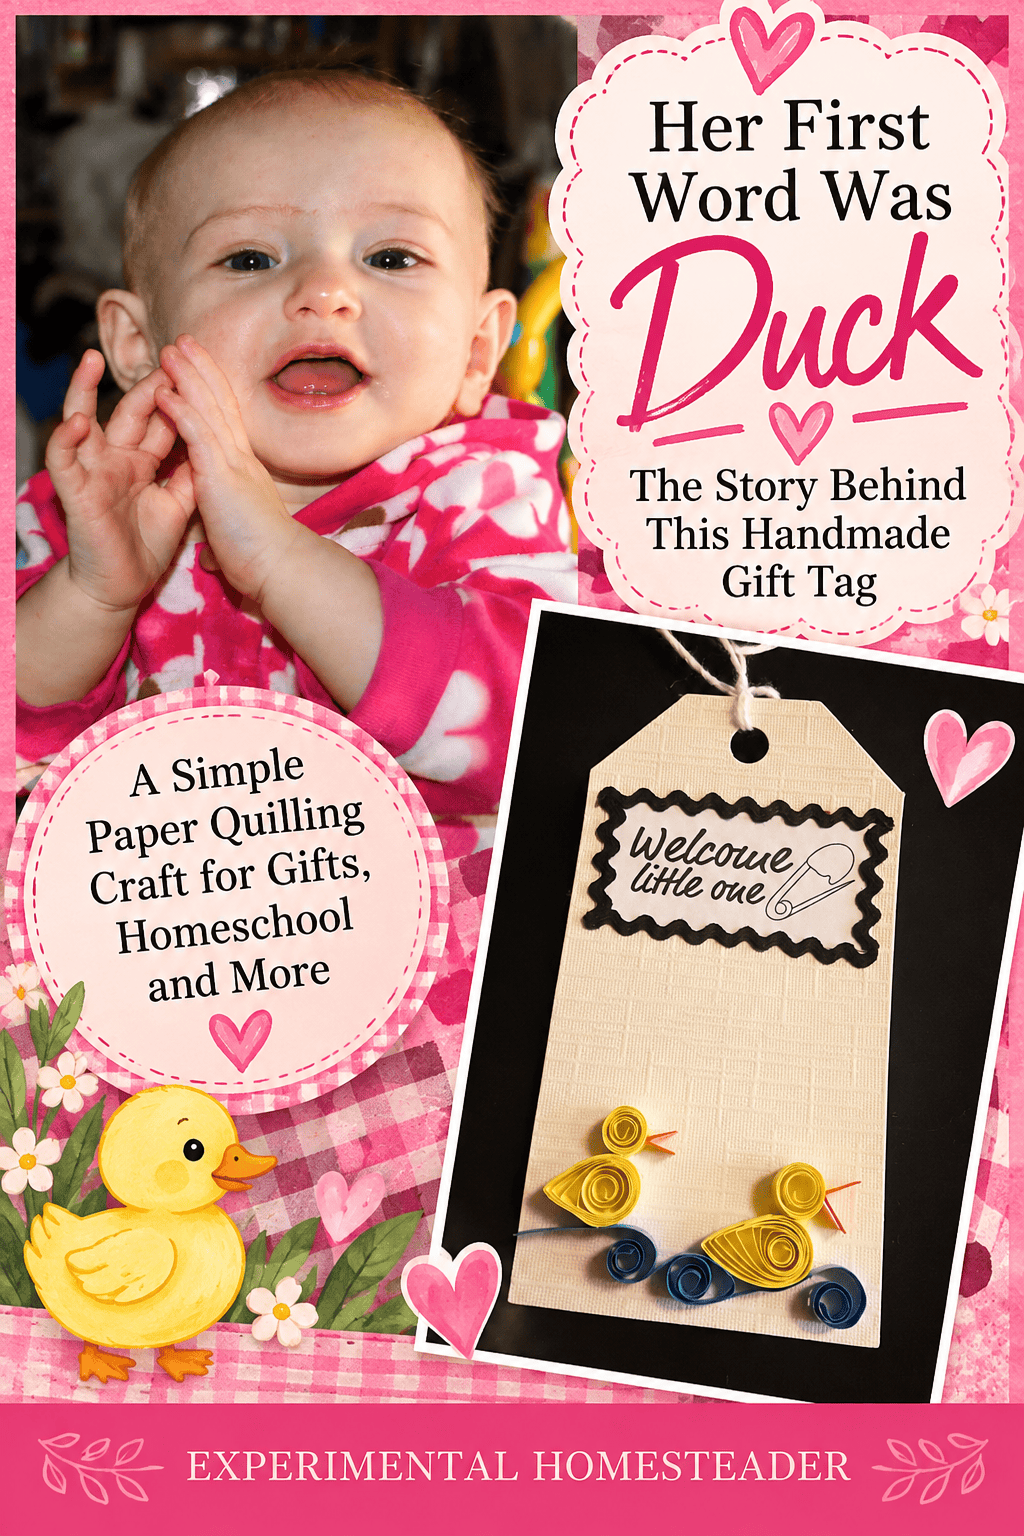
My granddaughter Trinity's first word was "duck." I was the one who taught her to say it, and her love of ducks inspired a craft project that still makes me smile. I've raised domestic ducks myself, so a pair of little yellow paper ducks seemed especially appropriate for a handmade gift celebrating a new baby. If you enjoy decorative paper techniques, my shaving cream paper marbling tutorial is another way to make one-of-a-kind gift paper.
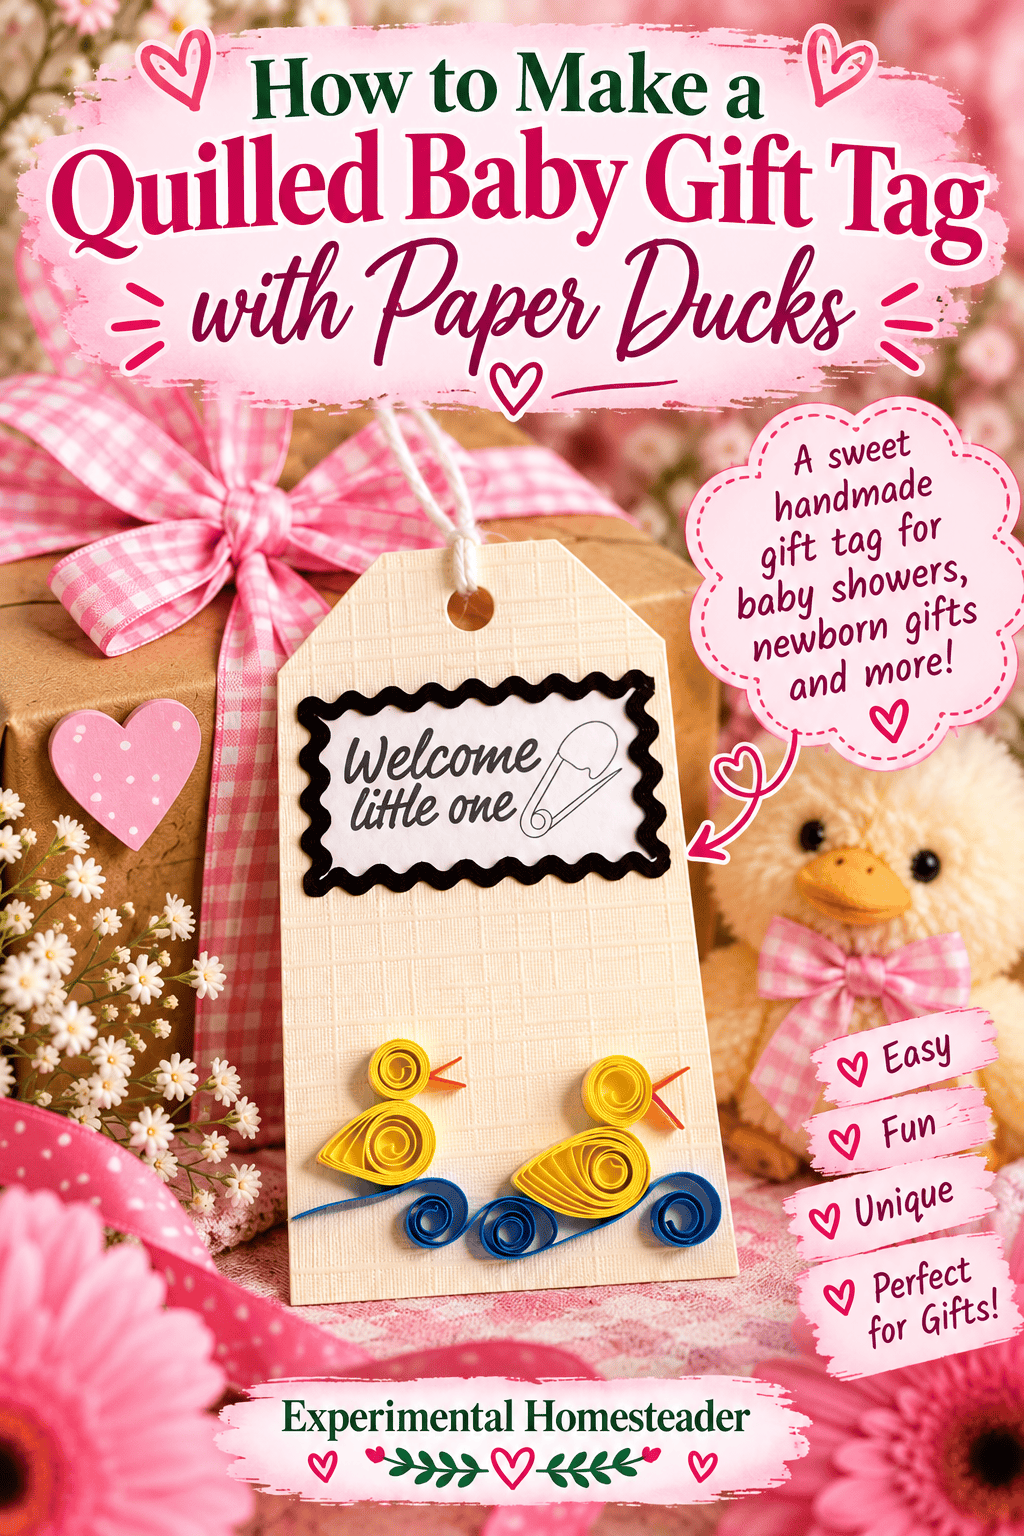
I hadn't done paper quilling since my school days. Rather than invest in a lot of specialized supplies for a craft I wasn't sure I'd continue, I bought a beginner's quilling kit with the basic tools and paper already included. I followed the kit's directions to make two ducks, then decided they would look adorable on a textured gift tag with a "Welcome Little One" greeting.
The greeting, complete with a diaper pin illustration, came from the freebie section of one of my craft magazines. I edged it with fabric rickrack, arranged the ducks above little blue paper curls that reminded me of water, and made a tag that felt much more personal than something I could pick up at the store. Here is how you can make your own version.

In This Article
Why Ducks Make a Sweet Homestead-Inspired Baby Gift
When you've spent time around domestic ducks, it's hard not to appreciate their personalities. Ducklings are familiar sights on many small farms and homesteads, and the shape of a duck is simple enough to translate into paper quilling. A curled strip of yellow paper can suggest a round head; another shaped coil becomes the body. A tiny orange beak brings the whole bird to life.
This is also the kind of project that fits naturally into a handmade household. You don't need an elaborate craft room or expensive equipment to make something thoughtful. A few strips of paper, a tag, and a little patience can turn ordinary supplies into a personal finishing touch for a gift. The same basic design can be adapted for a baby shower, a welcome-home present, or a farm-themed birthday.

How to Make a Quilled Baby Gift Tag with Paper Ducks
Make a handmade baby gift tag with two yellow quilled paper ducks and blue paper curls. Inspired by my granddaughter Trinity, whose first word was duck, this beginner-friendly craft also works for homeschool arts and crafts and thoughtful handmade gifts.
Materials
- 1 sturdy blank gift tag
- Yellow, orange and blue quilling paper
- Clear-drying craft glue and toothpick or fine-tip applicator
- “Welcome Little One” paper greeting
- Narrow fabric rickrack
- Ribbon or twine for hanging
Tools
- Quilling tool or beginner's quilling kit
- Small scissors and optional tweezers
Instructions
- Choose a tag large enough to hold a greeting near the top and two small ducks near the bottom. A sturdy tag matters because quilled paper is three-dimensional and can pull on flimsy cardstock. If you're cutting your own tag, trim the upper corners and punch a hole for the string. Lay everything on the tag before applying glue so you can check the spacing.
- Roll the yellow paper for the heads
Insert the end of a yellow paper strip into your quilling tool and roll it into a coil. Slide the coil off carefully. For a tight round head, keep the paper fairly snug and glue the end in place. Make a second head of similar size. You can adjust the size by using shorter or longer strips, but matching heads will help the ducks look like a pair. - Shape the duck bodies
Roll a longer strip of yellow paper for each body. Let the coil loosen slightly before securing its end. Gently pinch one side to create a teardrop-like shape. You can adjust the rounded portion with your fingers so it suggests the breast and body of a duck. Place a head beside each body to see how the pieces work together before gluing them to the tag. - Add the beaks
Cut two very small pieces of orange or coral paper and fold or shape each into a little pointed beak. The beaks in my original project are tiny accents, not large features. Attach one beside each yellow head with the smallest amount of glue you can manage. Tweezers are helpful here, especially if your fingers keep catching the paper coils. - Make the blue water curls
Roll blue strips into loose spirals, then gently pull or stretch the curls so they resemble little waves. They don't have to be identical. In fact, slightly different curls give the arrangement movement. Make several and arrange them beneath the ducks, allowing some of the spirals to turn in different directions. Keep the waves within the edges of the tag. - Prepare the welcome greeting
My “Welcome Little One” greeting came from a craft magazine, but you can print a sentiment, stamp one, or write it by hand. Cut it into a small rectangle that leaves room for a border. Glue narrow rickrack around the edges, trimming the corners neatly. Let the trim set before attaching the finished greeting near the top of the tag. - Arrange and attach the ducks
With the greeting in place, arrange the two yellow ducks toward the bottom of the tag. Position the blue spirals beneath them so they look as though they are floating on water. Once you like the composition, lift each piece one at a time and add a tiny dab of clear-drying glue where the paper touches the tag. Hold each piece briefly until it stays put. Too much glue can soak into the paper and flatten the delicate coils. - Finish and let everything dry
Allow the tag to dry flat, away from curious hands and pets. Check that the coils and rickrack are secure, then thread twine or ribbon through the hole. Because quilling is delicate, avoid pressing the finished tag under a heavy gift or stuffing it into a tight envelope. Attach it to the outside of a wrapped present or gift bag where the raised paper details can be appreciated.
Notes
Use very little glue so the coils keep their shape. Paper sizes vary between quilling kits, so adjust the coil lengths to fit your tag. Supervise children using scissors, quilling tools and small paper pieces. For items you plan to sell, use your own sentiment artwork or graphics licensed for commercial use.
Homeschool extension: Have older children practice rolling coils and shaping birds, then pair the activity with a lesson about domestic ducks. Younger children can help select colors and arrange finished shapes.
Tips for Making Neater Paper-Quilled Ducks
If you're new to quilling, practice rolling a few coils before starting the finished tag. Consistent tension helps, but perfection isn't necessary. If a body coil opens farther than you'd like, roll it again or use a shorter strip. If the ducks seem too large, make the greeting smaller or start with a bigger tag instead of crowding everything together.
Use a fine-tip applicator or toothpick to apply glue. A small amount is usually enough, and it is much easier to add another dot than to remove excess from a paper spiral. Work on a clean, dry surface and keep extra strips away from your glue bottle. You may also find it easier to build the heads, bodies, and waves first, then arrange all the pieces on the tag before attaching anything permanently.
Don't worry if your first ducks look slightly different from one another. Handmade work has character, and these are meant to be cheerful little birds, not perfect factory-made decorations.
Paper Quilling for Homeschool Arts and Crafts
This little duck project can also become a hands-on art lesson for homeschooled children. Paper quilling gives children an opportunity to work with shapes, colors, patterns and simple design while making something they can actually give to someone. Rolling narrow strips of paper and placing the finished coils can help children practice hand-eye coordination and fine motor control. The project also invites them to follow a sequence, make choices and solve small problems when a coil doesn't turn out quite as planned.
Adjust the activity to the child's age and dexterity. Younger children can choose paper colors, help arrange completed ducks and waves, or decorate a larger tag while an adult handles the delicate rolling and glue. Older children can practice making tight and loose coils, compare the shapes they create and assemble their own designs. Supervise the use of scissors, sharp or slotted quilling tools and glue, and keep tiny paper pieces away from children who might put them in their mouths.
For a homestead-themed lesson, pair the craft with a conversation about domestic ducks: what ducklings need, how ducks differ from chickens, and why water is important to them. Children might observe ducks on the homestead, draw what they see, then try to recreate the rounded body and beak with quilled paper. If you don't keep ducks, a library book or photographs can provide a starting point. You can also let children make matching gift tags for grandparents, a new sibling or a friend, turning an art lesson into an opportunity to practice generosity and thoughtful gift giving.
More Ways to Use This Simple Paper Craft
Once children or adults learn to roll a few basic coils, the same skills can be used for birthday cards, bookmarks, scrapbook decorations and seasonal gift tags. The two ducks could become a family of three, a duckling beside its mother, or a pair of birds on a pond. Different colors and a new greeting can turn the design into a spring project, a Mother's Day card or a farm-animal craft for a family celebration. For a group activity, prepare the cardstock and sentiments ahead of time so everyone can concentrate on making and arranging their paper shapes.
Ways to Personalize the Gift Tag
Blue waves and yellow ducks are a lovely combination for a baby gift, but you can change the colors to suit the recipient. Add the baby's name or birth date to the greeting, use a different color of twine, or coordinate the tag with the wrapping paper. A simple "Welcome to the Flock" sentiment could work especially well for a family that keeps poultry, while "Welcome Little One" remains a classic choice.
The same technique can be used on a greeting card, scrapbook page, or small framed paper craft. For a farm-themed party, make several matching tags and use them as favors. If you're giving a homemade blanket, knitted item, or other handmade present, a quilled tag adds one more personal detail.
Could You Sell Handmade Quilled Gift Tags?
Crafting can also be a way to earn a little extra money from home, provided you price your work carefully. A small item like this might be offered as a custom gift tag, a set of baby-shower tags, or an add-on to other handmade gifts. Before selling, calculate the cost of cardstock, quilling strips, glue, trim, packaging, selling fees, and the time required to make each tag. A design that is inexpensive in materials may still take enough time that it needs a higher price than you first expect.
Consider offering simple variations that you can make consistently. Custom names and colors may appeal to buyers, but every extra option adds work. If you plan to sell your tags, use sentiments and illustrations you've created yourself or have permission to use commercially. My original magazine freebie was a lovely addition to a personal project, but a free magazine cutout does not automatically come with commercial reproduction rights.
Why Two Little Paper Ducks Matter
There's a difference between choosing a cute animal for a baby gift and choosing an animal that already has a place in your family's story. Ducks aren't just a design I happened to find in a craft kit. I've raised real ducks, and when Trinity was little, I taught her the word "duck." It became her very first word. That's the kind of detail that stays with you long after the baby stage is over.
When I picked up paper quilling again after all those years, I wasn't trying to make an expensive showpiece. I wanted to see whether I still enjoyed curling narrow strips of paper into something recognizable. The kit gave me a place to start, but turning the two ducks into a gift tag was my own little leap. The blue curls became water, a magazine greeting became the centerpiece, and suddenly those scraps and strips of paper had a reason to be together.
That is what I would encourage anyone trying quilling for the first time to do: learn the basic shapes, then look around your own life for the subject. Maybe it's an animal you've raised, a flower from your garden, or something a grandchild says that you never want to forget. A beginner's project doesn't have to look professionally manufactured to be meaningful. In fact, the personal choices are often what make it worth keeping.
A Little Handmade Gift with a Family Story
What I love most about this tag isn't the cost of the materials or the time it took to make. It's the story behind those two yellow ducks. Trinity's first word was "duck," and I was the one who taught her to say it. Having raised domestic ducks myself, I couldn't think of a sweeter motif for a project inspired by her.
If you like putting a personal message into something handmade, my pie-crust fortune cookies offer another way to do it, this time with an edible treat and a paper fortune added after baking. That's one of the pleasures of making gifts by hand. We can use what we know, what we grow, what we raise, and the little family moments we remember to create something no store-bought tag could quite replace. For more paper projects, see my marbled paper tutorial, paper-making video, and handmade greeting card ideas. If you try your own version, I would love to hear what animal or family memory inspires your design.