How to Make DIY Printed Candles with Tissue Paper and Vintage Designs
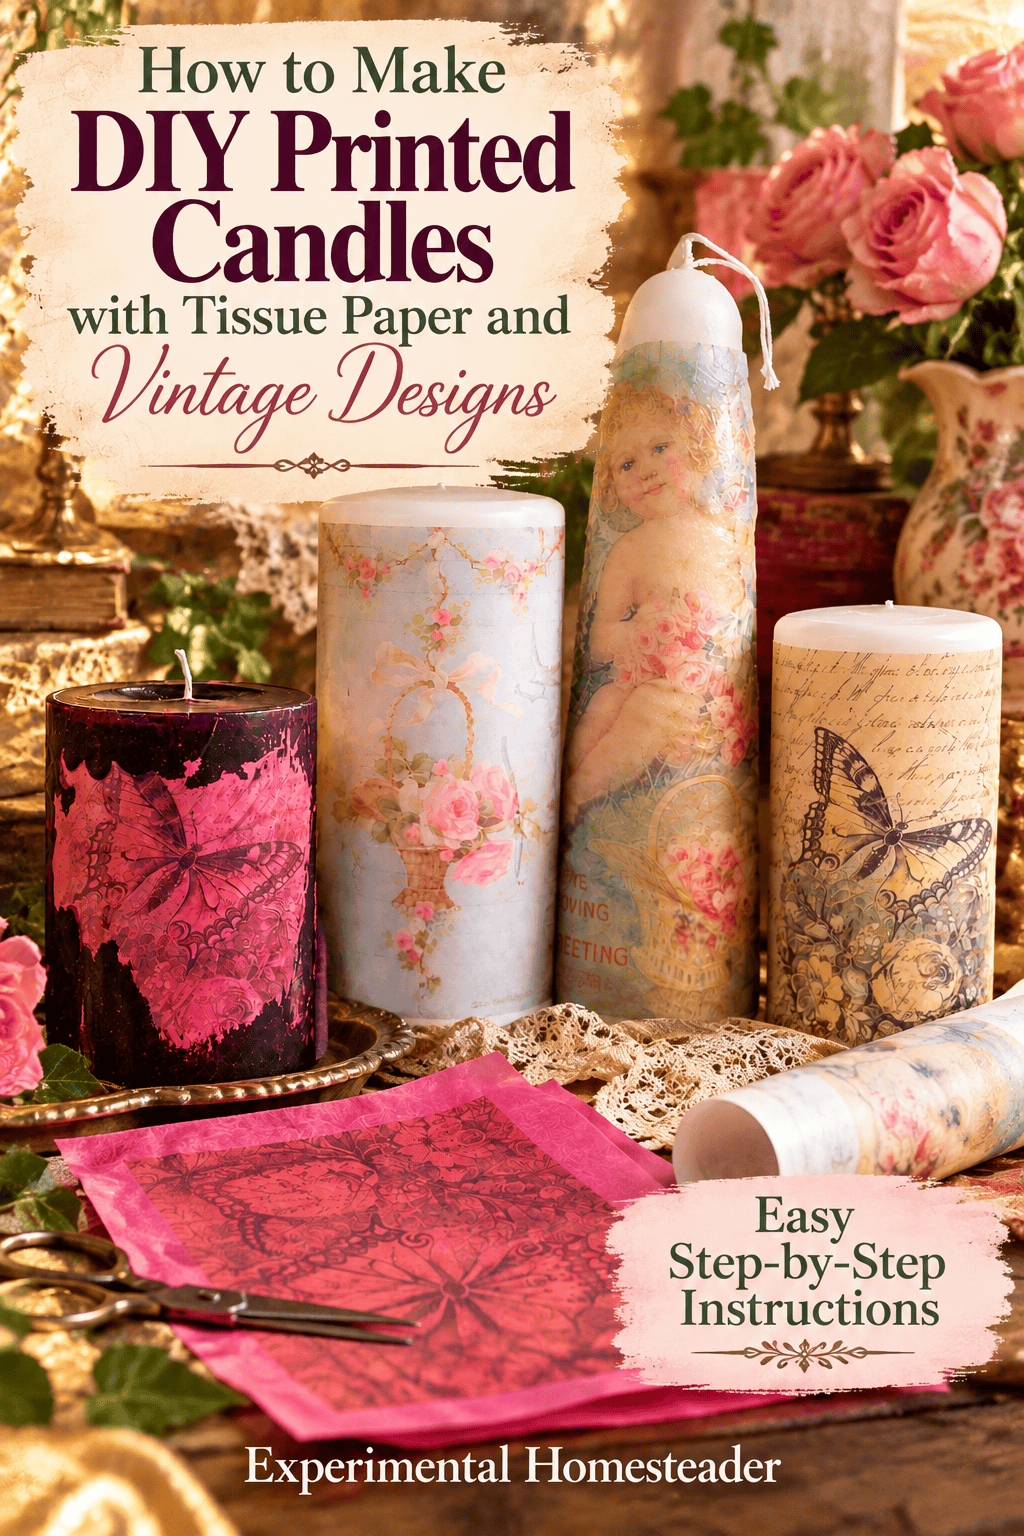
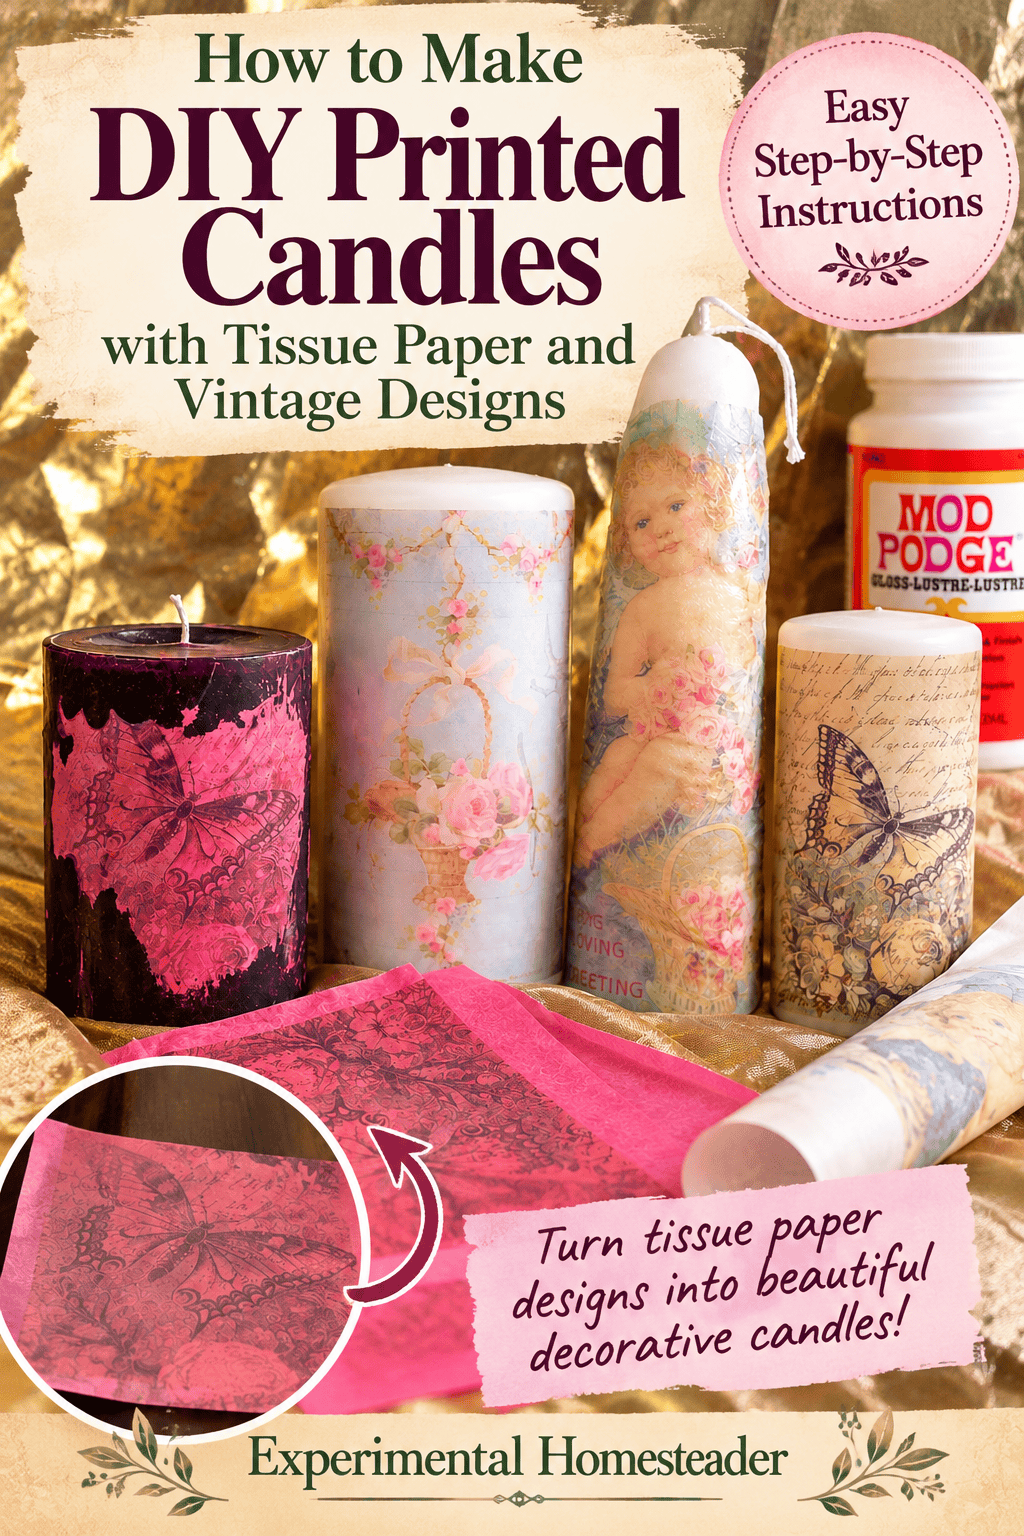
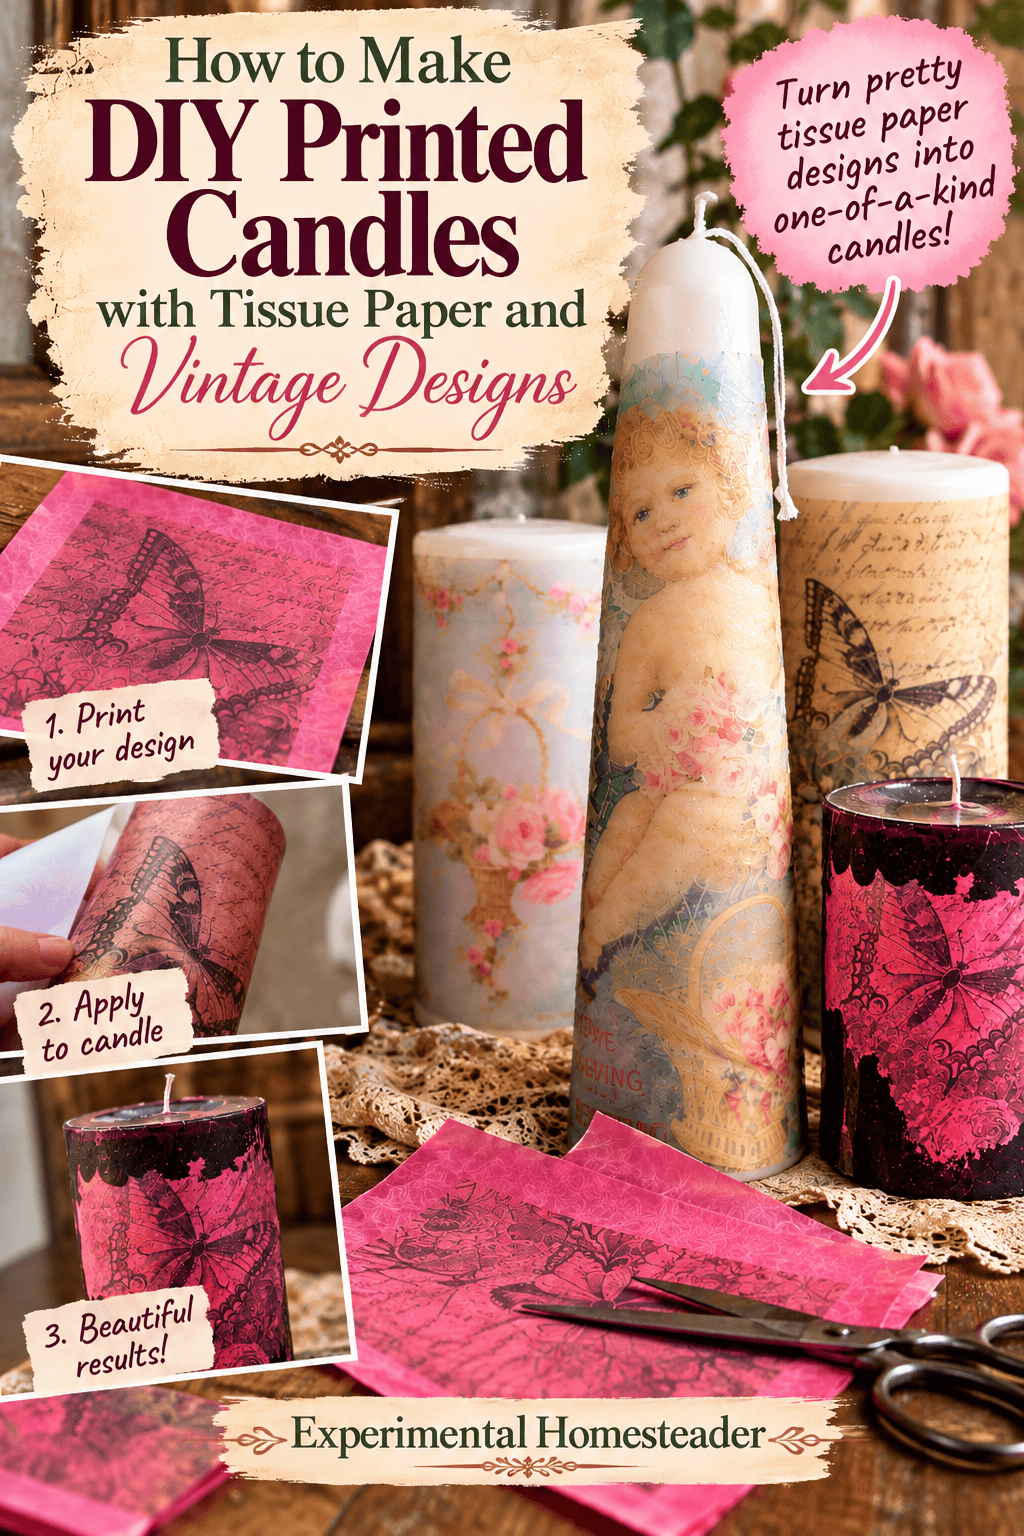
When I first tried making printed candles, I thought it would be a quick project. Then I discovered two things I hadn't planned for: the color of the candle matters, and so does the color of the tissue paper. With snow on the ground and the roads in poor condition, I used what I had - pink tissue paper and a purple candle. The result was not what I had pictured.
I shared a photograph on Facebook to see what other people thought. Some liked the vintage appearance, but I still wasn't satisfied. Eventually I went out for white tissue paper and white candles, tried the first method again, and got the results I wanted. I'm keeping both experiments here because knowing what didn't work can save you some frustration.
Important safety note: These are decorative candles only. Do not light candles decorated with tissue paper, vellum, glue, Mod Podge, printed images, or other applied materials. The paper and finishes may ignite or behave unpredictably near heat or flame. If you want the look of a glowing candle, use an appropriate flameless candle display instead.

In This Article
Before You Make Your Vintage Printed Candles
Before getting started, decide whether you want a soft, almost seamless image or a more obvious vintage-paper look. That choice matters because the color of the candle shows through the tissue. I learned this the hard way when I tried a combination of supplies that changed the look of the artwork. I had hoped for a delicate printed design, but the combination of colors changed how the artwork looked. It was a good reminder that a project can be inexpensive and still benefit from a little planning.
For the cleanest appearance, begin with a white pillar candle and white tissue paper. The pale background helps the tissue blend into the wax so the image becomes the focus. If you prefer a different color combination, try holding a small printed sample against the candle before committing to the whole design. A botanical illustration with thin lines can disappear against a dark background, while a bold black-and-white photograph may be easier to see.
Choose Artwork That Fits the Candle
Measure the space where you want the image to appear, rather than assuming that a picture sized for ordinary printer paper will fit. The curve of a candle changes how a design looks from the front, and an oversized picture can wrap important details out of view. My smaller candle needed wallet-sized prints. Make a trial print on regular paper, hold it against the candle, and check the placement before printing on tissue. Vintage flowers, butterflies, seed illustrations, and copies of meaningful family photographs all make lovely possibilities.
Prepare a Safe Workspace
Gather the supplies before you begin: a decorative pillar candle, tissue paper, cardstock, tape, scissors, your chosen image, and a compatible printer. My original project used a heat gun for crafting, so I also needed a heat-resistant work surface and room to work without bumping anything. Tissue paper can tear or jam a printer, so check the printer manufacturer's recommendations before trying to feed it through. A print that is slightly crooked is frustrating, but damaging a printer is far worse.
Most importantly, these are display-only candles. Tissue paper and other applied decorations can catch fire, and heating wax or paper can cause burns. Do not light the finished candle. If you want a soft glow in your farmhouse display, use a separate flameless candle rather than lighting the decorated one. The Create card below documents the method I experimented with, including the precautions and what I learned along the way.

How to Make DIY Printed Candles with Tissue Paper and Vintage Designs
Decorative farmhouse printed candle craft using vintage artwork and tissue paper. Includes lessons from two experiments. Display only.
Materials
- White pillar candles for decoration
- White tissue paper
- Cardstock and transparent tape
- Printed photographs or vintage-style designs you have permission to use
- Optional: vellum, parchment paper, and Mod Podge for the alternative decorative experiment
Tools
- Printer compatible with the paper setup
- Scissors
- Heat or embossing tool, used carefully on a heat-safe work surface
Instructions
Choose and size your design. Select vintage artwork or a photograph you have permission to reproduce. Measure the visible area of the candle and print a test on plain paper. My smaller candle needed wallet-sized images.
Prepare the tissue paper. If your printer supports the setup, secure white tissue paper smoothly to cardstock with tape. Check printer manufacturer guidance before feeding delicate tissue into a printer.
Print the design. Load the prepared sheet in the correct orientation and print at the size you tested. Let the ink dry completely before handling the tissue.
Trim and position the image. Cut around the printed design, separate the tissue from its backing, and arrange it on the unlit candle with the seam at the back.
Carefully attach the design. In my original experiment I gently warmed the candle surface with a heat gun for crafting so the tissue adhered to the wax. Heating paper and wax carries fire and burn risks. Work on a heat-resistant surface, stop if paper scorches or smokes, and allow the wax to cool completely. Never light the decorated candle.
Notes
DISPLAY ONLY. Never light a decorated candle. Heating wax and paper risks fire and burns. White tissue on a white candle gave cleaner results than pink tissue on purple wax. Vellum scorched when heated directly.
On my first attempt, the contrasting colors made it difficult to get a clean finish. White tissue paper on a white candle produced a softer, more polished appearance and allowed the printed image to stand out.
Method 2: My Vellum and Mod Podge Experiment
I also tried a second approach using vellum, parchment paper, tape, a heat gun for crafting, and Mod Podge. I printed a larger design - about 5 by 7 inches for the candle I was using - wrapped the vellum around the candle, and secured it at the back. I covered the vellum with parchment while attempting to soften the wax.
This method was much harder to control. The wax did not bond as I expected, and when I applied the heat directly to the vellum, it began to burn. I stopped heating it, trimmed the excess vellum, and applied two coats of Mod Podge, allowing about 20 minutes between coats. That created a decorative finish, but it is not suitable for a candle that will be lit.
I'm including the experiment so you can see why I preferred the white tissue paper method. If you use Mod Podge or vellum, treat the finished object strictly as a decorative display piece.
What I Learned from Making Printed Candles
White-on-white was the biggest improvement. The print showed more clearly, the edges blended into the candle better, and the finished designs looked closer to what I had imagined. I also learned that a vintage-looking print can be lovely even when the first attempt doesn't go as planned.
The butterfly, floral, and cherub designs in my photographs show how different the same basic project can look. These candles make pretty accents for a mantel, shelf, or handmade gift display - just keep them unlit and away from heat sources. For another handmade gift detail, see my quilled baby gift tag.
Why Handmade Candles Belong in a Homestead Home
Homesteading isn't only about growing food, putting up the harvest, or tending animals. It's also about making a home feel like your own without buying something new every time you want to change the decor. A plain candle, a small piece of tissue paper, and an image you love can become a keepsake for a shelf or seasonal display. That's the part of this project that appeals to me: taking something ordinary and giving it a personal touch.
My first attempt also reminded me that using what is already in the house doesn't always give the exact result I imagined. When winter weather kept me from shopping for supplies, I made do with what was on hand. It was an experiment, and the colors changed the appearance of the printed design. Later, white tissue on a white candle made the image look much cleaner. Both attempts taught me something, and neither required an elaborate craft setup.
Choosing Vintage Designs with a Personal Story
Vintage florals, butterflies, and cherubs suit the soft, old-fashioned look of these candles, but the design doesn't have to come from a commercial craft collection. A scan of a family photograph, a handwritten recipe card, or a piece of artwork with special meaning can make the finished display more personal. Imagine a decorative candle featuring a copy of a grandmother's handwriting on a kitchen shelf, or a family portrait incorporated into a holiday centerpiece.
For a farmhouse-style display, consider botanical illustrations, old seed packet artwork, antique-looking typography, or black-and-white family photographs. Simple designs with plenty of light space tend to be easier to see against a white candle than a crowded picture with a dark background. Use artwork you own, have permission to reproduce, or have confirmed is in the public domain. Old-looking artwork is not automatically copyright-free.
What to Check Before Printing on Tissue Paper
Start by measuring the flat height and the circumference of your candle. Leave some space at the top and bottom rather than placing the image right against the edges. A small design often looks better on a narrow pillar than a large print forced around the curve. Print a test copy on ordinary paper first to check the size and placement before using delicate tissue.
The tissue color matters more than you might expect. White tissue blends into a white candle and makes the edges less obvious. Colored tissue can tint the artwork and create a very different look. Printer compatibility matters, too. Some printers cannot safely feed tissue paper, even when it is attached to cardstock. Check the manufacturer's guidance and do not force paper through a machine that resists it.
If you decide to try the heat gun for crafting method described in my original project, remember that it involves hot wax and flammable paper. Work on a heat-resistant surface, keep children and pets away from the work area, and stop immediately if the paper begins to scorch. Never leave the tool unattended. The finished piece is a decoration, not a candle to burn.
Displaying Printed Candles Around the Farmhouse
These decorative candles can add a little vintage character to a mantel, bookshelf, entryway table, or guest room. A grouping of different heights looks especially nice alongside a wooden tray, a small crock, dried flowers, or other pieces you already use in your home. Keep paper decorations away from open flames, heaters, fireplaces, and direct heat, even when the decorated candles themselves are not lit.
For seasonal decorating, switch the artwork rather than buying a whole new collection of accessories. Botanical prints fit spring, old-fashioned fruit illustrations suit harvest time, and family photographs or winter greenery designs can make a thoughtful holiday display. They also work as handmade gifts, especially when the image means something to the recipient. Include a note that the candle is for display only so nobody mistakes it for a burnable candle.
What My Two Candle Experiments Taught Me
One reason I keep the less successful attempt in this tutorial is that craft instructions rarely show what happens when the supplies don't match the picture in your head. The materials from my first attempt were not necessarily bad on their own. They simply weren't the right combination for the delicate, vintage appearance I wanted. The tissue added another layer of color, and the printed picture couldn't blend into the candle the way it could on a white background.
Trying again with white tissue and white candles made the difference obvious. It wasn't a complicated new technique that solved the problem. It was choosing a background that didn't compete with the picture. That's useful to remember when working with botanical prints, family photographs, and any artwork with fine details. If you're after an aged-paper effect, experiment first with the artwork itself rather than assuming darker candle wax will create the look.
The vellum experiment taught me a different lesson. Vellum is thicker and behaves differently from tissue paper. It didn't settle into the softened wax as I expected, and applying heat directly caused it to burn. The Mod Podge finish gave me a decorative result, but it also made the candle completely unsuitable for lighting. I would not describe that method as an interchangeable substitute for the tissue paper approach. It's an example of why knowing how materials react is part of learning a craft.
Planning a Set of Decorative Candles Without Wasting Supplies
If you're making several candles for a holiday table or gifts, start with one test piece. Pick the candle size, print the artwork on ordinary paper, and hold that paper against the curved surface. This tells you whether the picture is too large, whether important details will disappear around the sides, and where a seam might show. A narrow pillar usually needs a simpler, smaller design than a wide one.
Choose a consistent theme before you print several images. For example, three different botanical illustrations can look like a coordinated collection without being identical. A black-and-white family photo collection could tell a story across several candles. You can also vary the height of the candles while keeping the tissue color and image style consistent. This is an inexpensive way to make a display feel intentional instead of cluttered.
Keep the cutting scraps and test prints until you're finished. A small leftover piece of tissue can be useful for checking how an ink color looks against the candle, while a rejected paper proof may help you resize the next design. Don't use original family photographs, handwritten heirlooms, or irreplaceable documents directly in this project. Work from copies, and save your digital files in case you want to make another gift later.
Troubleshooting Common Printed Candle Problems
The tissue paper wrinkles or tears
Thin tissue is delicate, especially when it has been printed and handled several times. Keep it flat while preparing the print, trim carefully, and avoid tugging at the edges when positioning the picture. If the tissue tears, a fresh print is often less frustrating than trying to hide a rip across an important part of the design.
The artwork looks faded or muddy
Look at the color underneath it first. My own pink-and-purple experiment showed how much the background changes the result. Fine lines and pale colors may be difficult to see on darker wax. Try a stronger contrast in the printed image or use a white candle and white tissue for a softer blended edge.
The image is crooked or the seam shows
Find the front of the candle before you begin and decide where the back will be. Position the main part of the artwork where it will be seen, with the joining edges at the rear. If you plan to display the candle in a grouping, think about which side will face outward. A paper-size mockup helps you spot these issues before working with the final print.
The paper scorches or the wax melts unevenly
Stop immediately. Do not keep heating the area in an attempt to smooth it out. Tissue and vellum can ignite, and hot wax can cause burns. The heat gun for crafting technique requires caution and isn't suitable for every material or every crafter. A decorative alternative is to display the artwork on a separate paper sleeve around a non-heating object, rather than trying to apply it to a candle with heat.
Making the Finished Display Feel Like Home
A handmade project feels more meaningful when it connects to the rest of the household. The old seed catalog illustration you love, a photograph from a family gathering, or a flower that reminds you of a favorite garden can be the starting point for a decoration with a story. You don't need to buy a complete set of matching accessories. Use a few pieces you already own and let the artwork be the focus.
When giving one as a gift, think about the person who will receive it. A family photograph might be especially meaningful to a relative, while a vintage flower print could suit someone who loves cottage-style decorating. A simple handwritten gift tag explaining the picture adds more personality than elaborate packaging. Most importantly, label the finished candle clearly as decorative and not for burning. That's a small detail that matters long after the craft project is finished.
Frequently Asked Questions About DIY Printed Candles
Can I light a candle decorated with tissue paper?
No. Tissue paper, ink, glue, vellum, and decorative coatings can create a fire hazard. Keep these candles unlit. For a glowing display, choose a separate flameless candle made for that purpose rather than heating or lighting a decorated wax candle.
Why did my printed image look different on the candle?
The colors underneath the print affect how the image appears. In my experiment, the underlying colors changed the appearance of the printed design. Test your colors before making several pieces.
Can I use family photographs?
Yes, provided you have the right to reproduce the image. Make a digital copy first so you don't risk damaging an original photograph. Resize the copy to fit your candle and keep the original safely stored.
Are these a good way to reuse leftover craft supplies?
They can be, especially if you already have plain decorative candles, appropriate tissue paper, and images you want to use. Just don't compromise on printer or heat gun for crafting safety to use up a particular supply.
For more handmade projects, visit my DIY Homestead & Handmade Living collection.