Ingredients
Units
Scale
Instructions
- Take a half cup of that active sourdough starter and combine it with one cup lukewarm water in a large mixing bowl. Stir until it dissolves. This process, or ‘autolysis,’ allows the water to fully hydrate the flour, making the dough easier to shape and handle later.
- Mix in 2 3/4 cups of flour and 2 teaspoons of salt.
- Knead this mixture in the bowl for about 10 minutes, or until all the ingredients are fully incorporated and the dough appears smooth.
- Let nature perform its magic as you let the dough rest in the bowl, covered with a damp tea towel or slid into a ziplock bag that you seal, at room temperature for about 4 to 6 hours*. This waiting period is the 'bulk fermentation phase, where a symphony of yeast and bacteria work together to influence your bread's taste and texture.
- Once the dough's size has nearly doubled with visible bubbles on the surface, it's time for some hands-on work again. Quite literally. Gently remove the dough from the bowl, and lightly fold it over itself a few times on a clean, lightly floured surface. This process of stretching and folding helps develop strength in your dough.
- After a few folds, shape the dough into a tight ball. Place this in a lightly floured proofing basket or a kitchen towel-lined bowl. Let it rest, covered, overnight in the refrigerator. This stage, called 'proofing,' further helps gas bubbles form, contributing to your bread's light, airy texture.
- The next day, preheat your oven and Dutch oven (or cast iron skillet with a lid) to 500 degrees Fahrenheit for about 30 minutes. Be sure you have placed a cast iron trivet in the bottom of the skillet or Dutch Oven.
- Place the dough on two layers of parchment paper once the cooking vessel you are using is pre-heated.
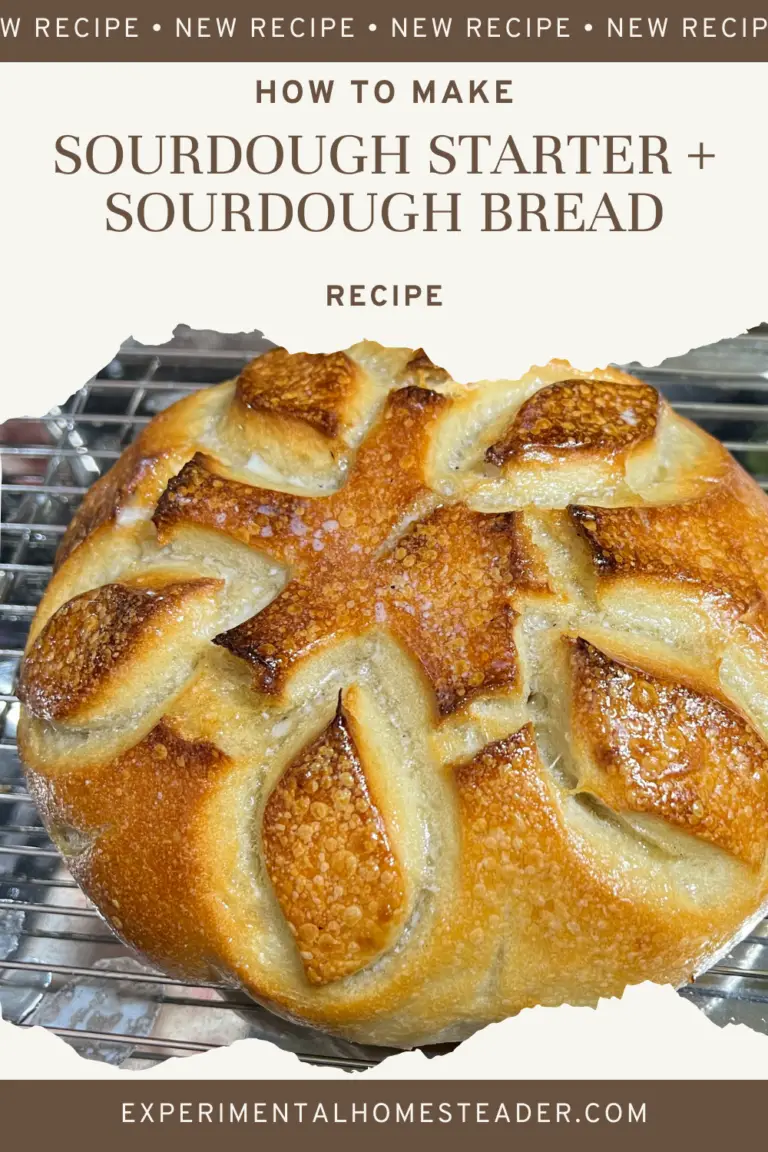
- Quickly make a few slashes on top with a sharp knife for an even expansion during baking. This is known as scoring and this is how people make those pretty designs on their breads.
- Pick up the parchment paper with the bread in the center of it and carefully place the dough in the heated Dutch Oven on top of the trivet.
- Sprinkle the top of the dough with a little bit of water - no more than a Tablespoon.
- Cover it the bread and bake for 15 minutes.
- Remove the cooking vessel from the oven and remove the lid to let the steam escape.
- Lower the oven temperature to 450 degrees Fahrenheit.
- Place a cast iron pizza pan - or similar item in the oven, place the lid back on the cooking vessel and place it on top of the pizza pan.
- Bake for 15 minutes.
- Remove the cooking vessel from the oven, remove the bread by grabbing the edges of the parchment paper, then carefully remove the trivet from the bottom of the cooking vessel.
- Place the trivet on top of the pizza pan in the oven.
- Gently flatten the parchment paper so it lays flat. It might seem like it is stuck to the bread, but it is not.
- Place the parchment paper and bread on top of the cast iron trivet.
- Bake it for 5 to 15 minutes until the bread has the golden-hue you want. Be sure to leave it in the oven until the crust is a deep, golden brown.
- Remove it from the oven once you are happy with the color of the bread and brush melted butter on the bottom of the bread and then the top of the bread.
- Allow it to cool and eat right away.
- If you prefer to wait to eat your bread, once it is cool, wrap it in two double layers of cling wrap and place it inside a sealed Ziplock bag in a cool, dark place such as a bread box.
Notes
* Keep an eye on the dough because the temperature of your kitchen determines how fast the dough doubles. It could be 2 hours or it could be 8 hours.
- Prep Time: 36


